2、实战:Pig微服务项目下载代码流水线配置-2024.6.22
实战:Pig微服务项目下载代码流水线配置-2024.6.22
目录
[toc]
环境
Jenkins 2.415-jdk11
GitLab gitlab-ce:16.2.2-ce.0

Terraform 1.1.7
Kind 0.14.0
Kubernetes 1.24.0(具备nfs存储)
Docker-CE1.19+   (Docker version 23.0.3, build 3e7cbfd)
ArgoCD 2.6.7

centos7 7.6.1810前提
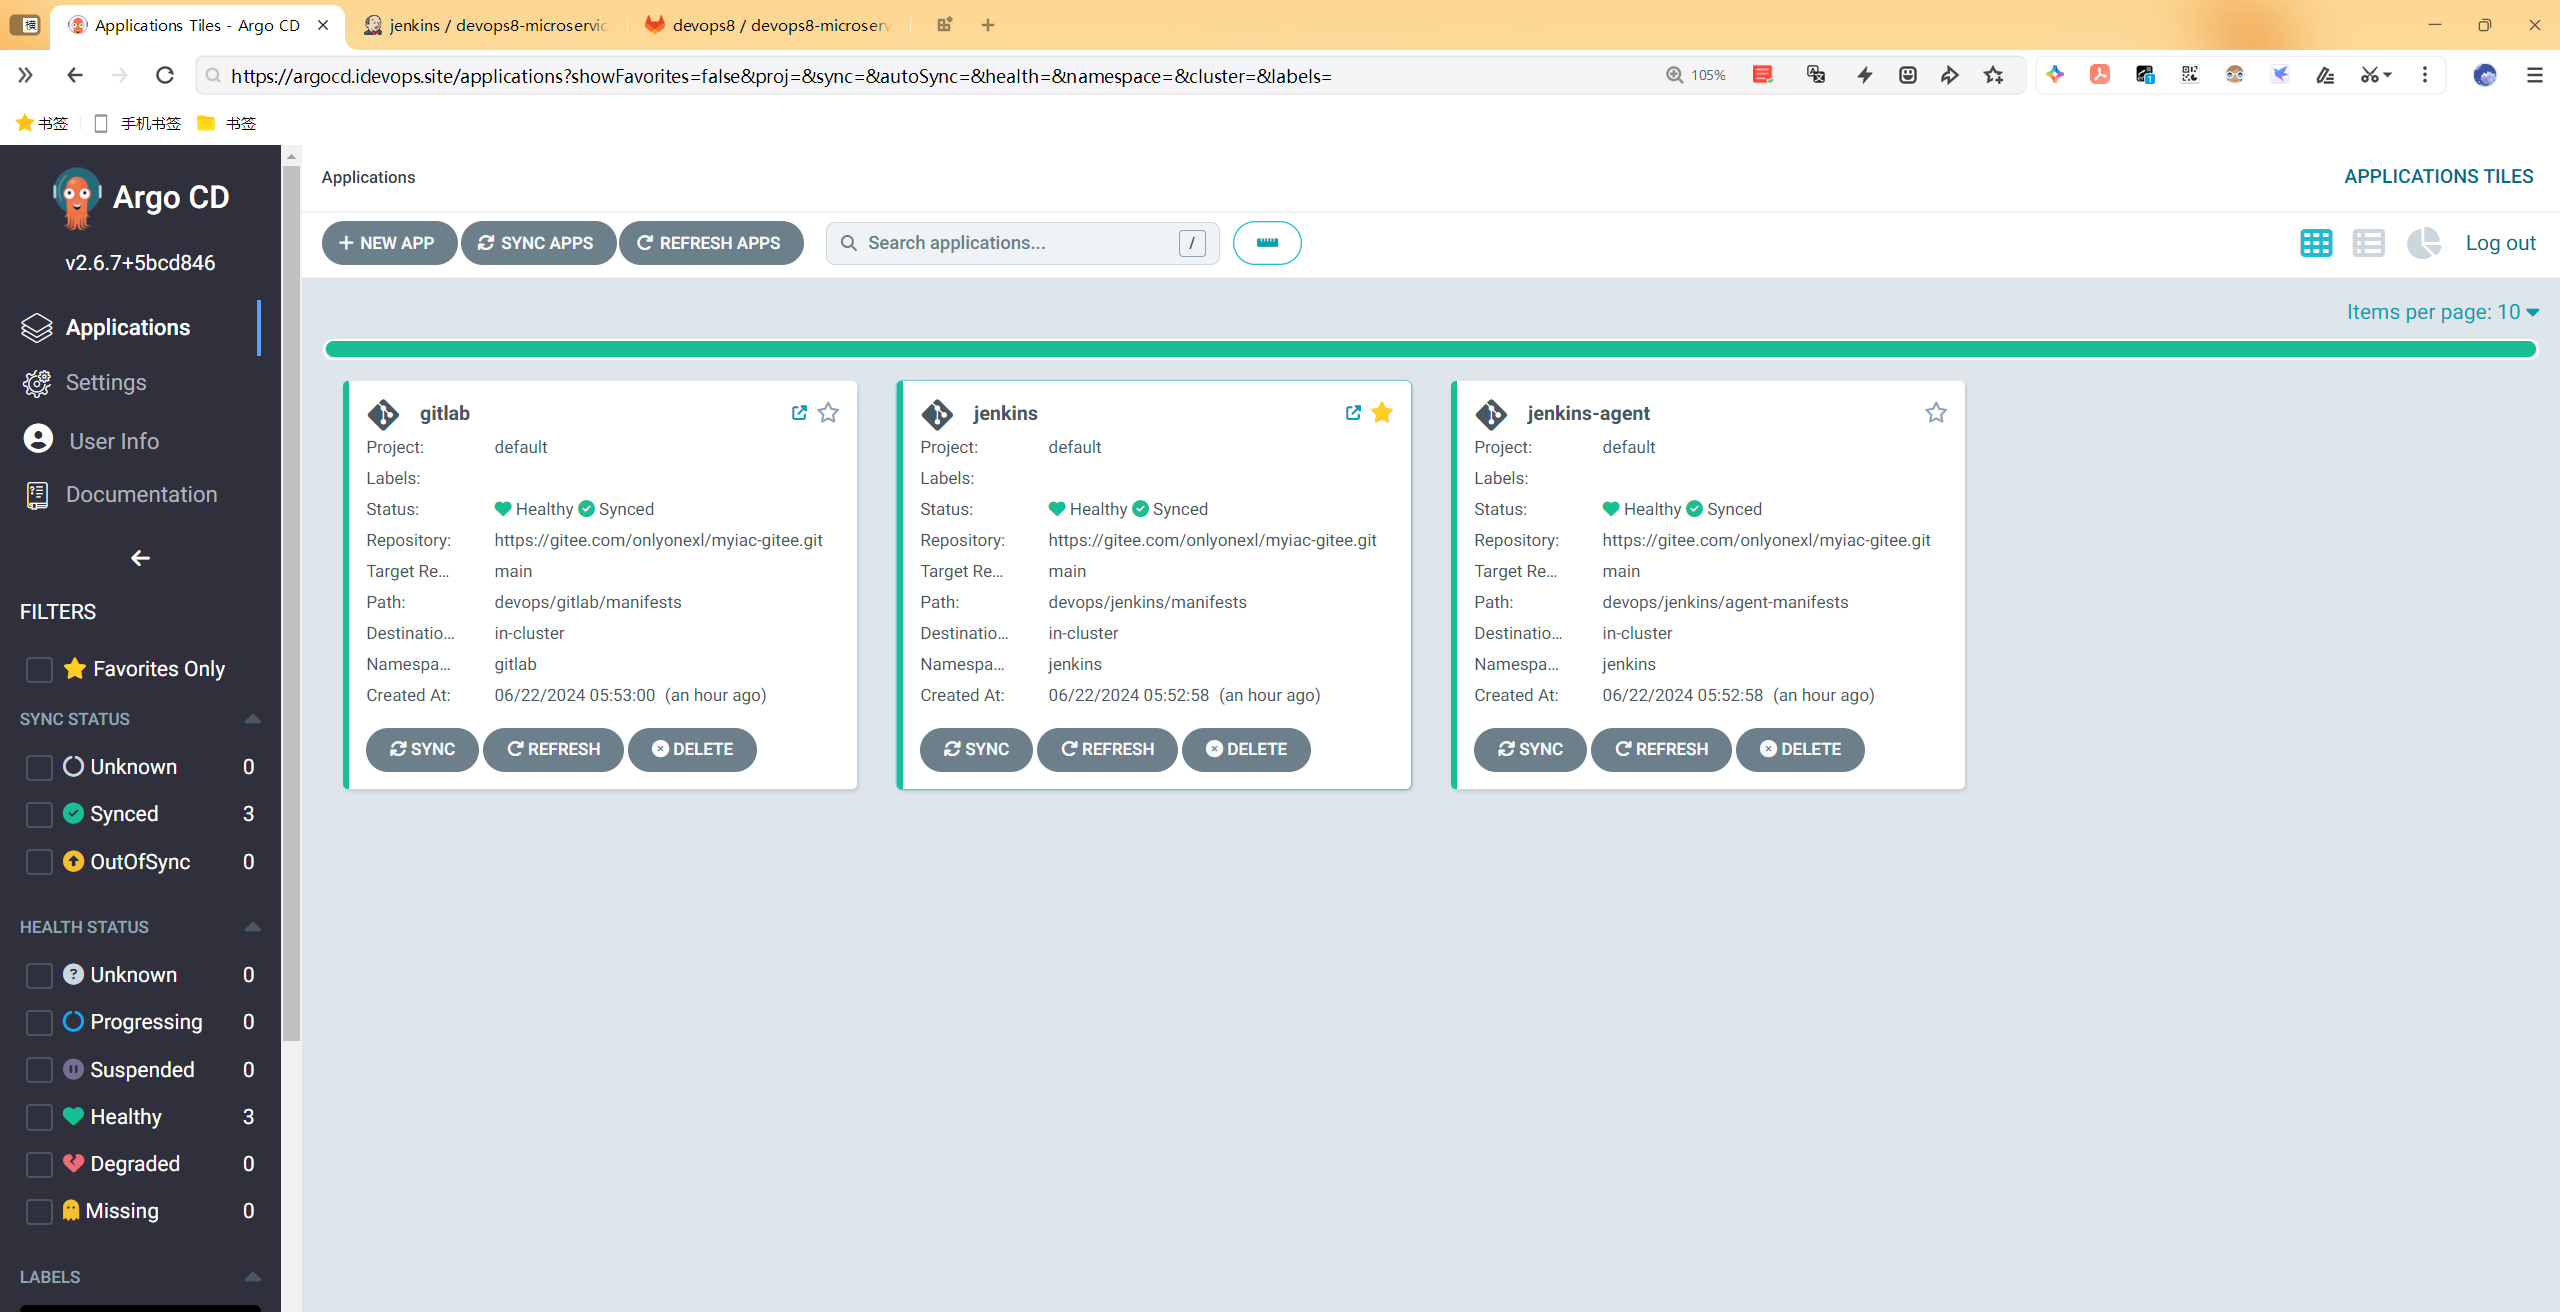
基础环境已具备。(kind搭建的k8s集群、jenkins、gitlab环境已具备)
具体搭建见如下文档:
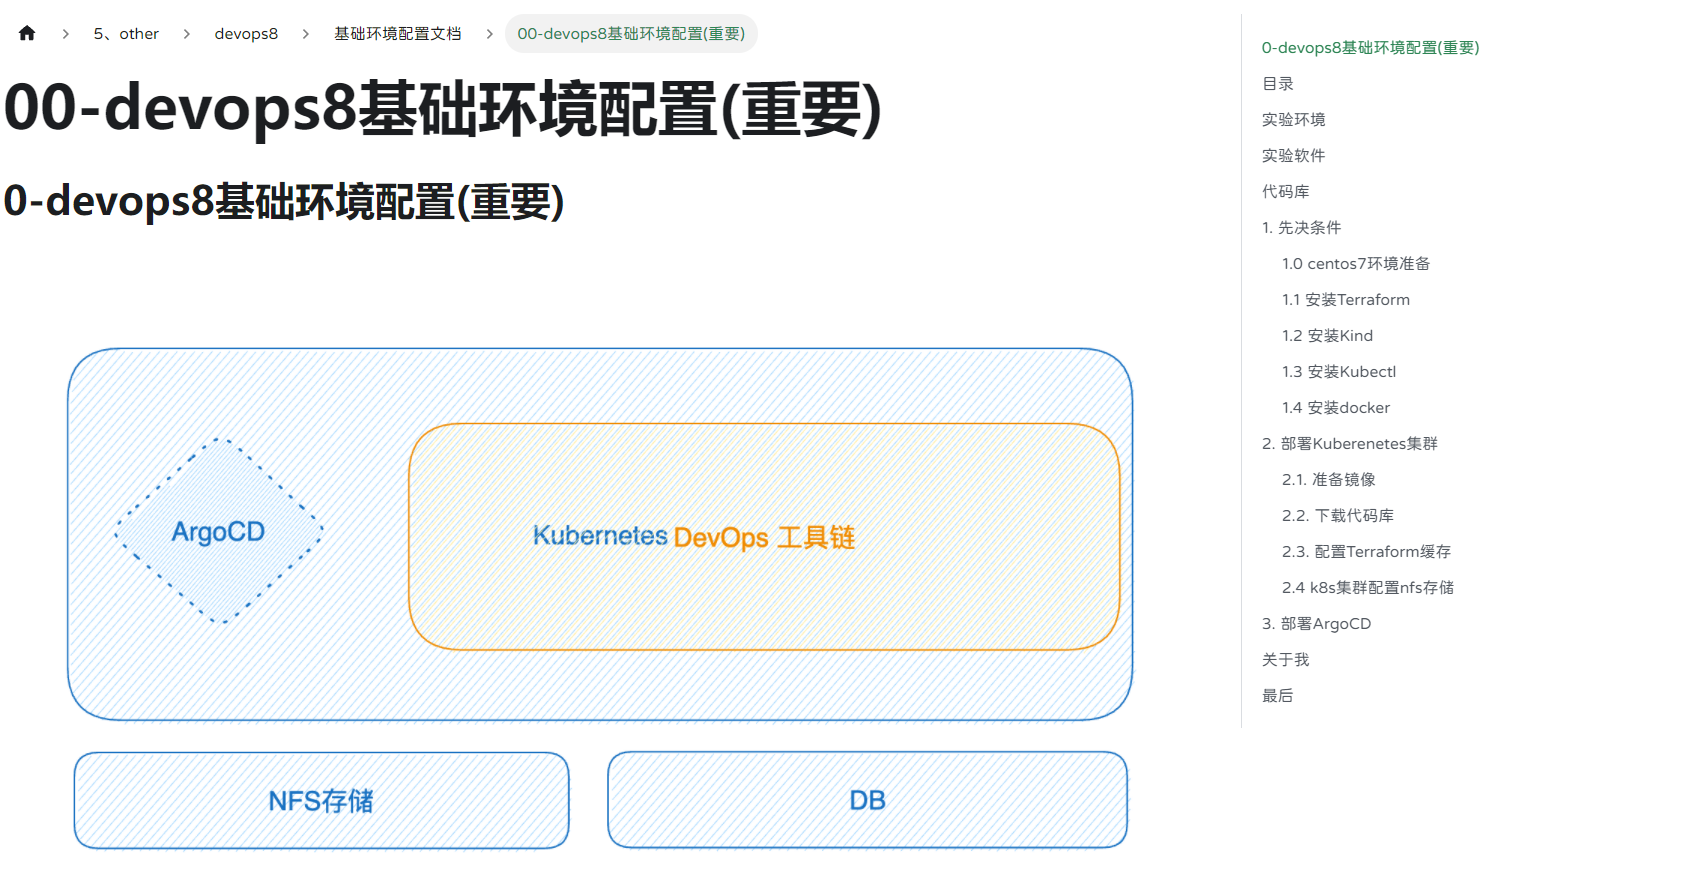
《00-devops8基础环境配置(重要)》 https://onedayxyy.cn/docusaurus/docs/devops8-basic-test-environment
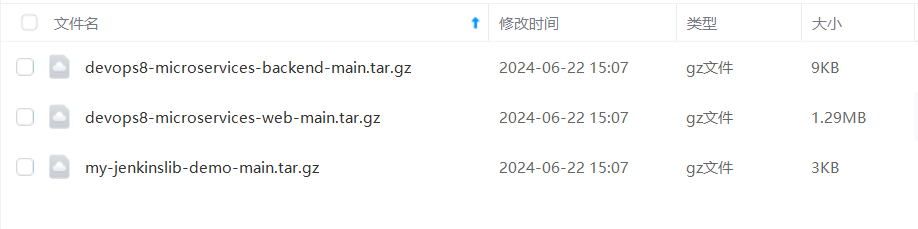
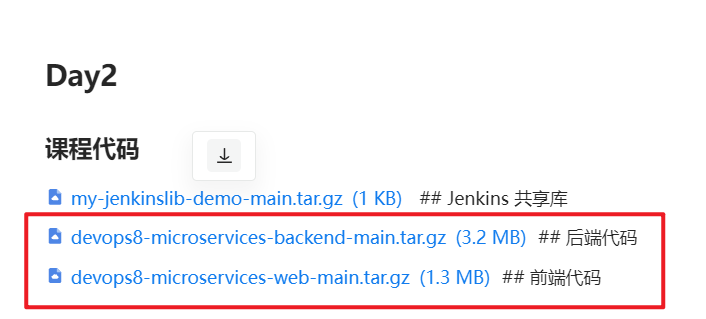
源码
- 源码
链接:https://pan.baidu.com/s/1V6wB2AbQznsvXHaTsUnMhw?pwd=eovp 提取码:eovp 2024.6.22-实战:Pig微服务项目下载代码流水线配置
说明
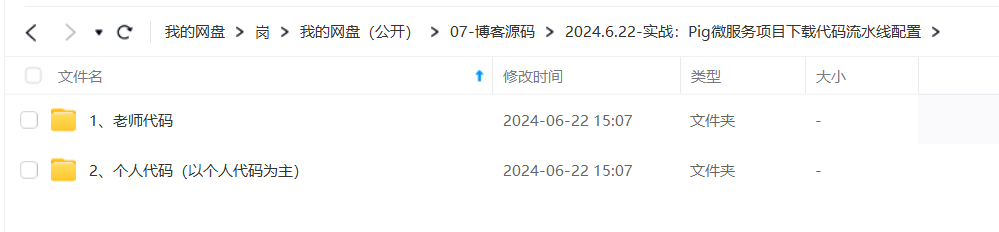
- 具体微服务源码如下:
- 个人这里为了方便,直接使用老师提供的代码
1、gitalb上创建后端和前端项目
1.gitlab上创建后端项目:devops8-microservices-backend
老师自己做过测试,是OK的
把微服务放在一个库里:(本次)
或者
把每一个模块拆分成一个代码库。
- 创建项目,并将本地代码上传gitlab仓库
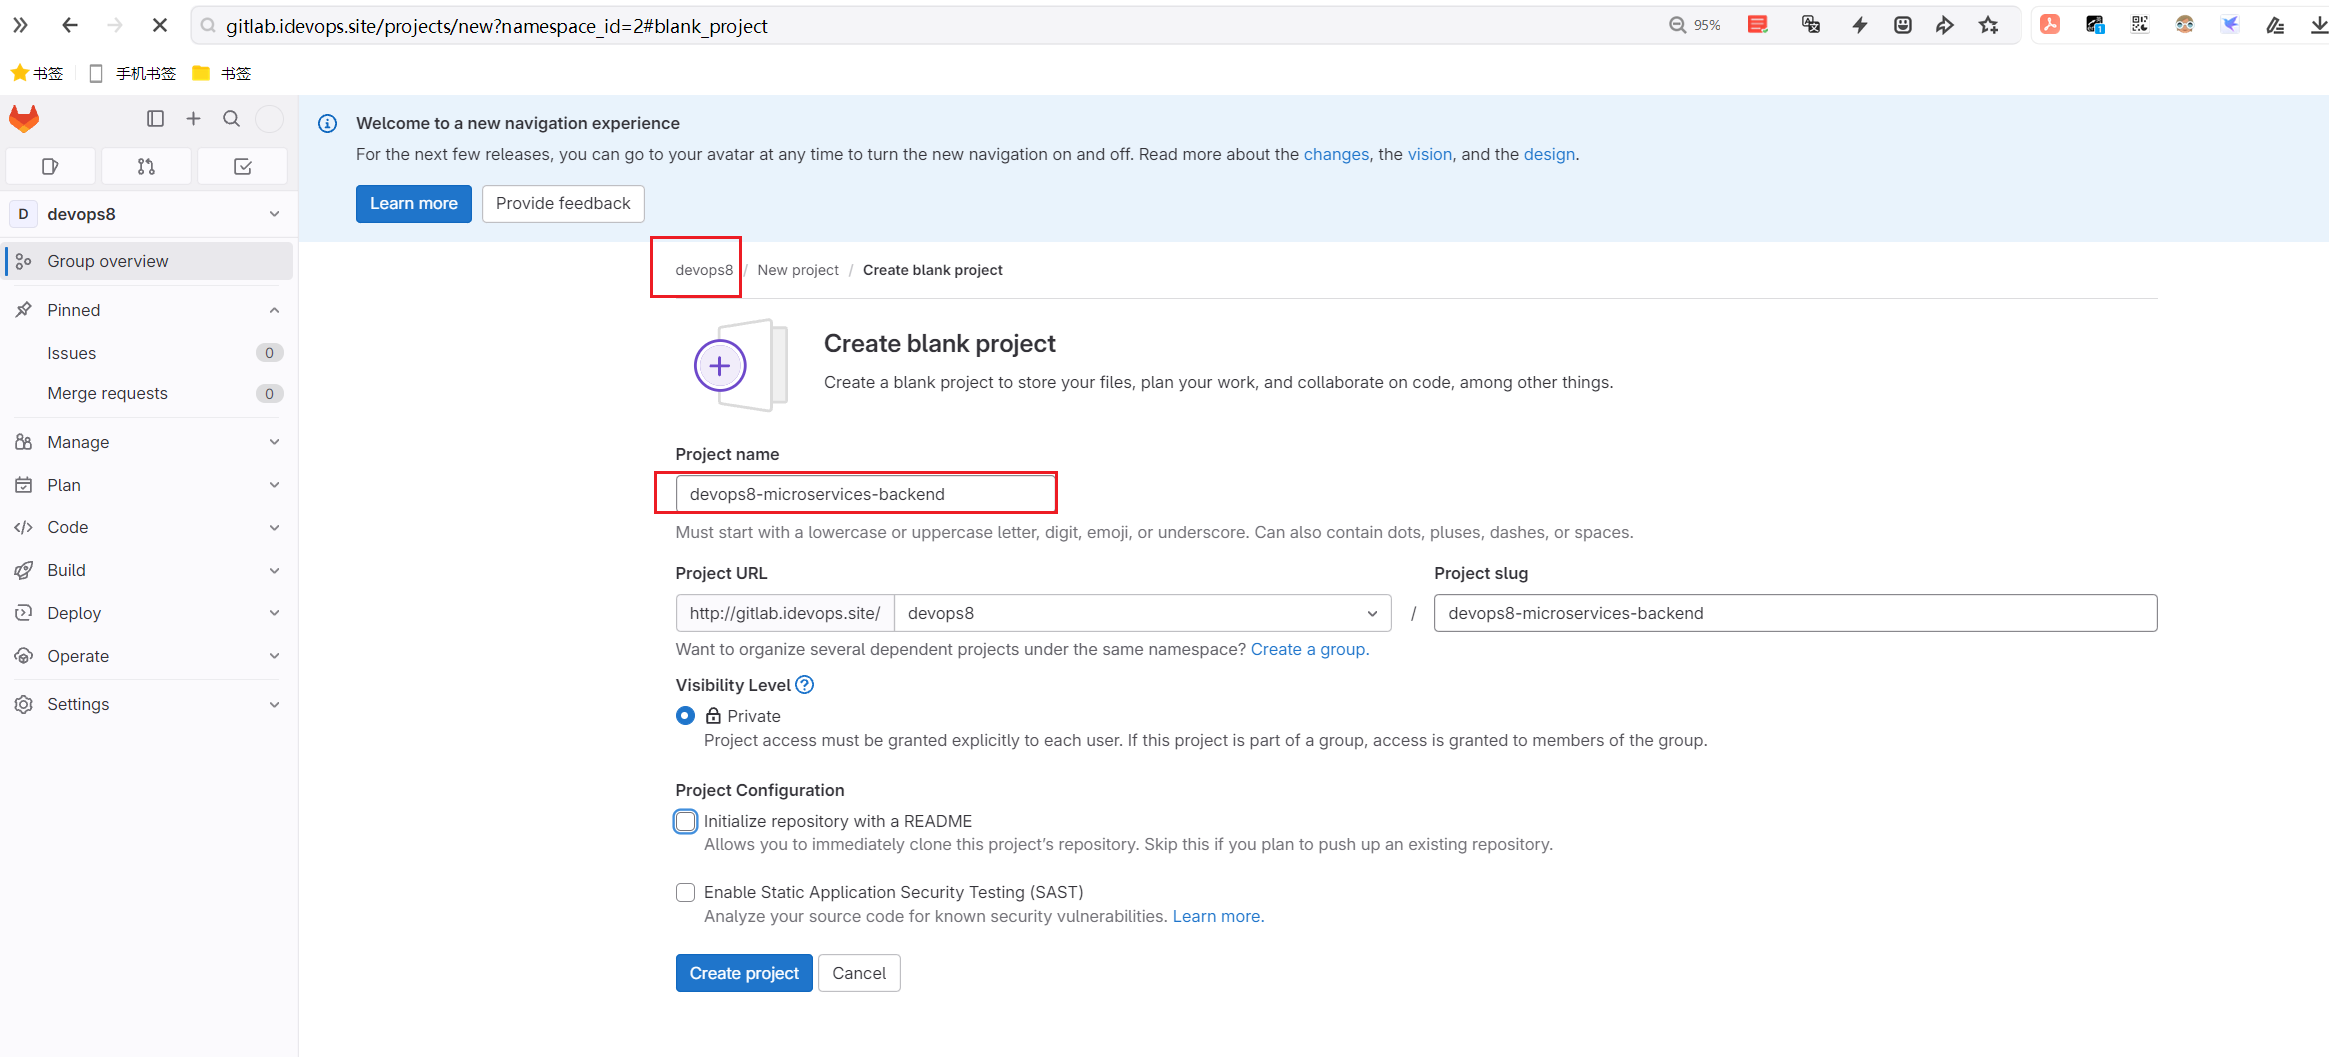
cd existing_folder
git init --initial-branch=main
git remote add origin http://gitlab.idevops.site/devops8/devops8-microservices-backend.git
git add .
git commit -m "Initial commit"
git push --set-upstream origin main- 将老师提供的代码解压
cd existing_folder
git init --initial-branch=main
git remote add origin http://gitlab.idevops.site/devops8/devops8-microservices-backend.git
git add .
git commit -m "Initial commit"
git push --set-upstream origin main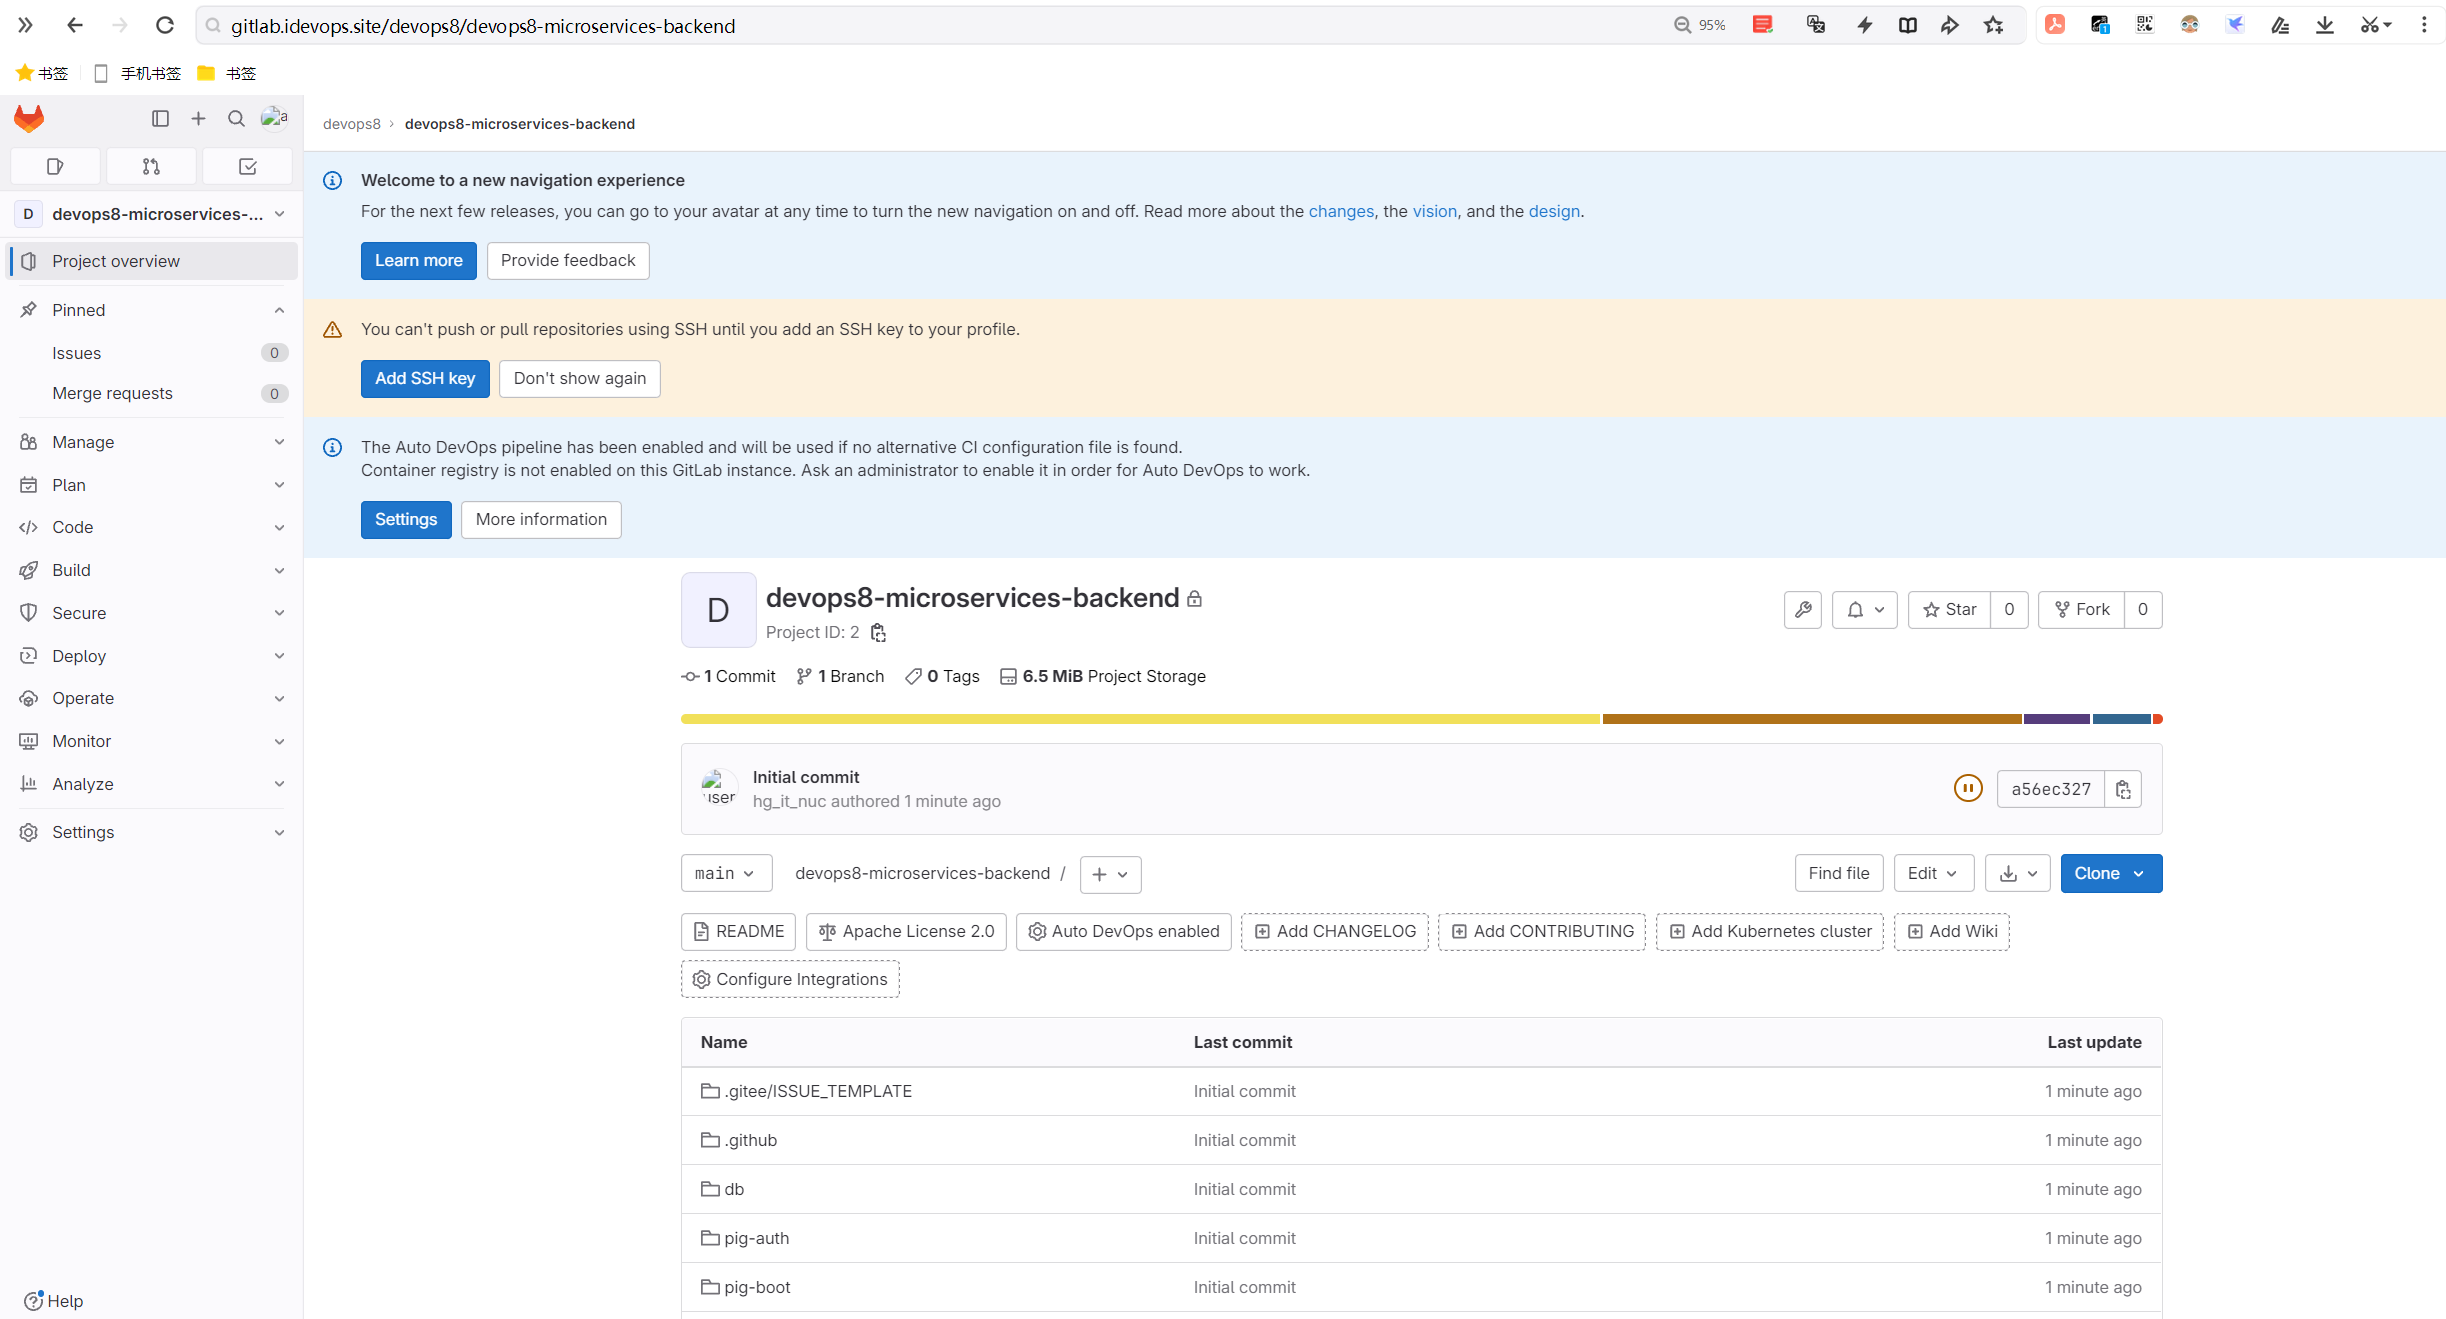
2.gitlab上创建前端项目:devops8-microservices-web
前端用npm打包,测试过了,没问题
这个项目没提供helm chart,我们得自己写。
但是他有docker-compose,我们基于它转换就好。
- 创建项目,并将本地代码上传gitlab仓库
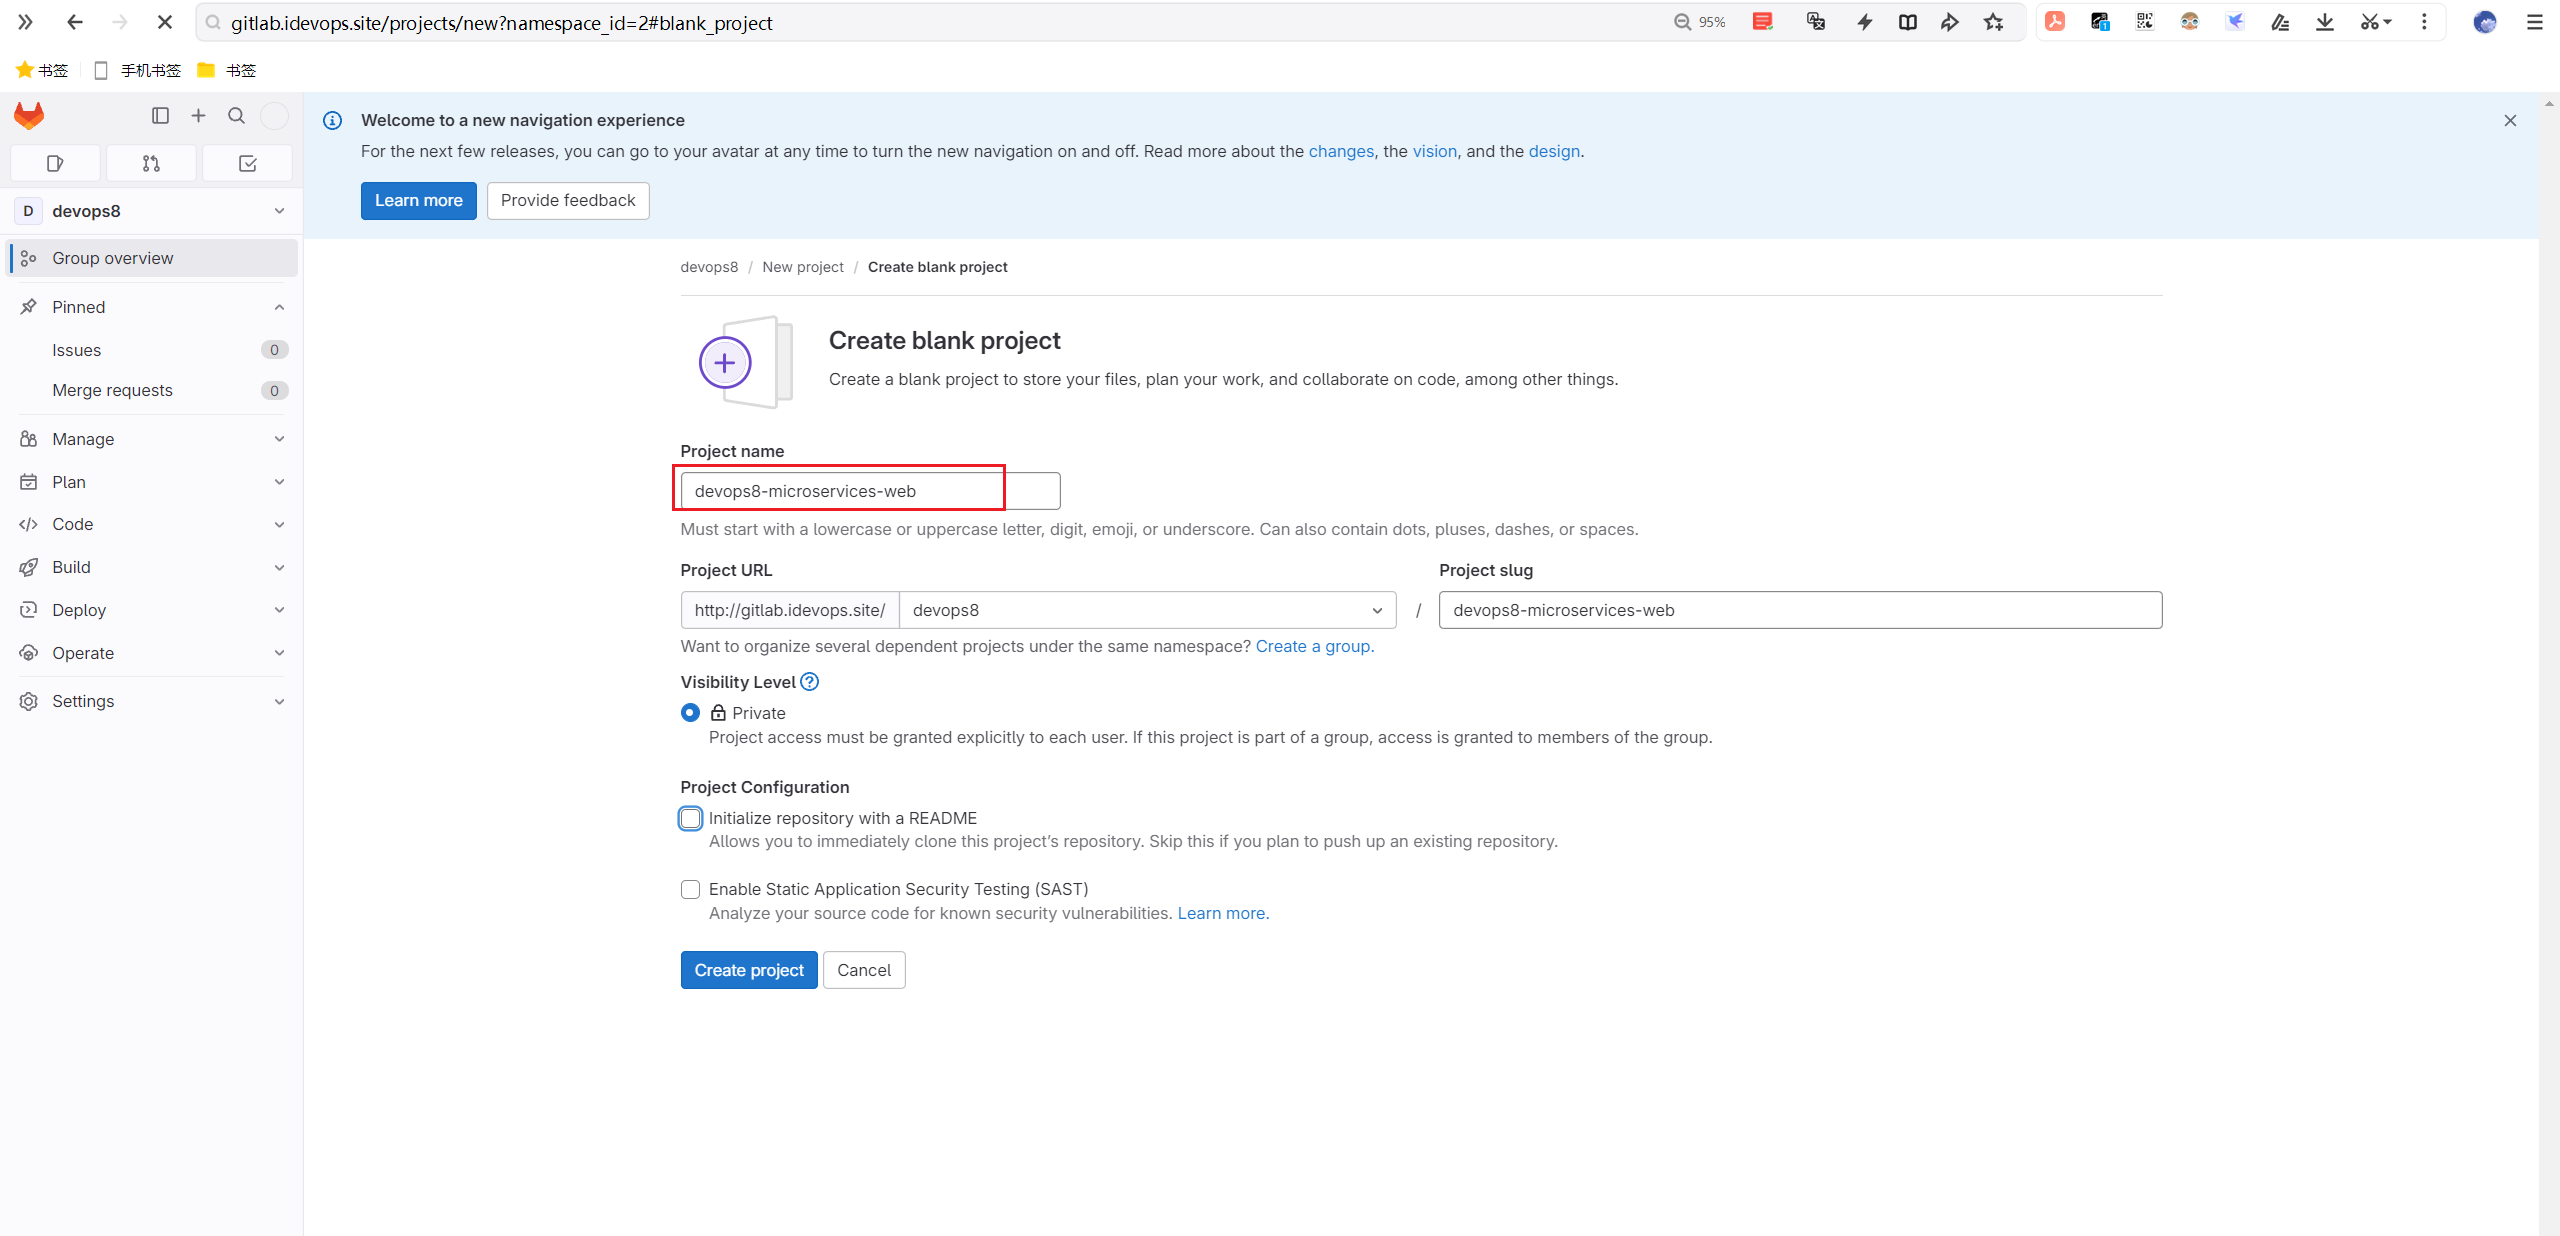
cd existing_folder
git init --initial-branch=main
git remote add origin http://gitlab.idevops.site/devops8/devops8-microservices-web.git
git add .
git commit -m "Initial commit"
git push --set-upstream origin main- 将老师提供的代码解压
cd existing_folder
git init --initial-branch=main
git remote add origin http://gitlab.idevops.site/devops8/devops8-microservices-web.git
git add .
git commit -m "Initial commit"
git push --set-upstream origin main
2、jenkins上创建后端和前端pipeline
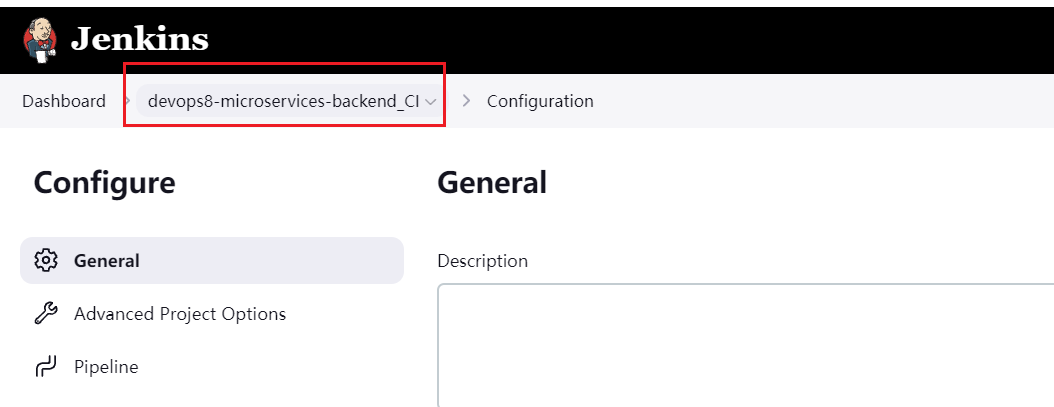
1.jenkins上创建devops8-microservices-backend_CI流水线
这一期的变化有点大:按微服务方式来做
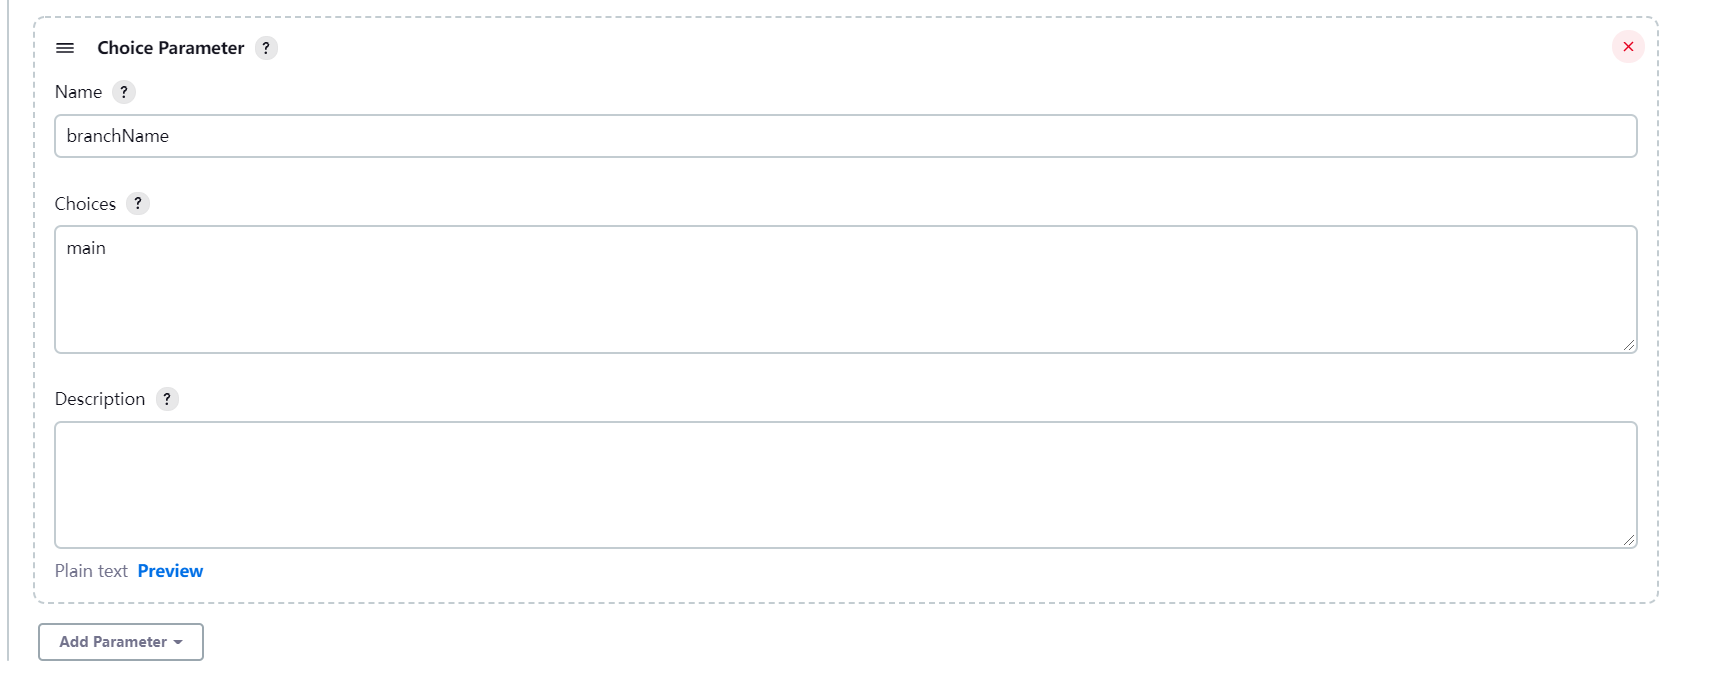
添加2个选项参数:
srcUrl http://gitlab.idevops.site/devops8/devops8-microservices-backend.git
branchName main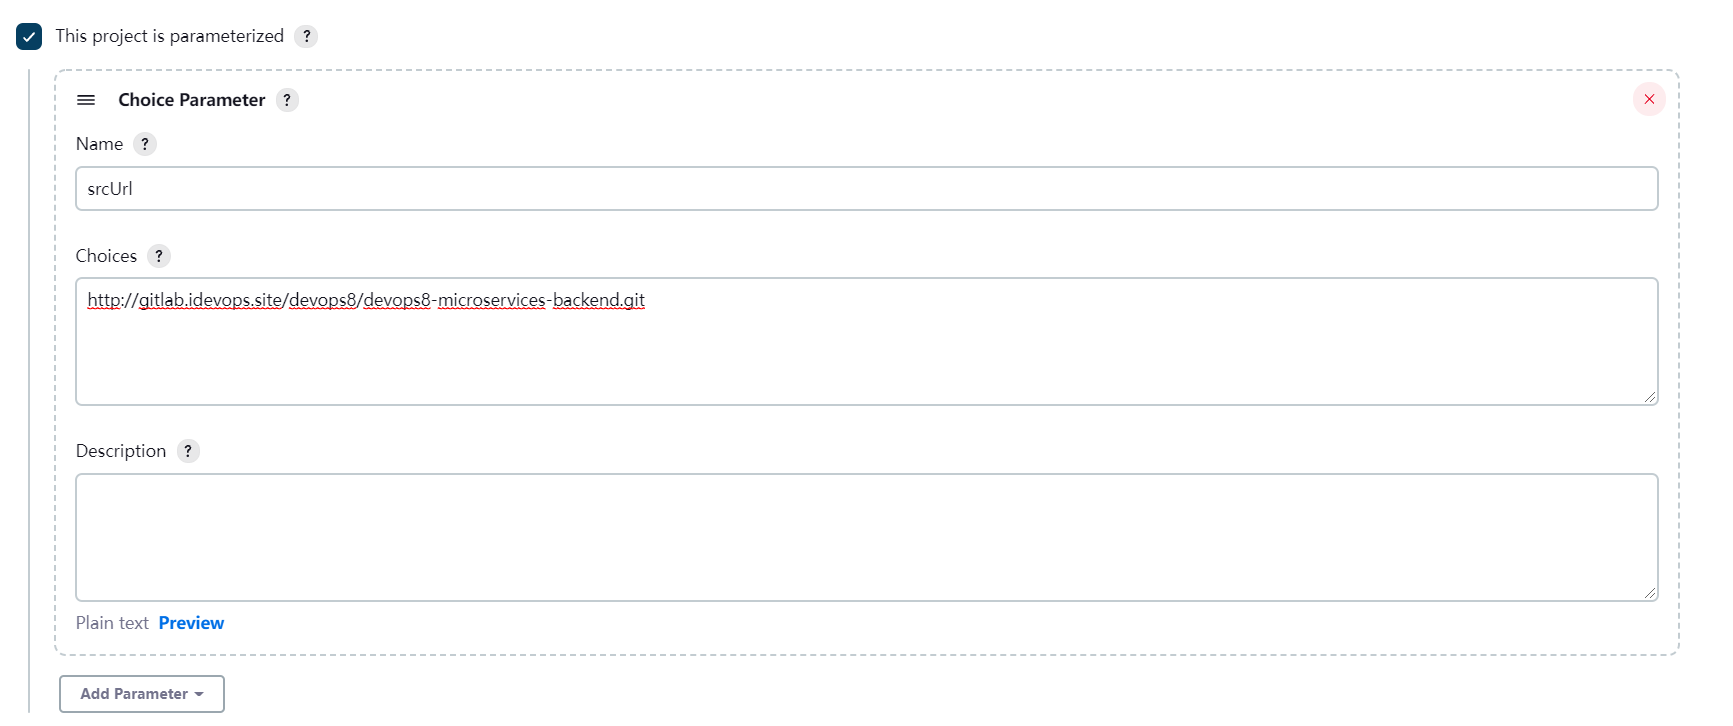
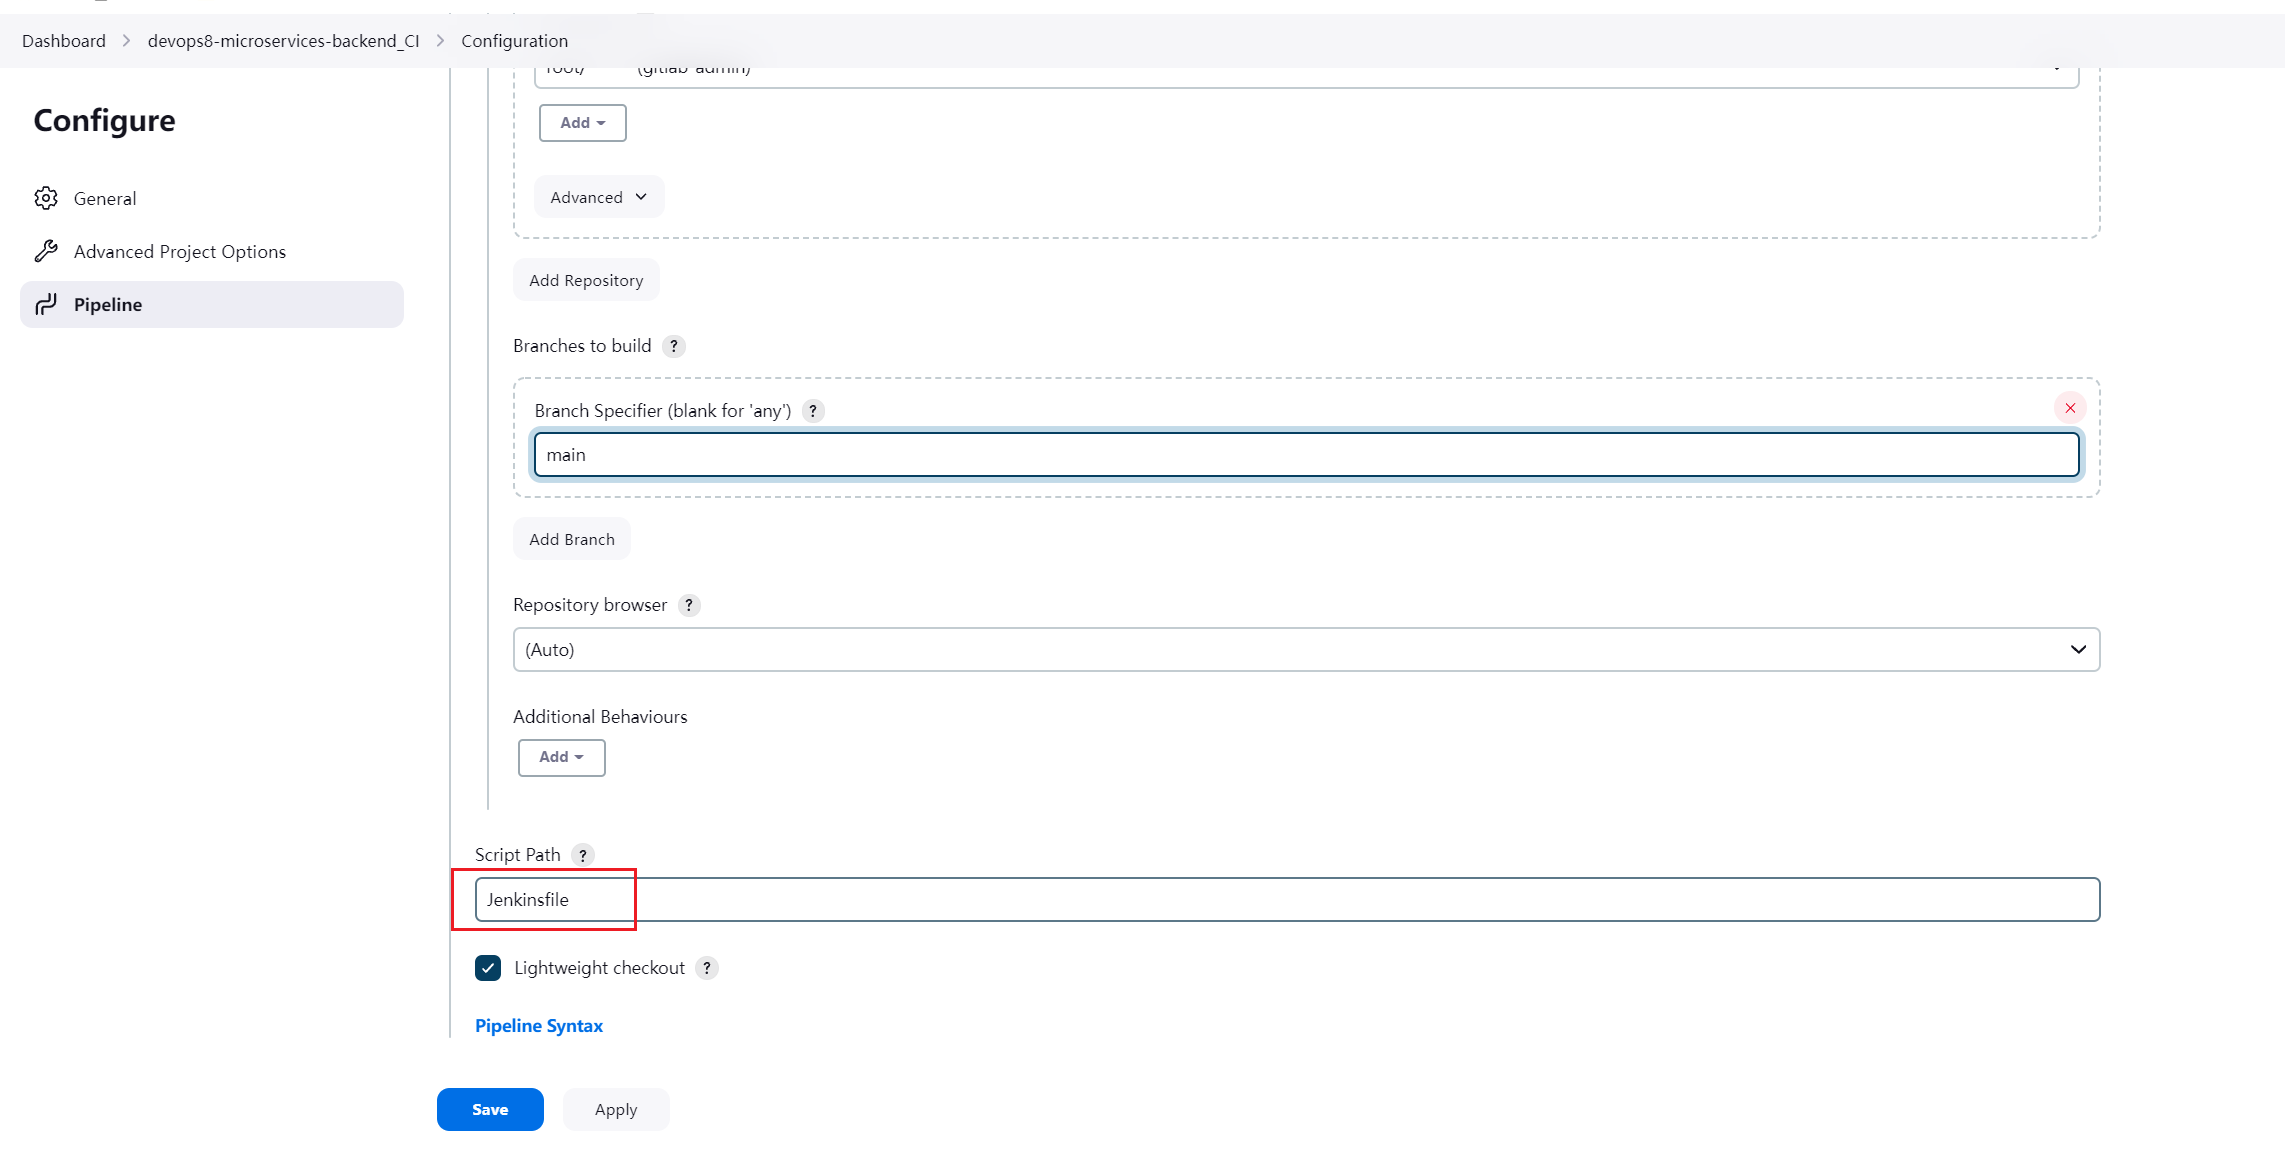
- 配置从gitlab 共享库地址
http://gitlab.idevops.site/devops8/my-jenkinslib-demo.git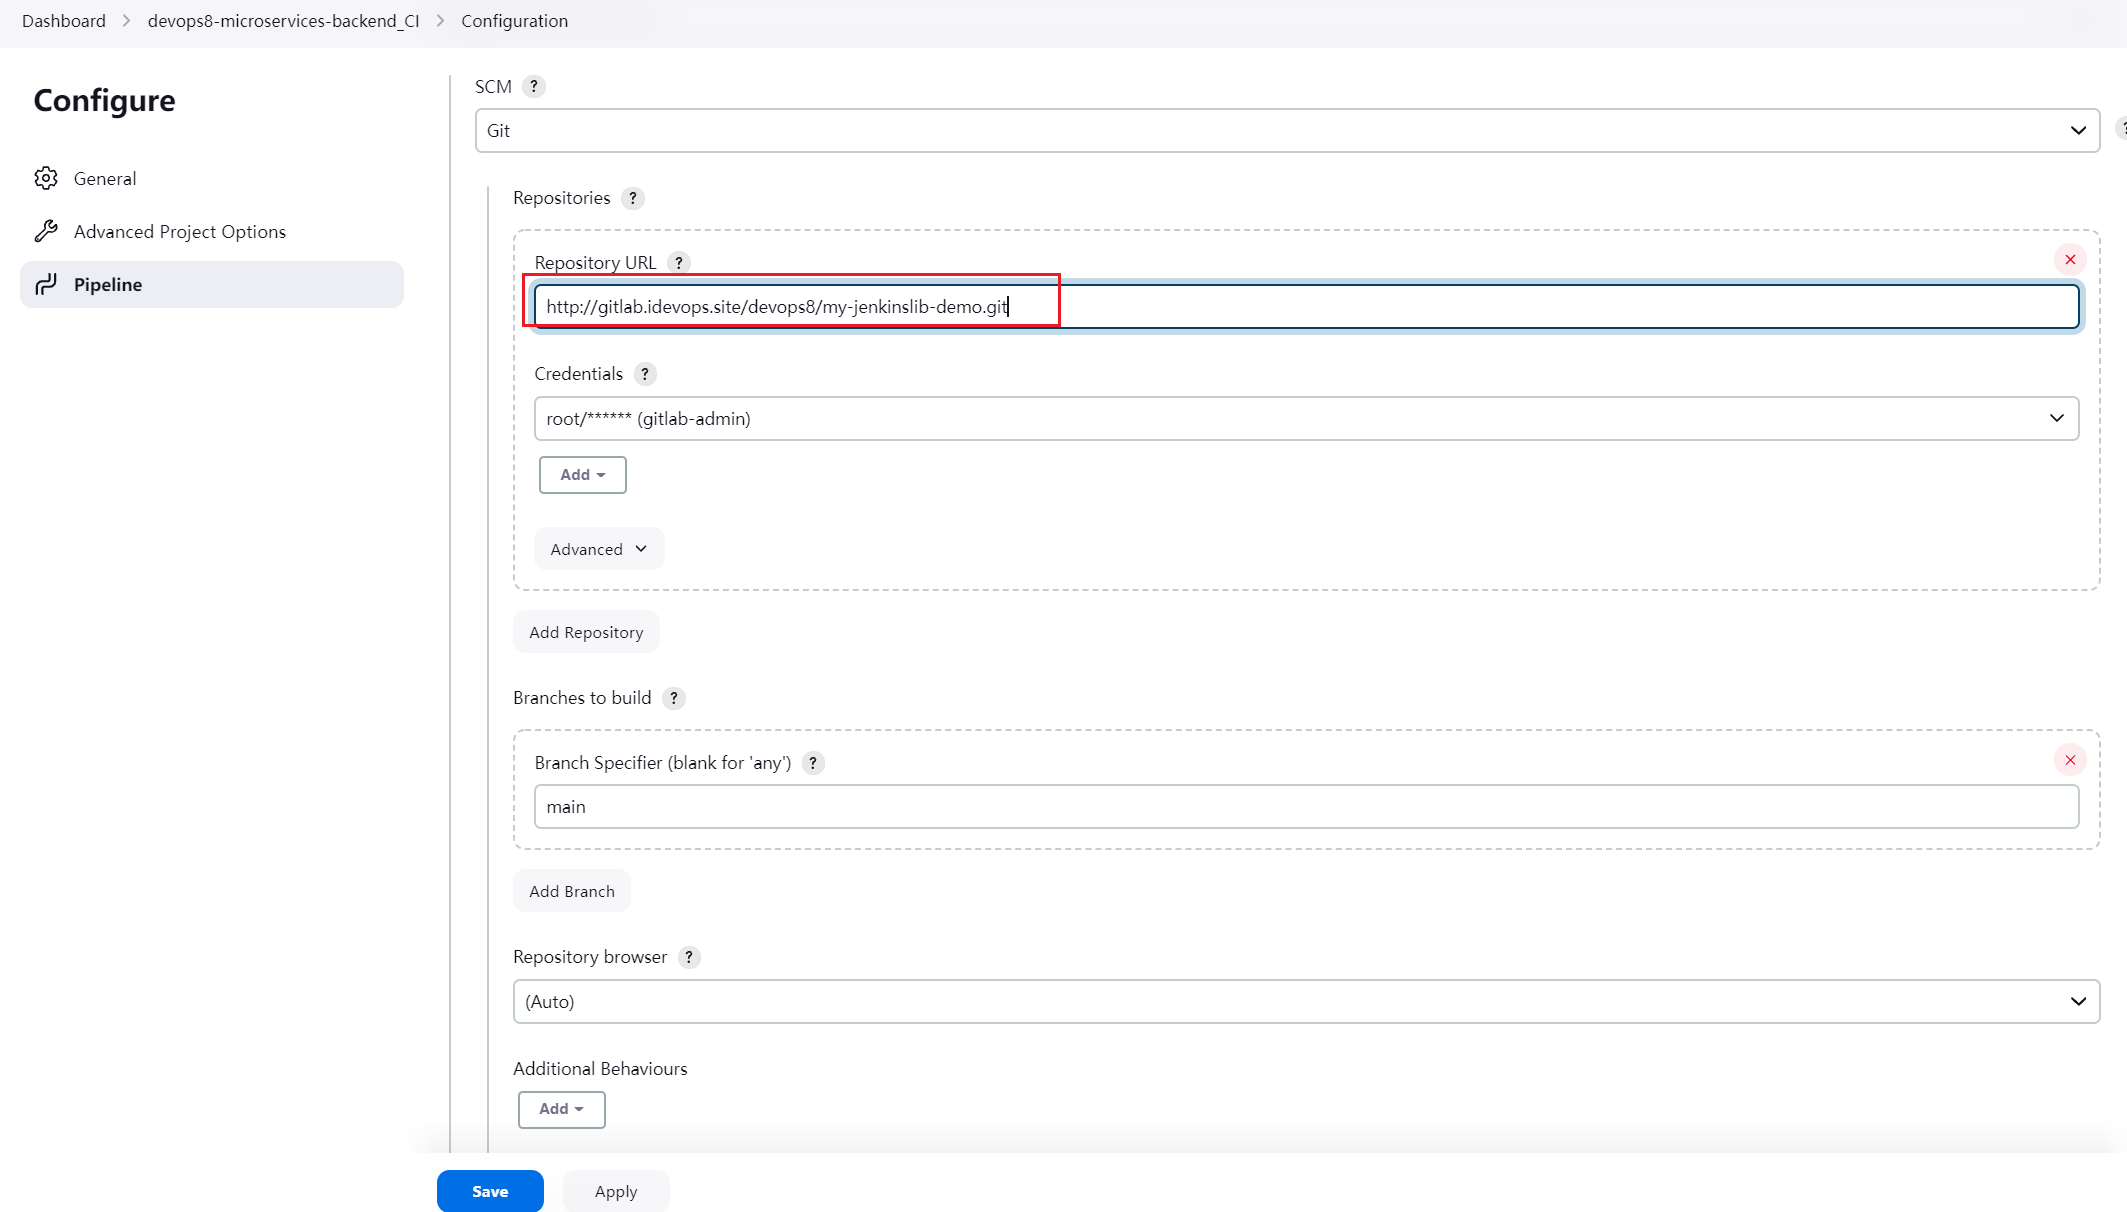
- 利用片段生成器写下下载代码 片段
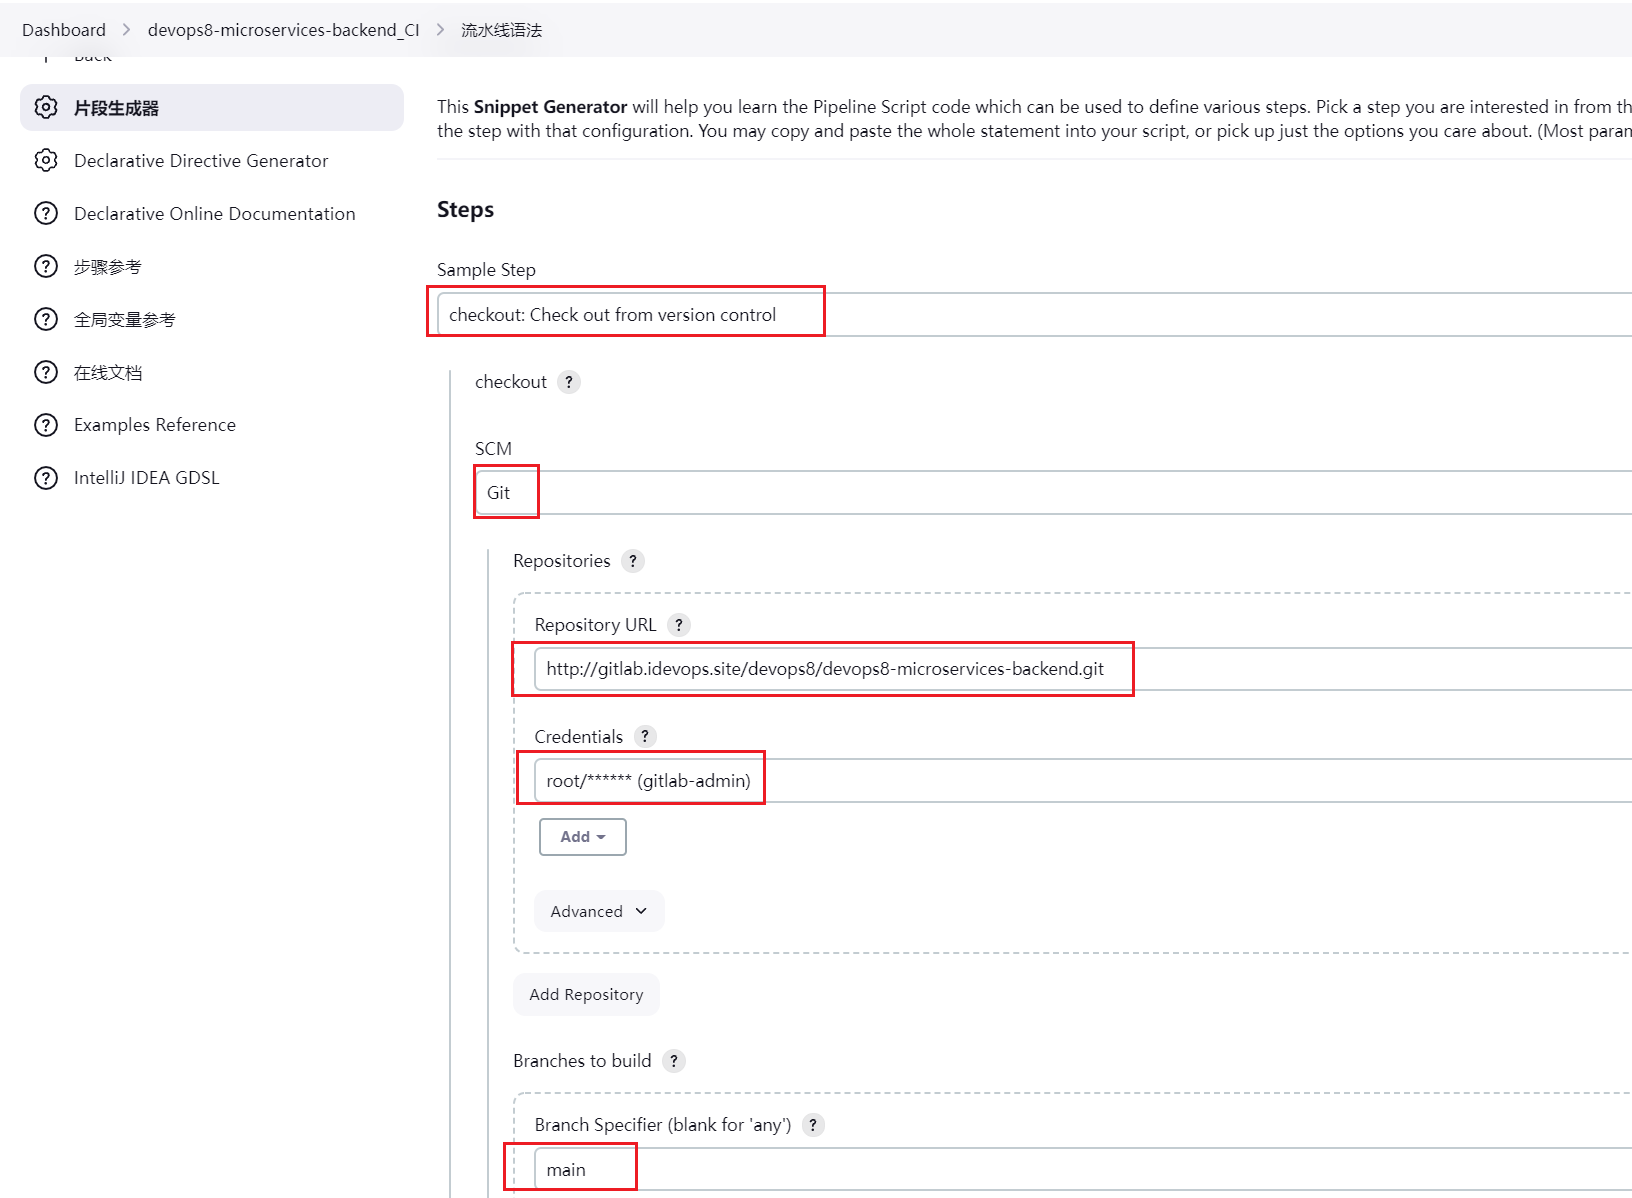
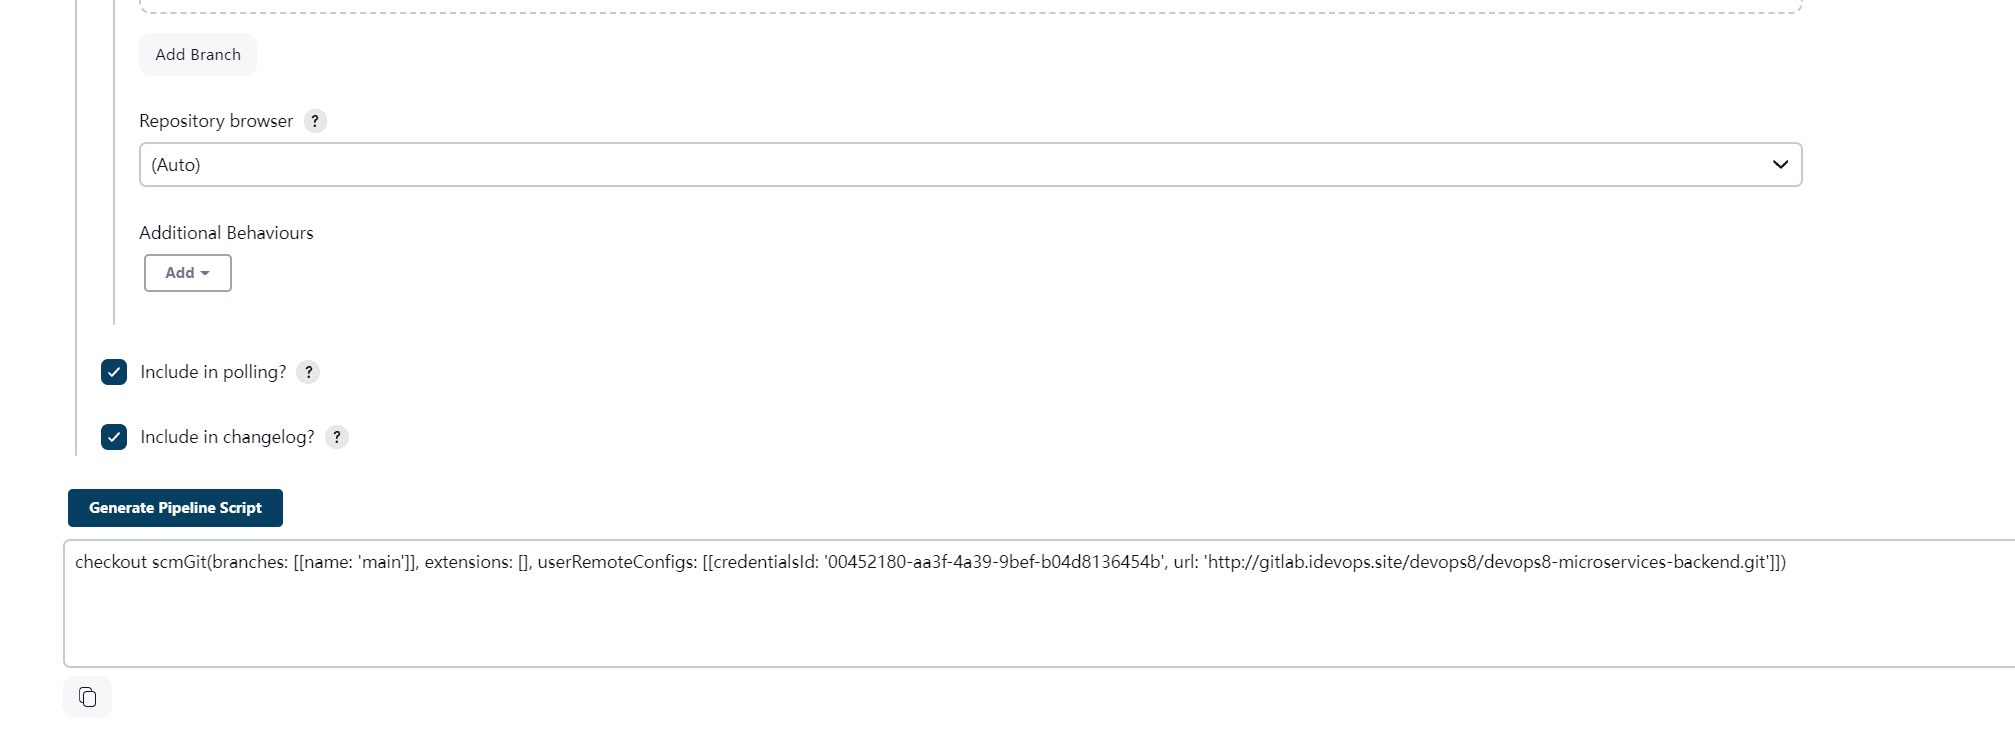
checkout scmGit(branches: [[name: 'main']], extensions: [], userRemoteConfigs: [[credentialsId: '00452180-aa3f-4a39-9bef-b04d8136454b', url: 'http://gitlab.idevops.site/devops8/devops8-microservices-backend.git']])- 将代码写到gitlab里共享库里
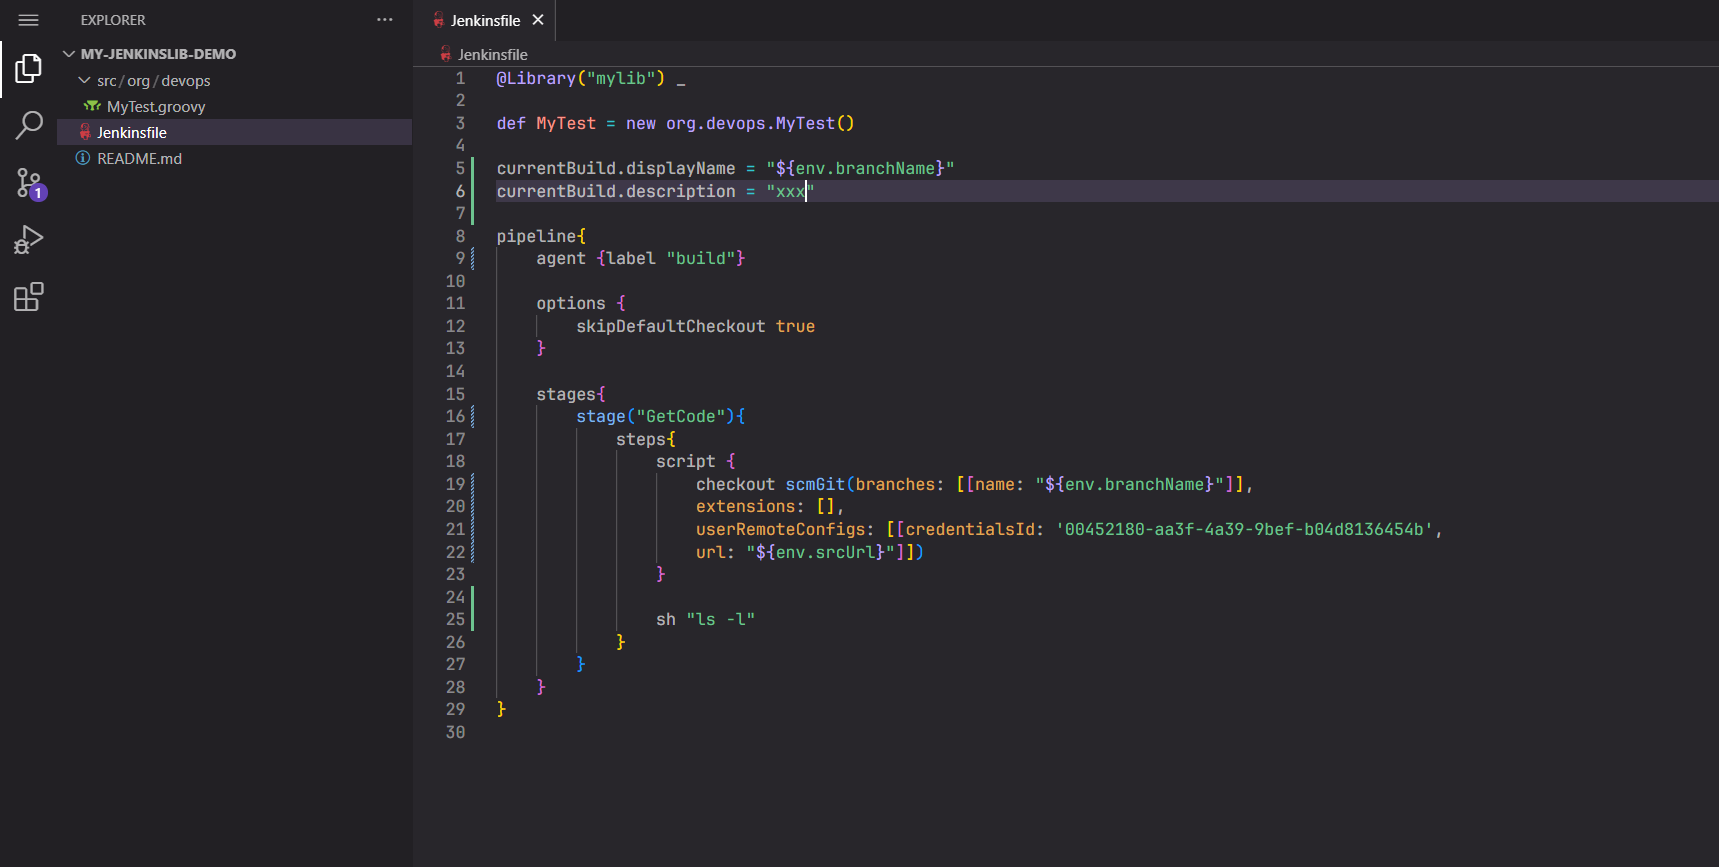
@Library("mylib") _

def MyTest = new org.devops.MyTest()

currentBuild.displayName = "${env.branchName}"
currentBuild.description = "xxx"

pipeline{
	agent {label "build"}

	options {
		skipDefaultCheckout true
	}

	stages{
		stage("GetCode"){
			steps{
				script {
					checkout scmGit(branches: [[name: "${env.branchName}"]],
					extensions: [],
					userRemoteConfigs: [[credentialsId: '00452180-aa3f-4a39-9bef-b04d8136454b',
					url: "${env.srcUrl}"]])
				}

				sh "ls -l"
			}
		}
	}
}然后提交。
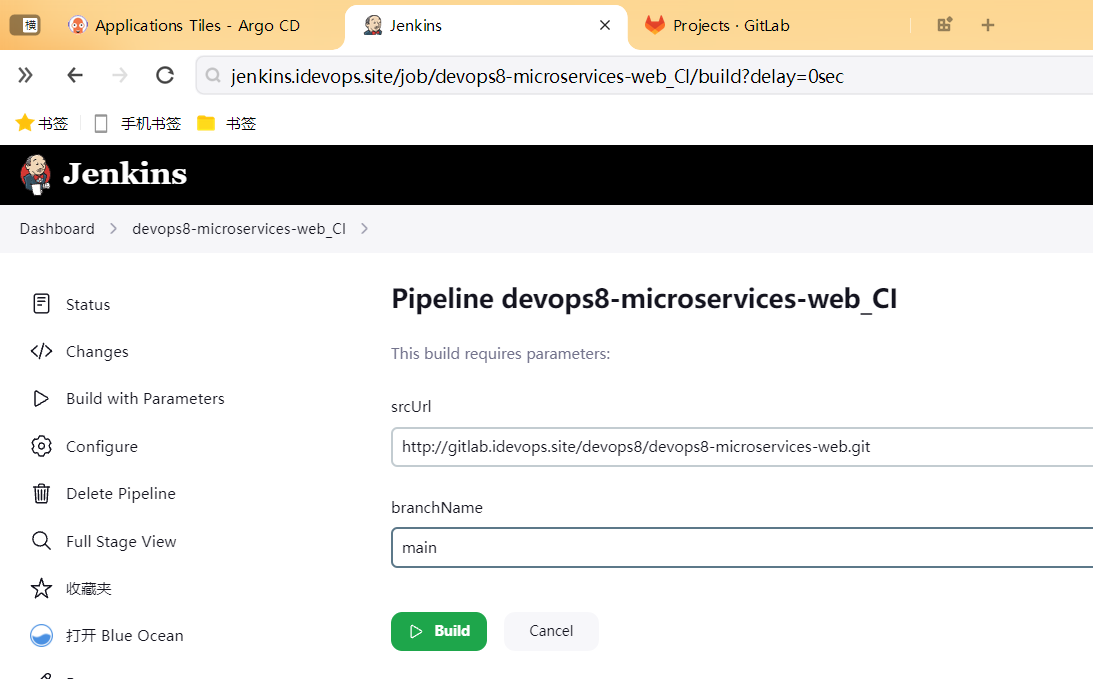
2.jenkins上创建devops8-microservices-web_CI流水线
按以上方法配置前端项目。
- 以后端项目为基础克隆到一个新项目:
devops8-microservices-web_CI
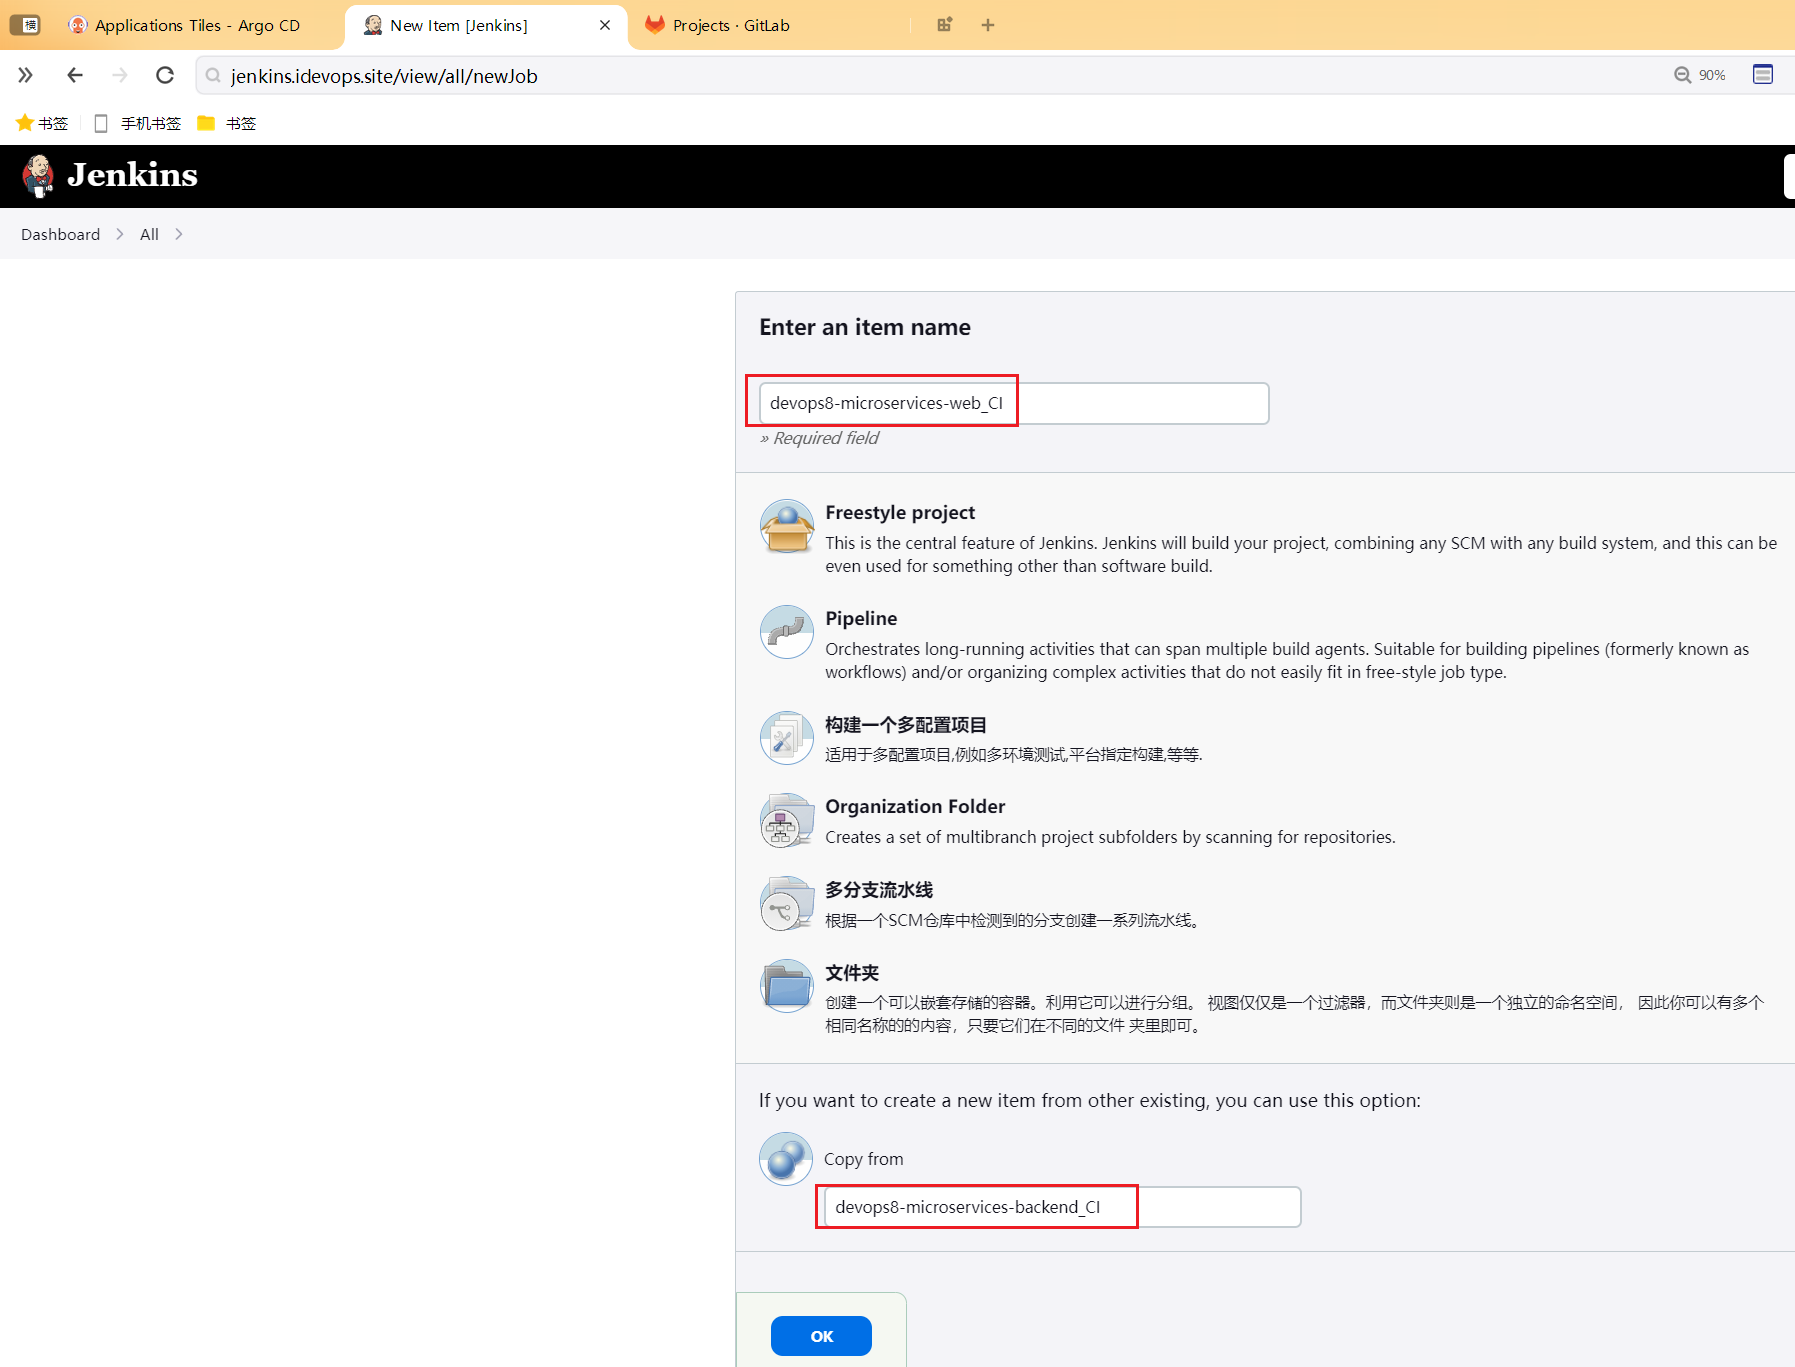
- 修改选项参数
srcUrl里仓库地址为前端项目
srcUrl http://gitlab.idevops.site/devops8/devops8-microservices-web.git
branchName main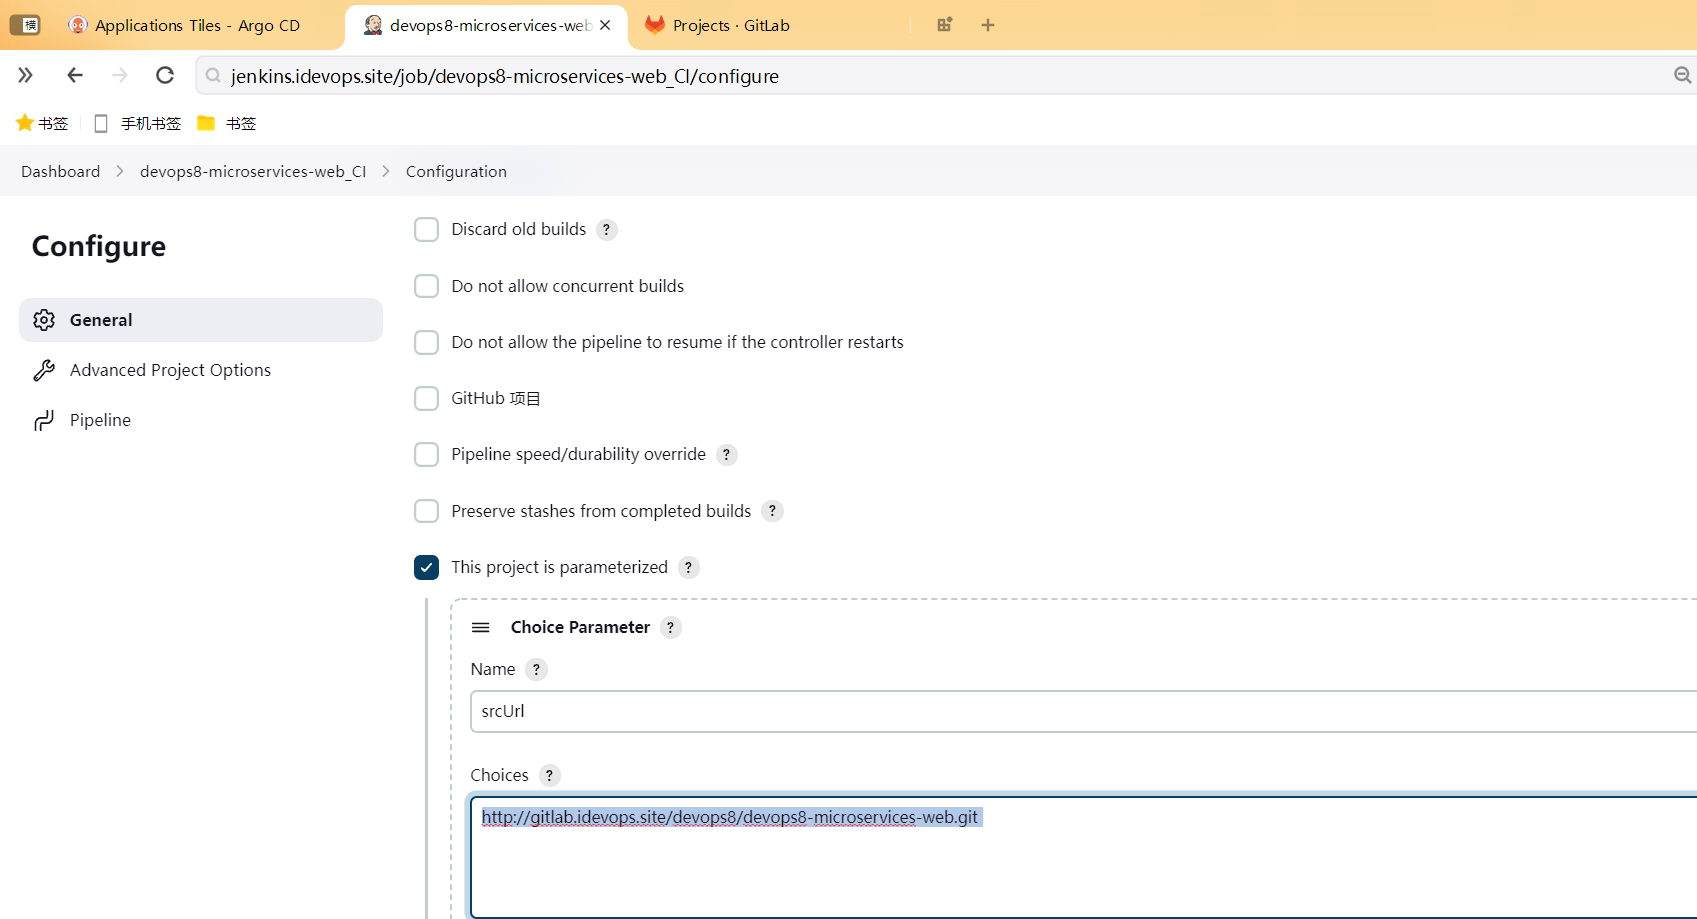
- 查看gitlab 共享库地址
http://gitlab.idevops.site/devops8/my-jenkinslib-demo.git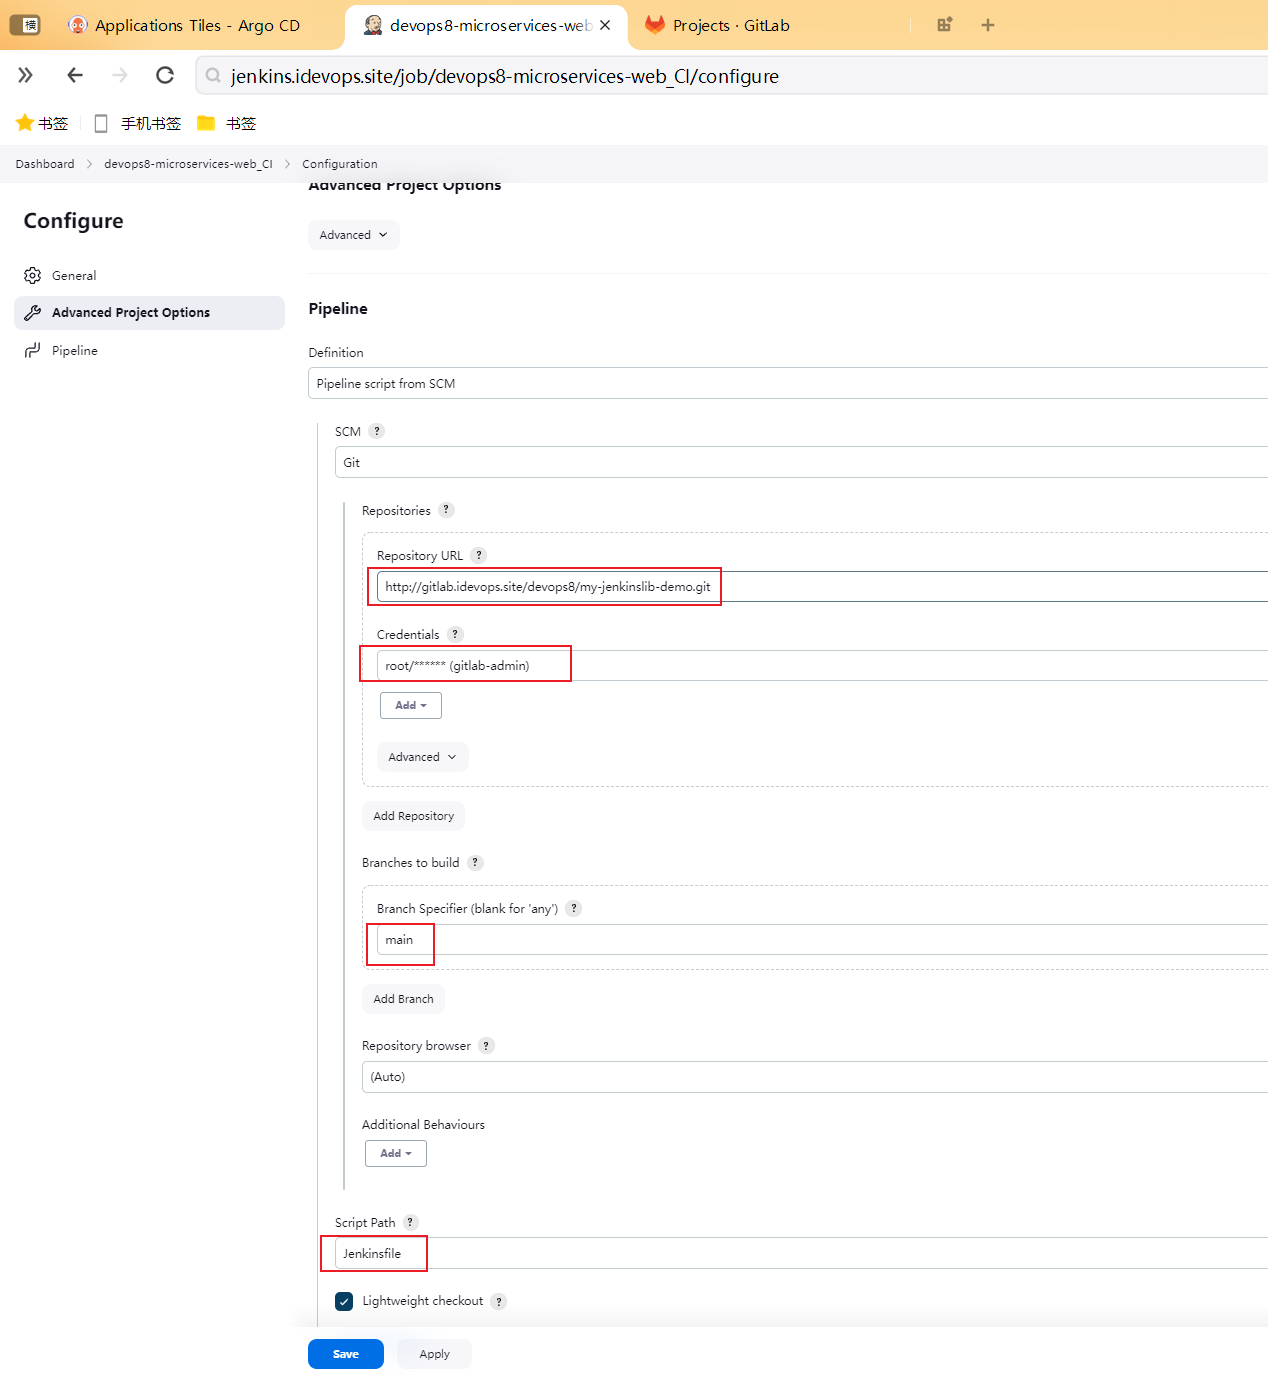
备注:这一部分上一小节已经存在,这里作为回顾。实际无序重复配置。
- 利用片段生成器写下下载代码 片段
checkout scmGit(branches: [[name: 'main']], extensions: [], userRemoteConfigs: [[credentialsId: '00452180-aa3f-4a39-9bef-b04d8136454b', url: 'http://gitlab.idevops.site/devops8/devops8-microservices-backend.git']])- 将代码写到gitlab里共享库里
@Library("mylib") _

def MyTest = new org.devops.MyTest()

currentBuild.displayName = "${env.branchName}"
currentBuild.description = "xxx"

pipeline{
	agent {label "build"}

	options {
		skipDefaultCheckout true
	}

	stages{
		stage("GetCode"){
			steps{
				script {
					checkout scmGit(branches: [[name: "${env.branchName}"]],
					extensions: [],
					userRemoteConfigs: [[credentialsId: '00452180-aa3f-4a39-9bef-b04d8136454b',
					url: "${env.srcUrl}"]])
				}

				sh "ls -l"
			}
		}
	}
}然后提交。
3、测试下载代码流水线
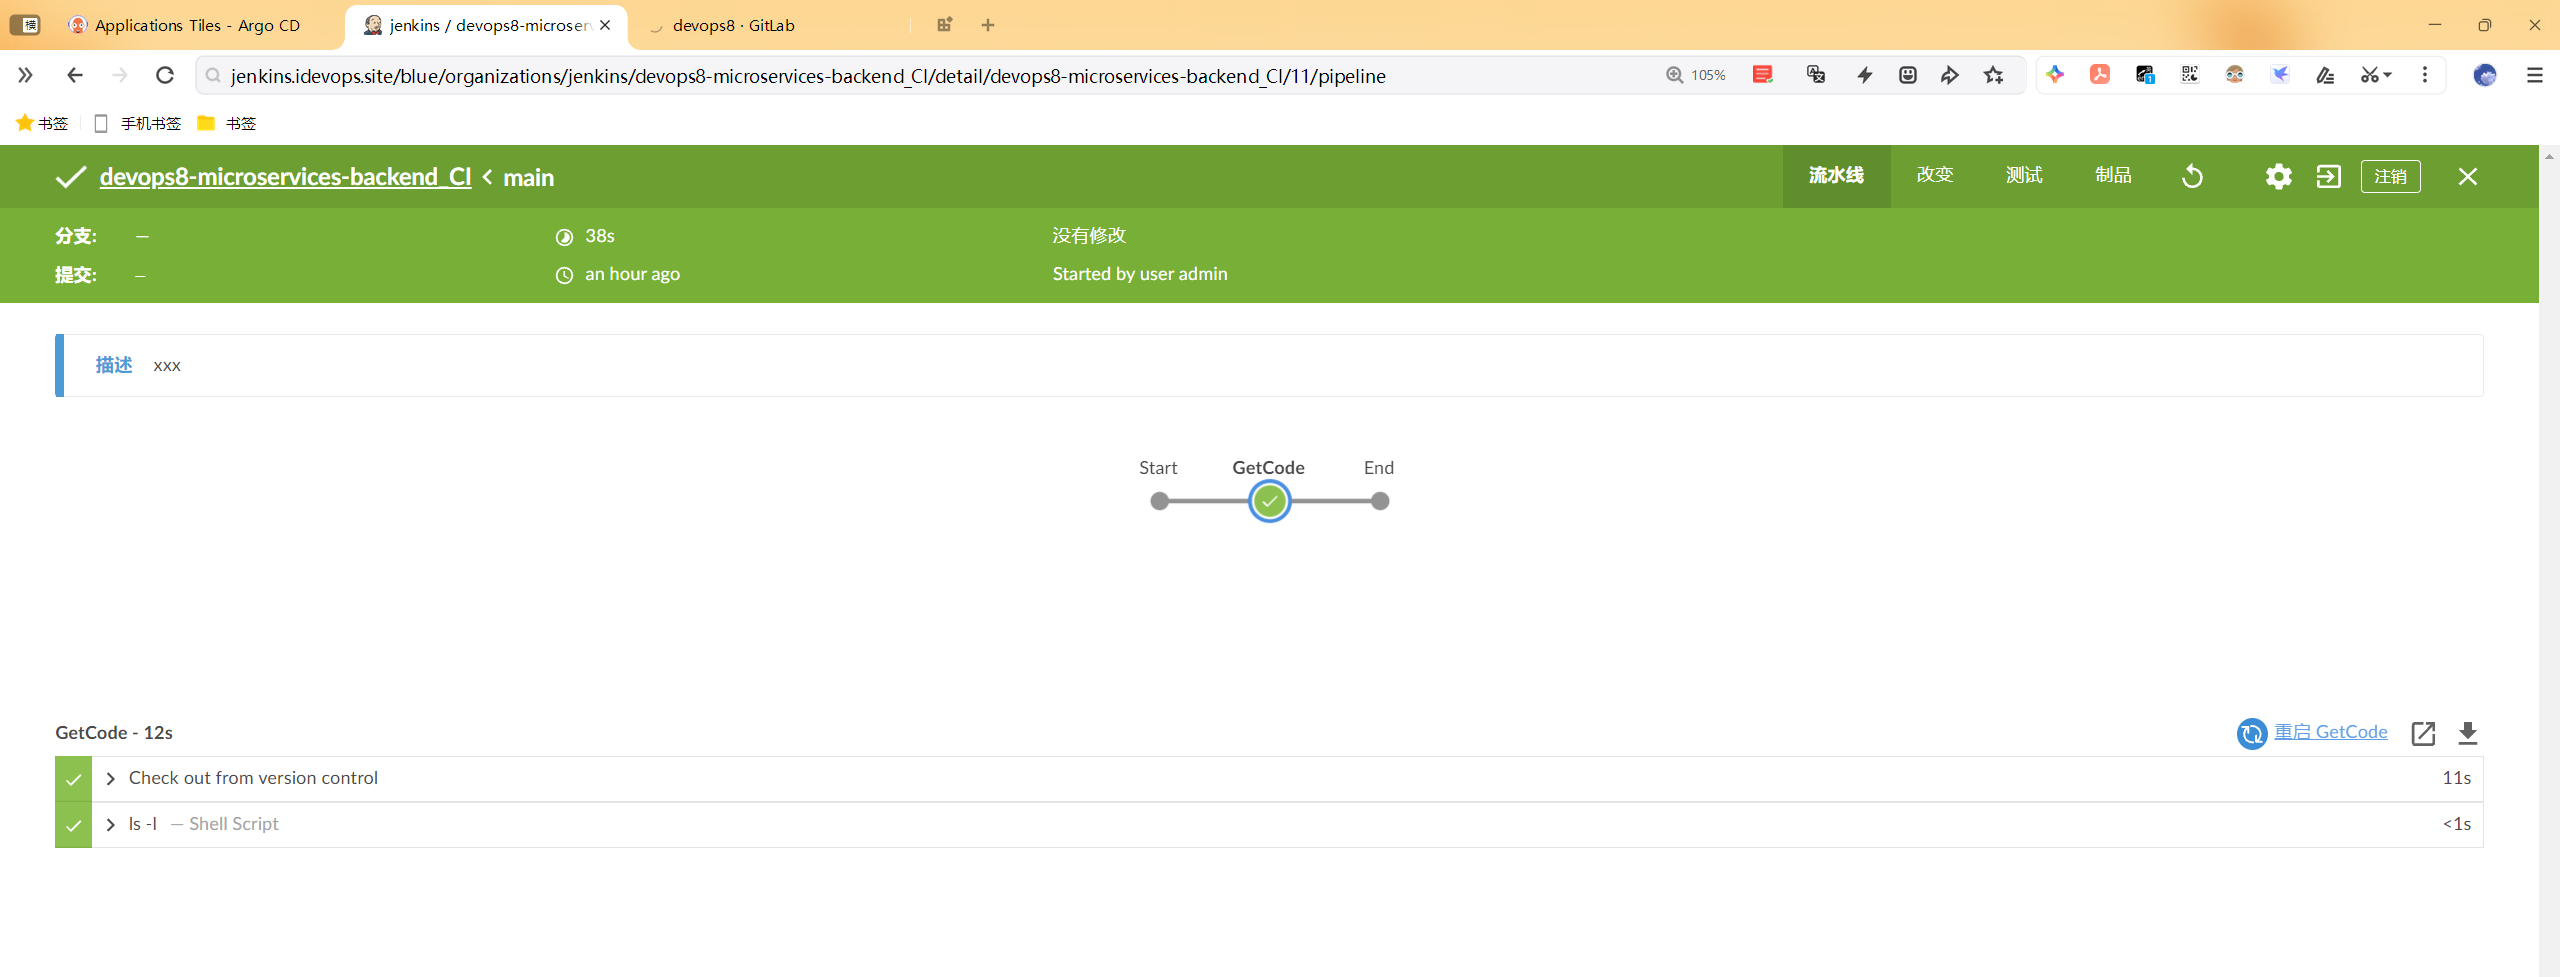
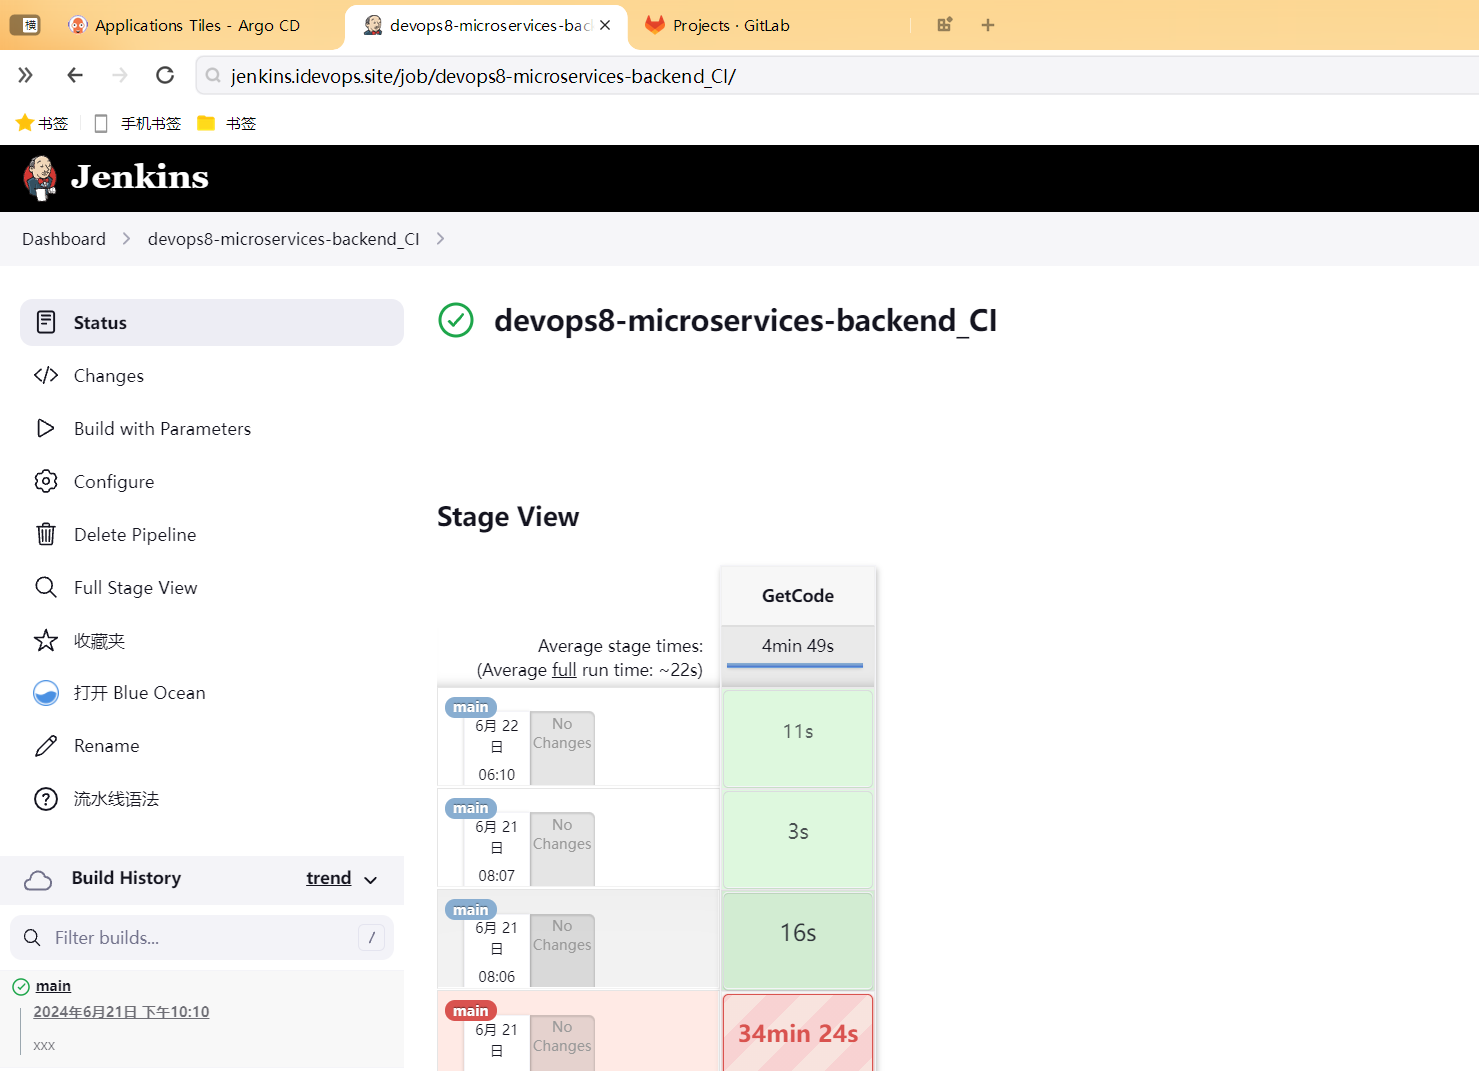
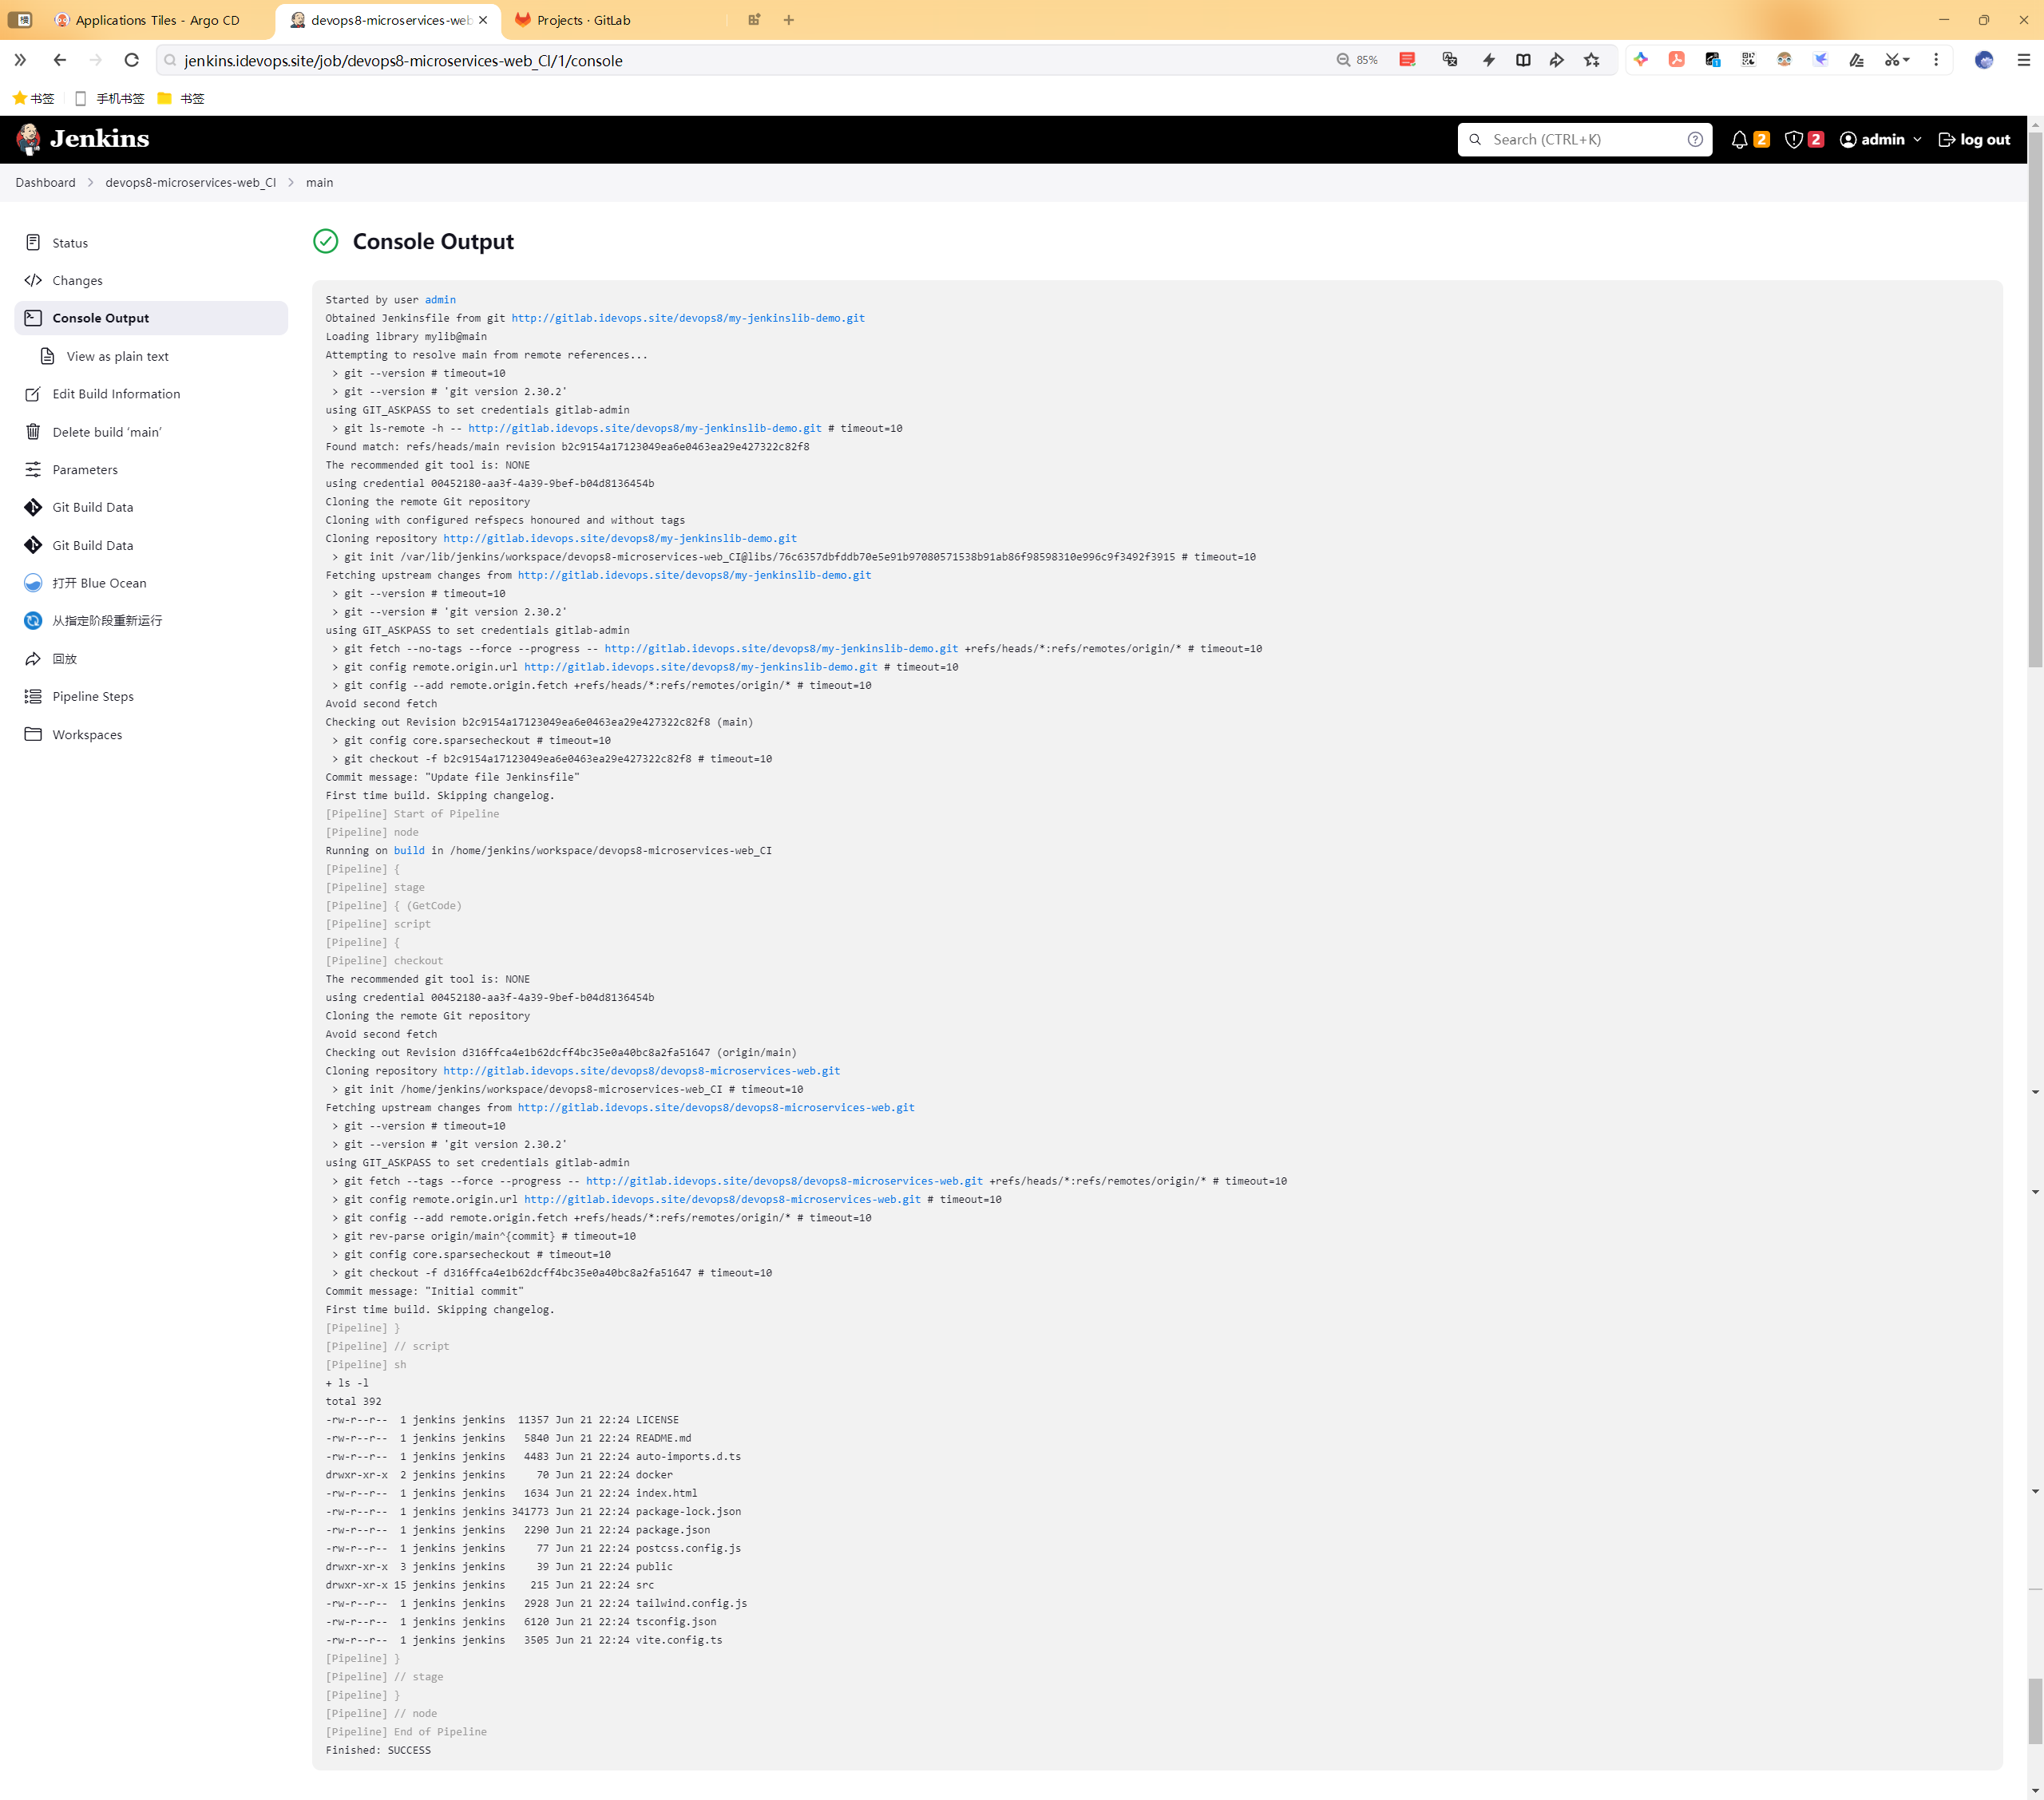
1.测试后端项目下载代码流水线
- 运行流水线测试效果(运行成功)
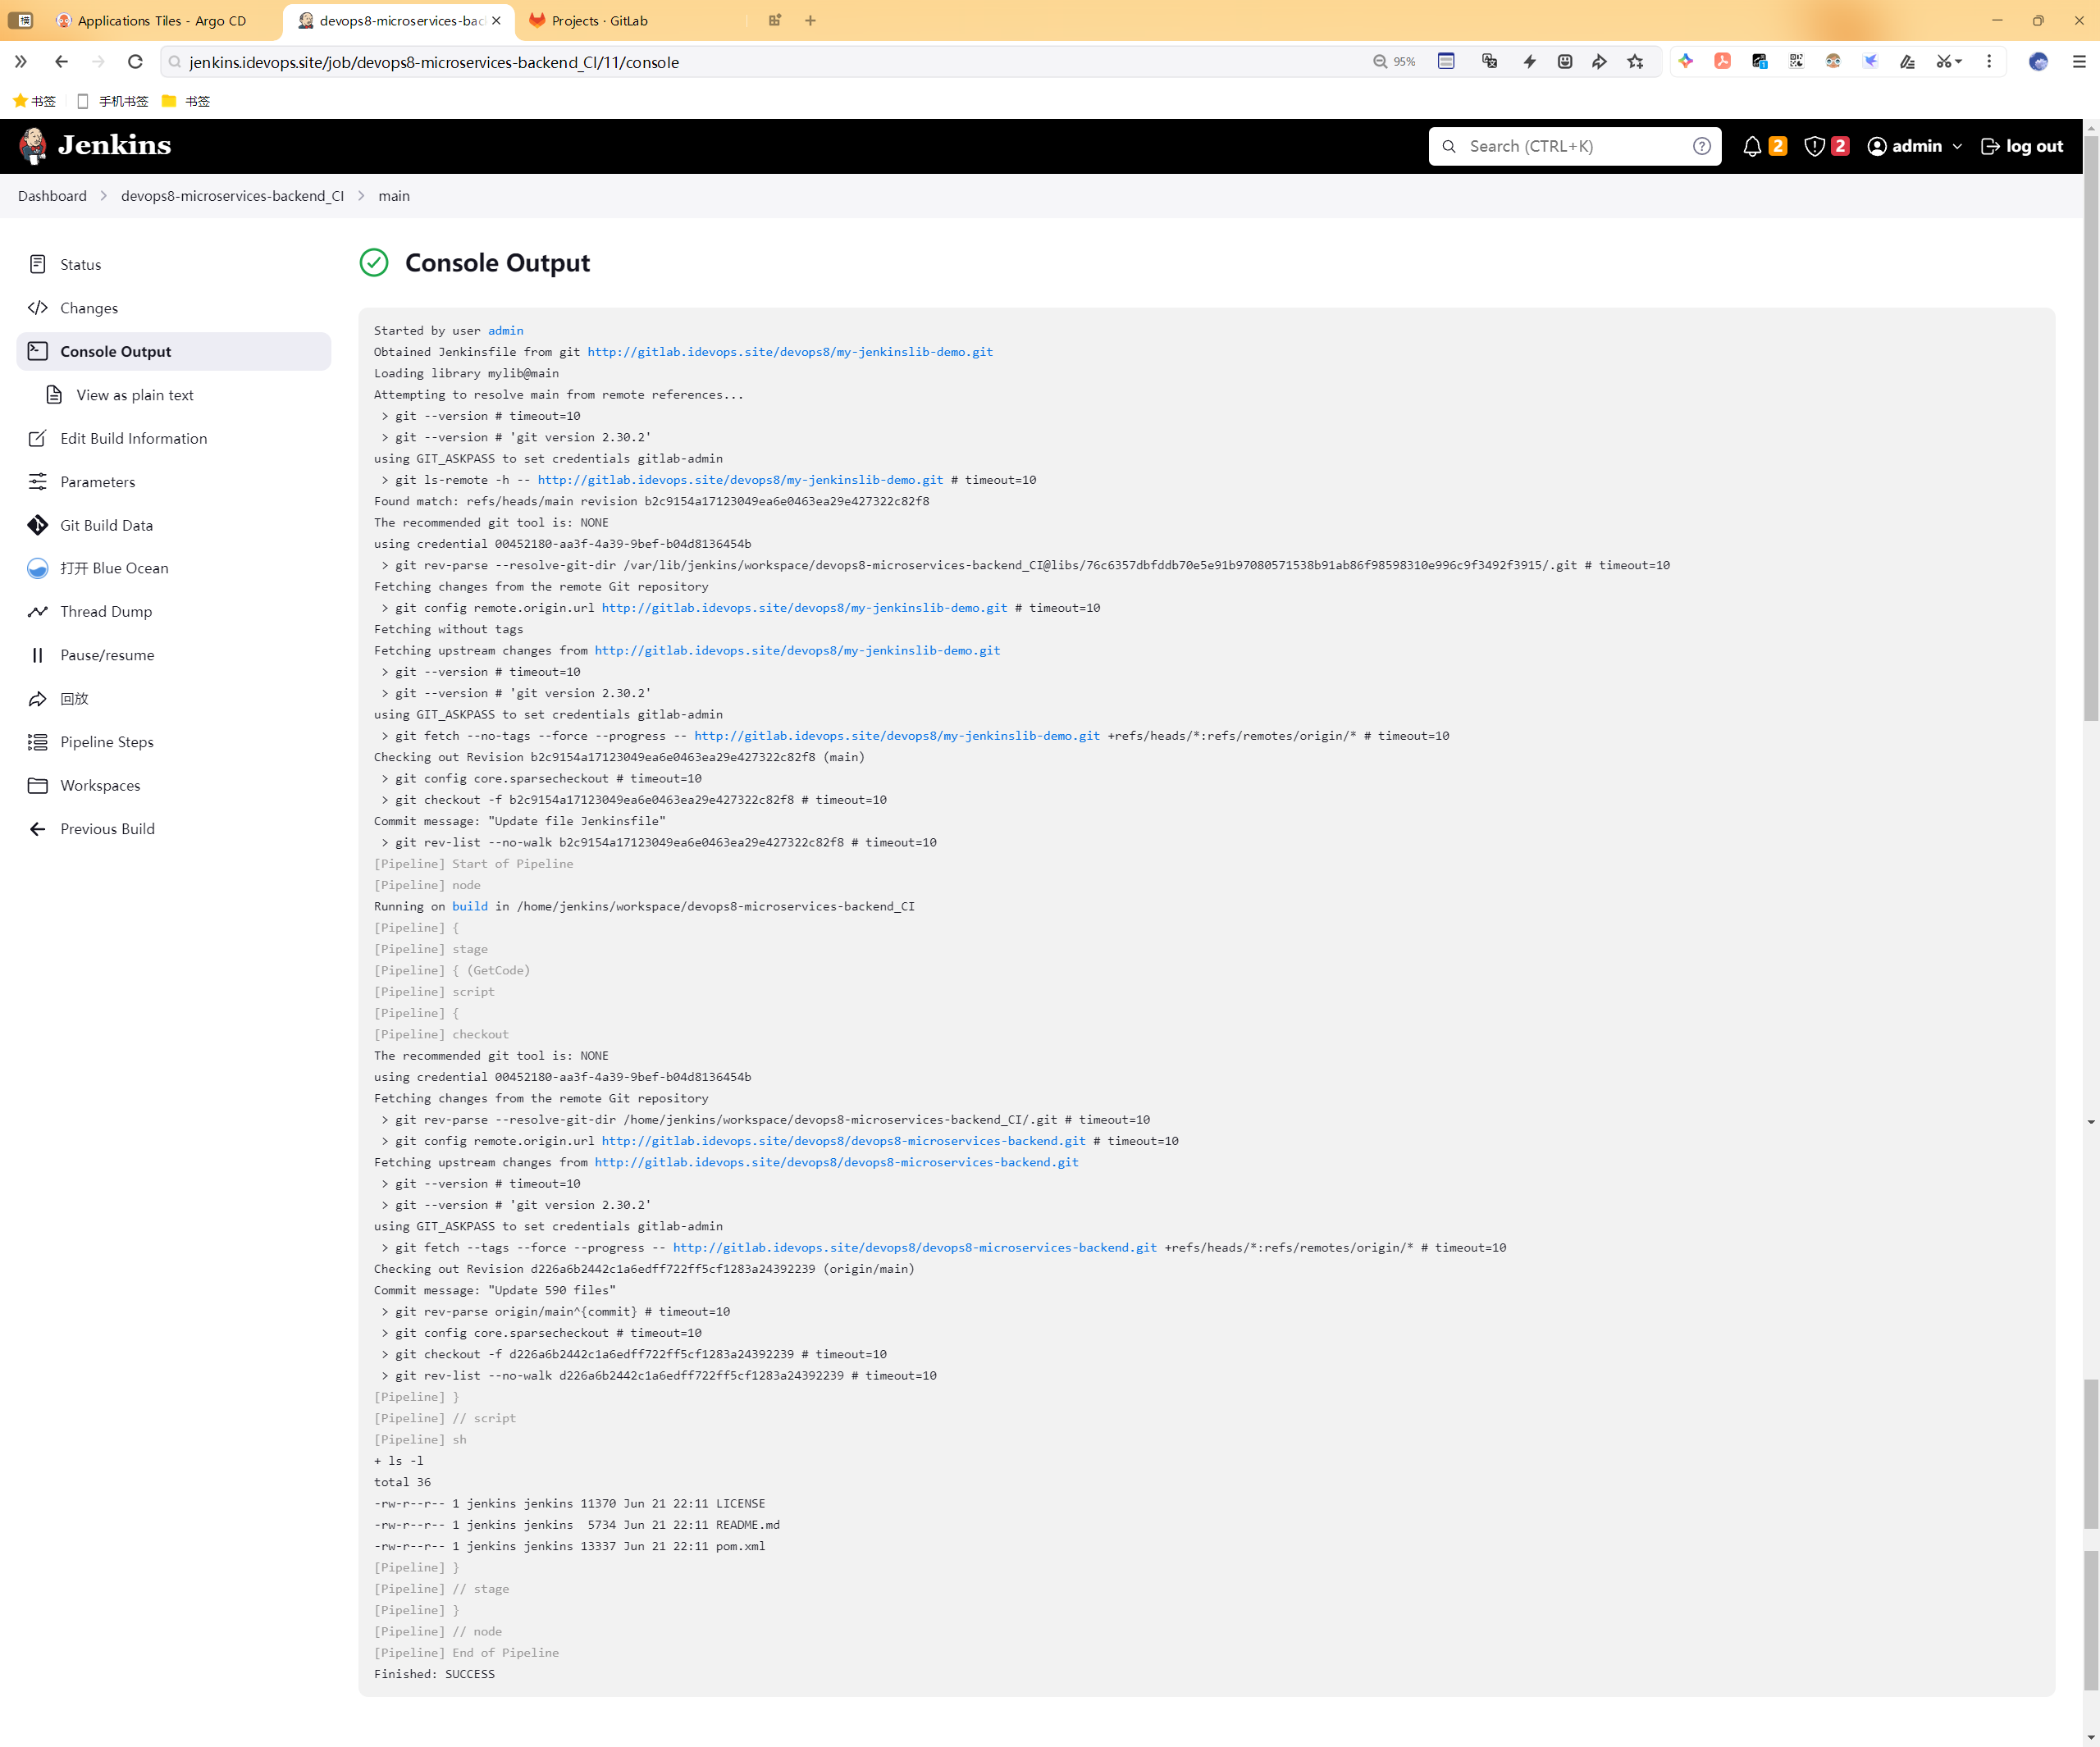
奇怪,前端项目这里下载的文件为啥这么少呀……
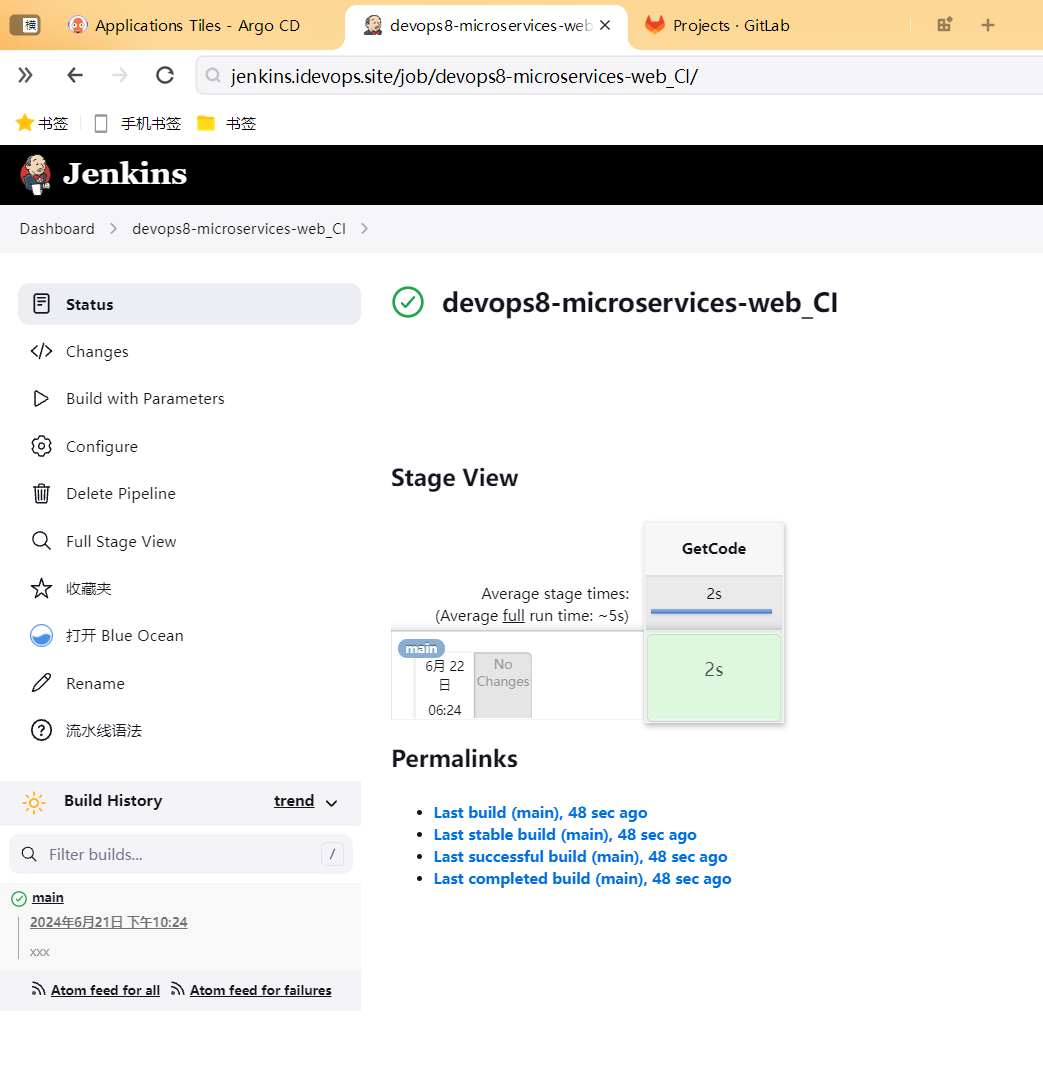
2.测试前端项目下载代码流水线
运行成功:
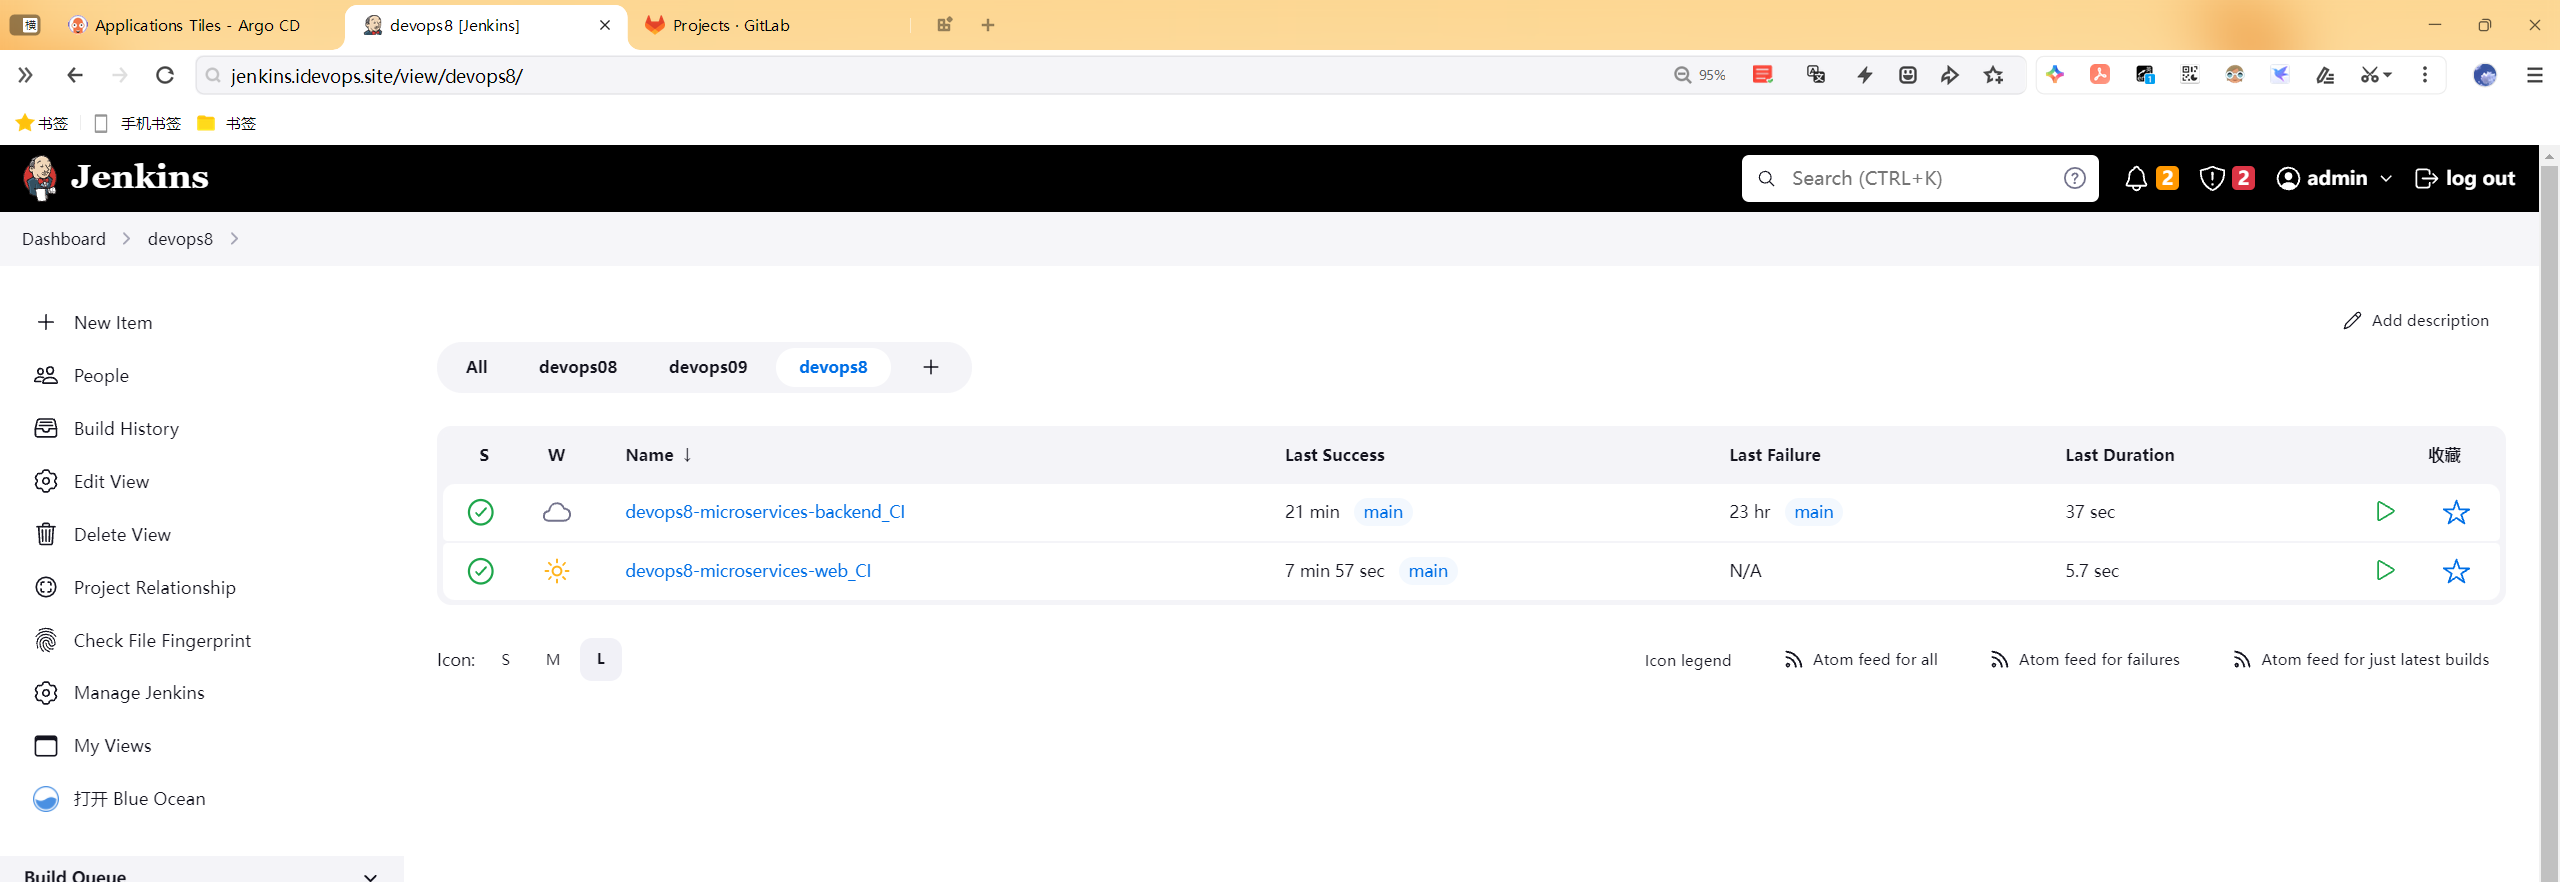
4、创建一个devops8视图
创建视图:
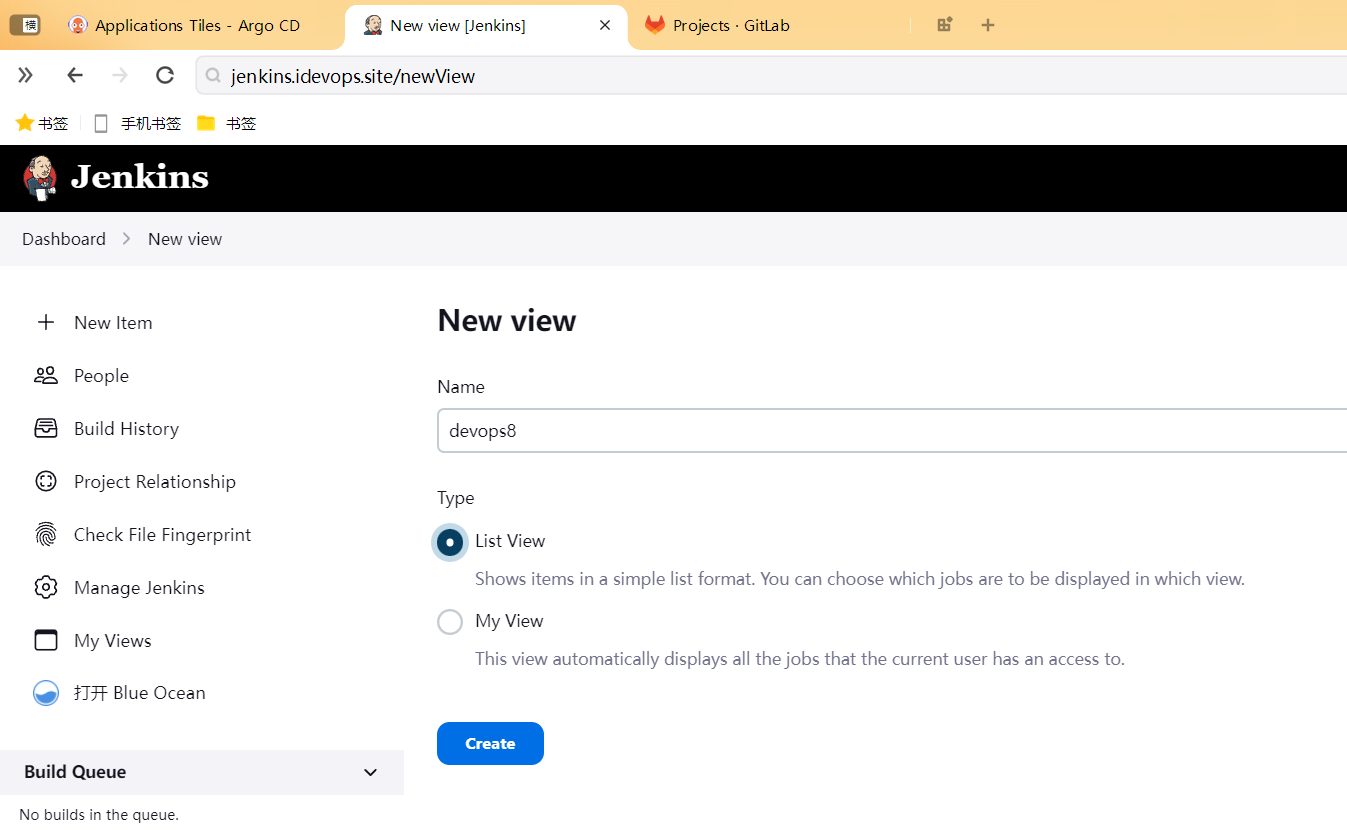
^devops08-(.*?)
devops8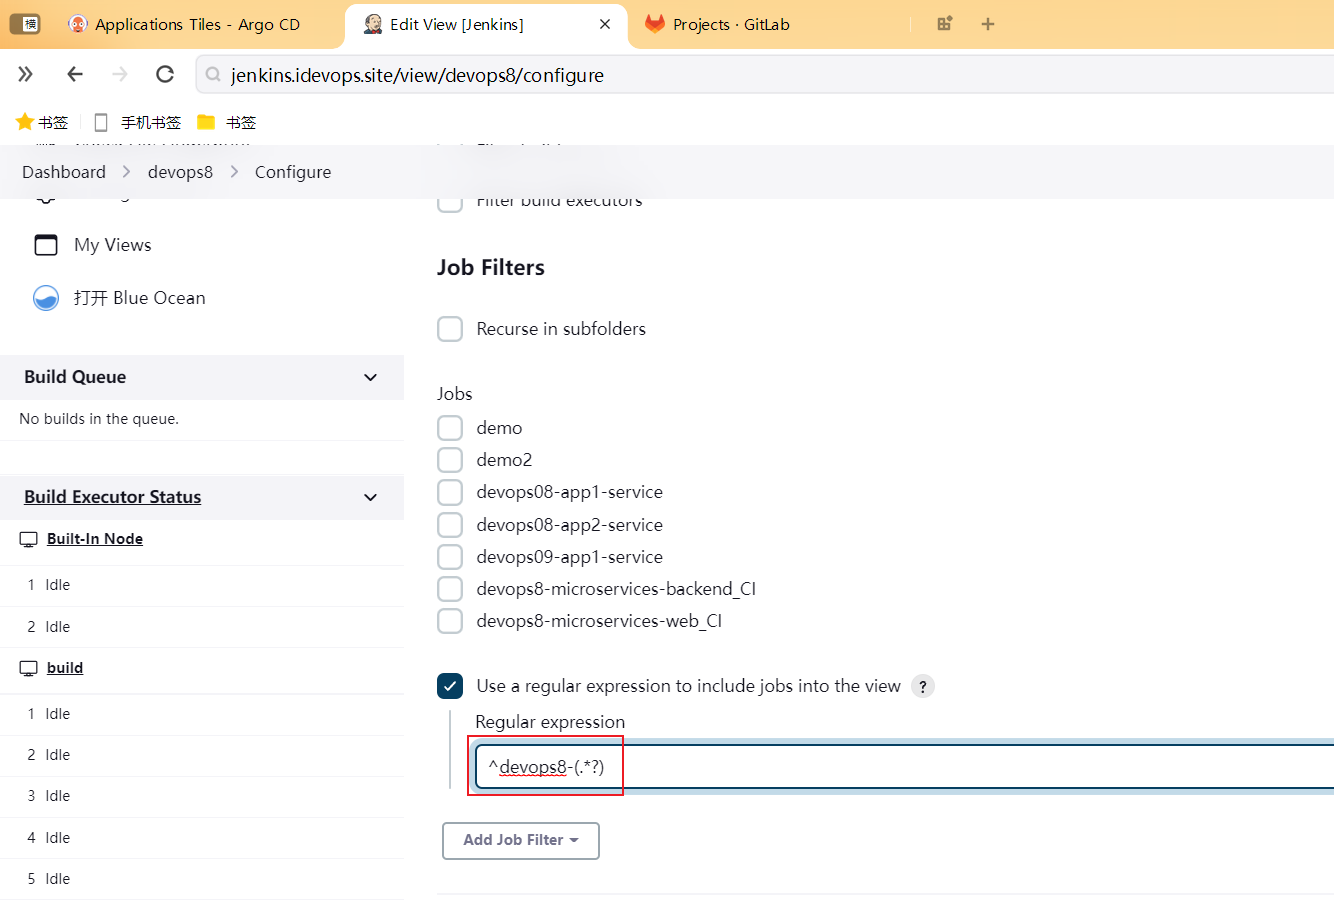
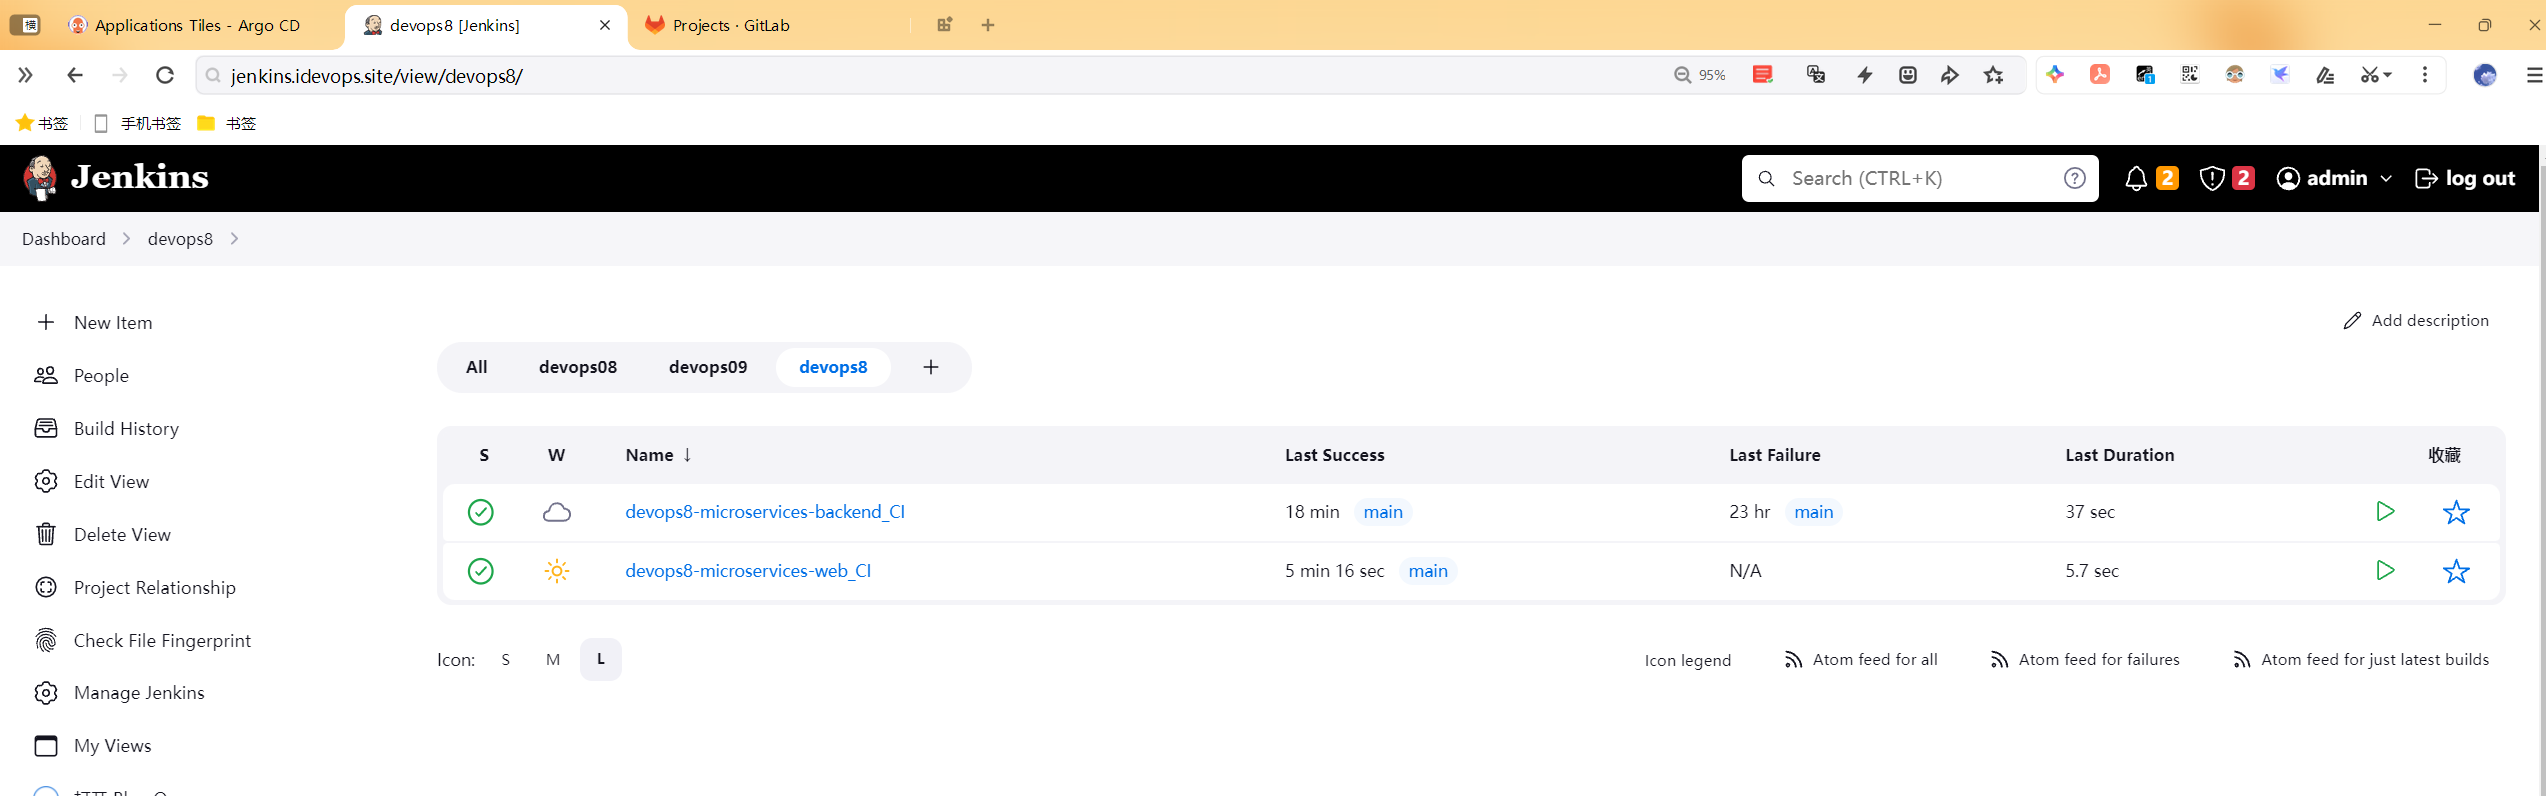
测试结束。
总结
目前只实现了代码下载功能,后续将继续晚上流水线。
- pipeline
- 业务代码
http://gitlab.idevops.site/devops8/devops8-microservices-backend.git
http://gitlab.idevops.site/devops8/devops8-microservices-web.git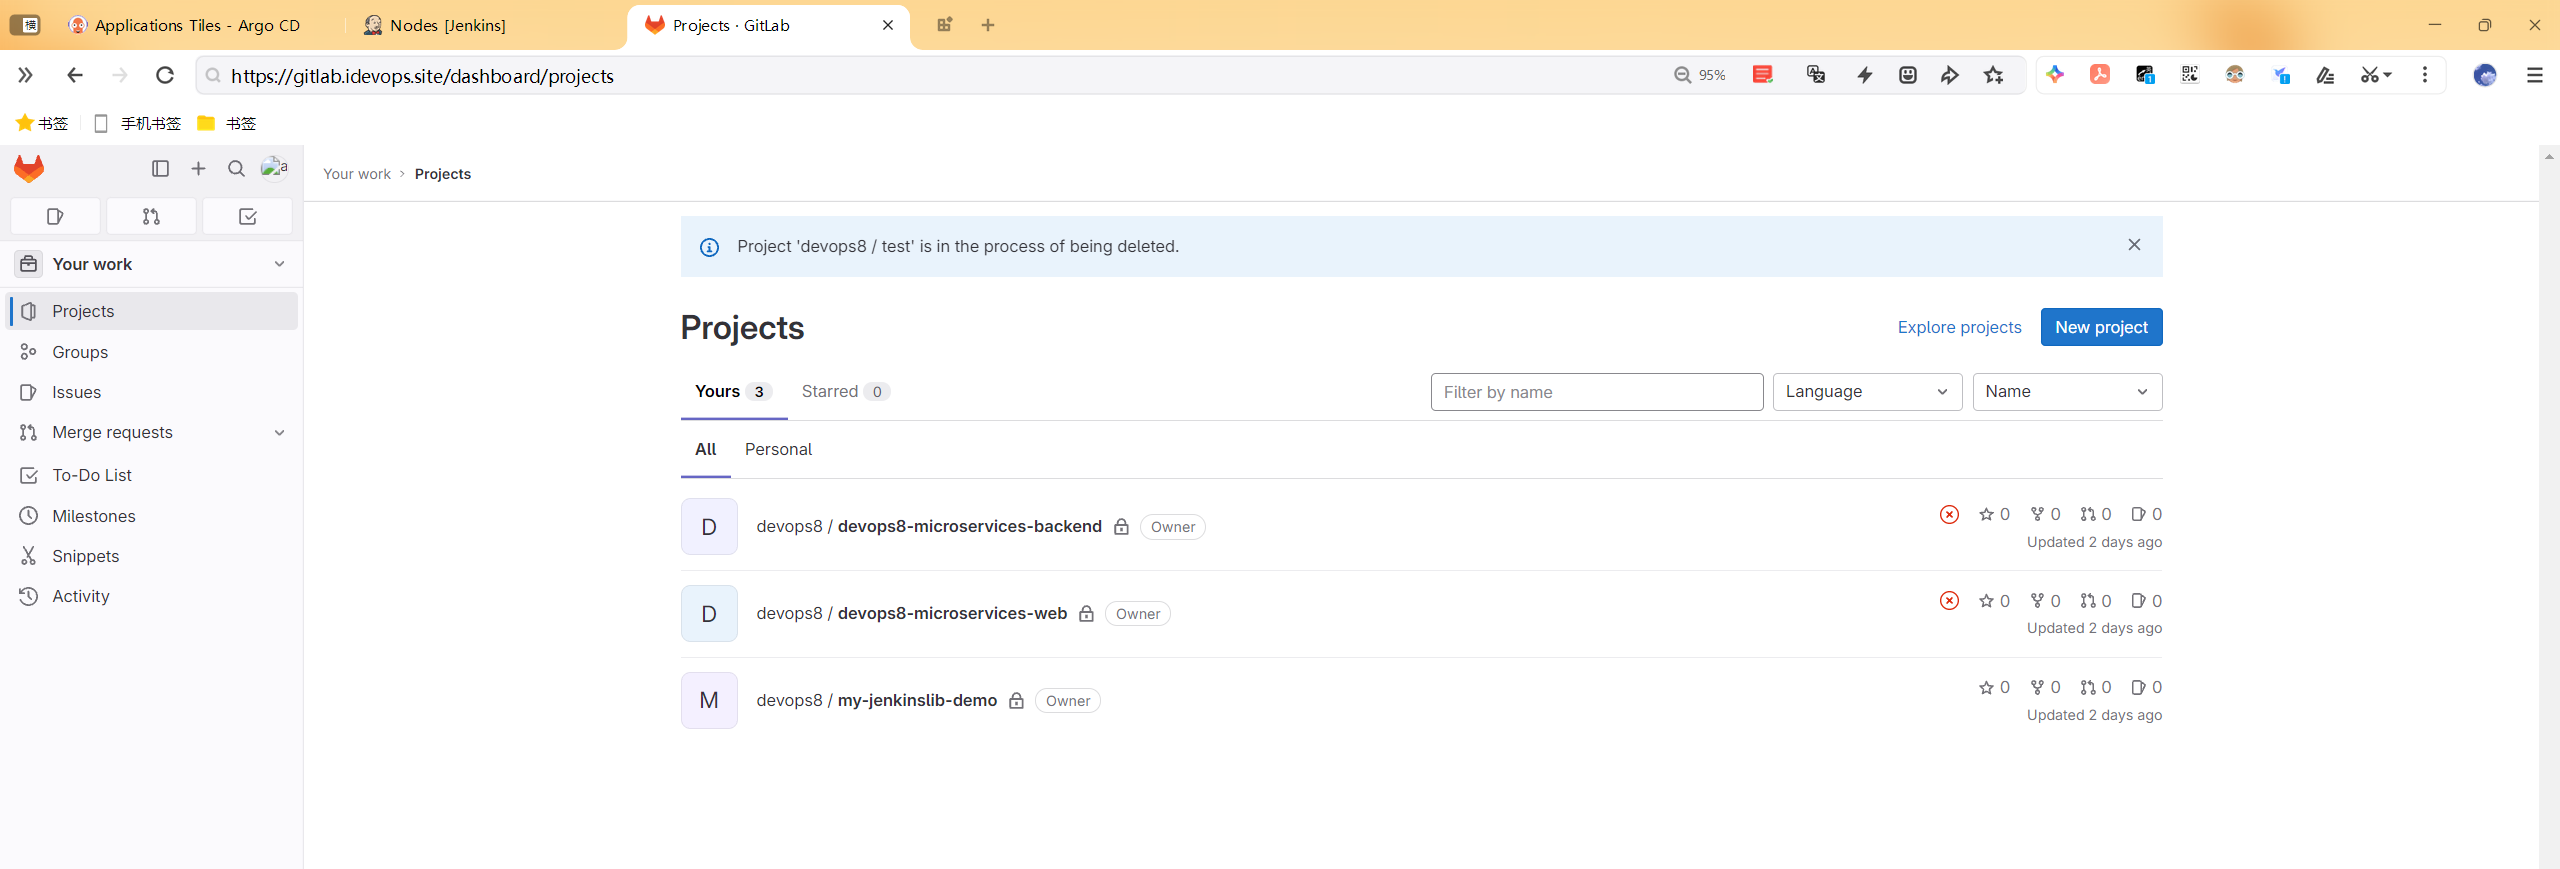
- 共享库
http://gitlab.idevops.site/devops8/my-jenkinslib-demo.git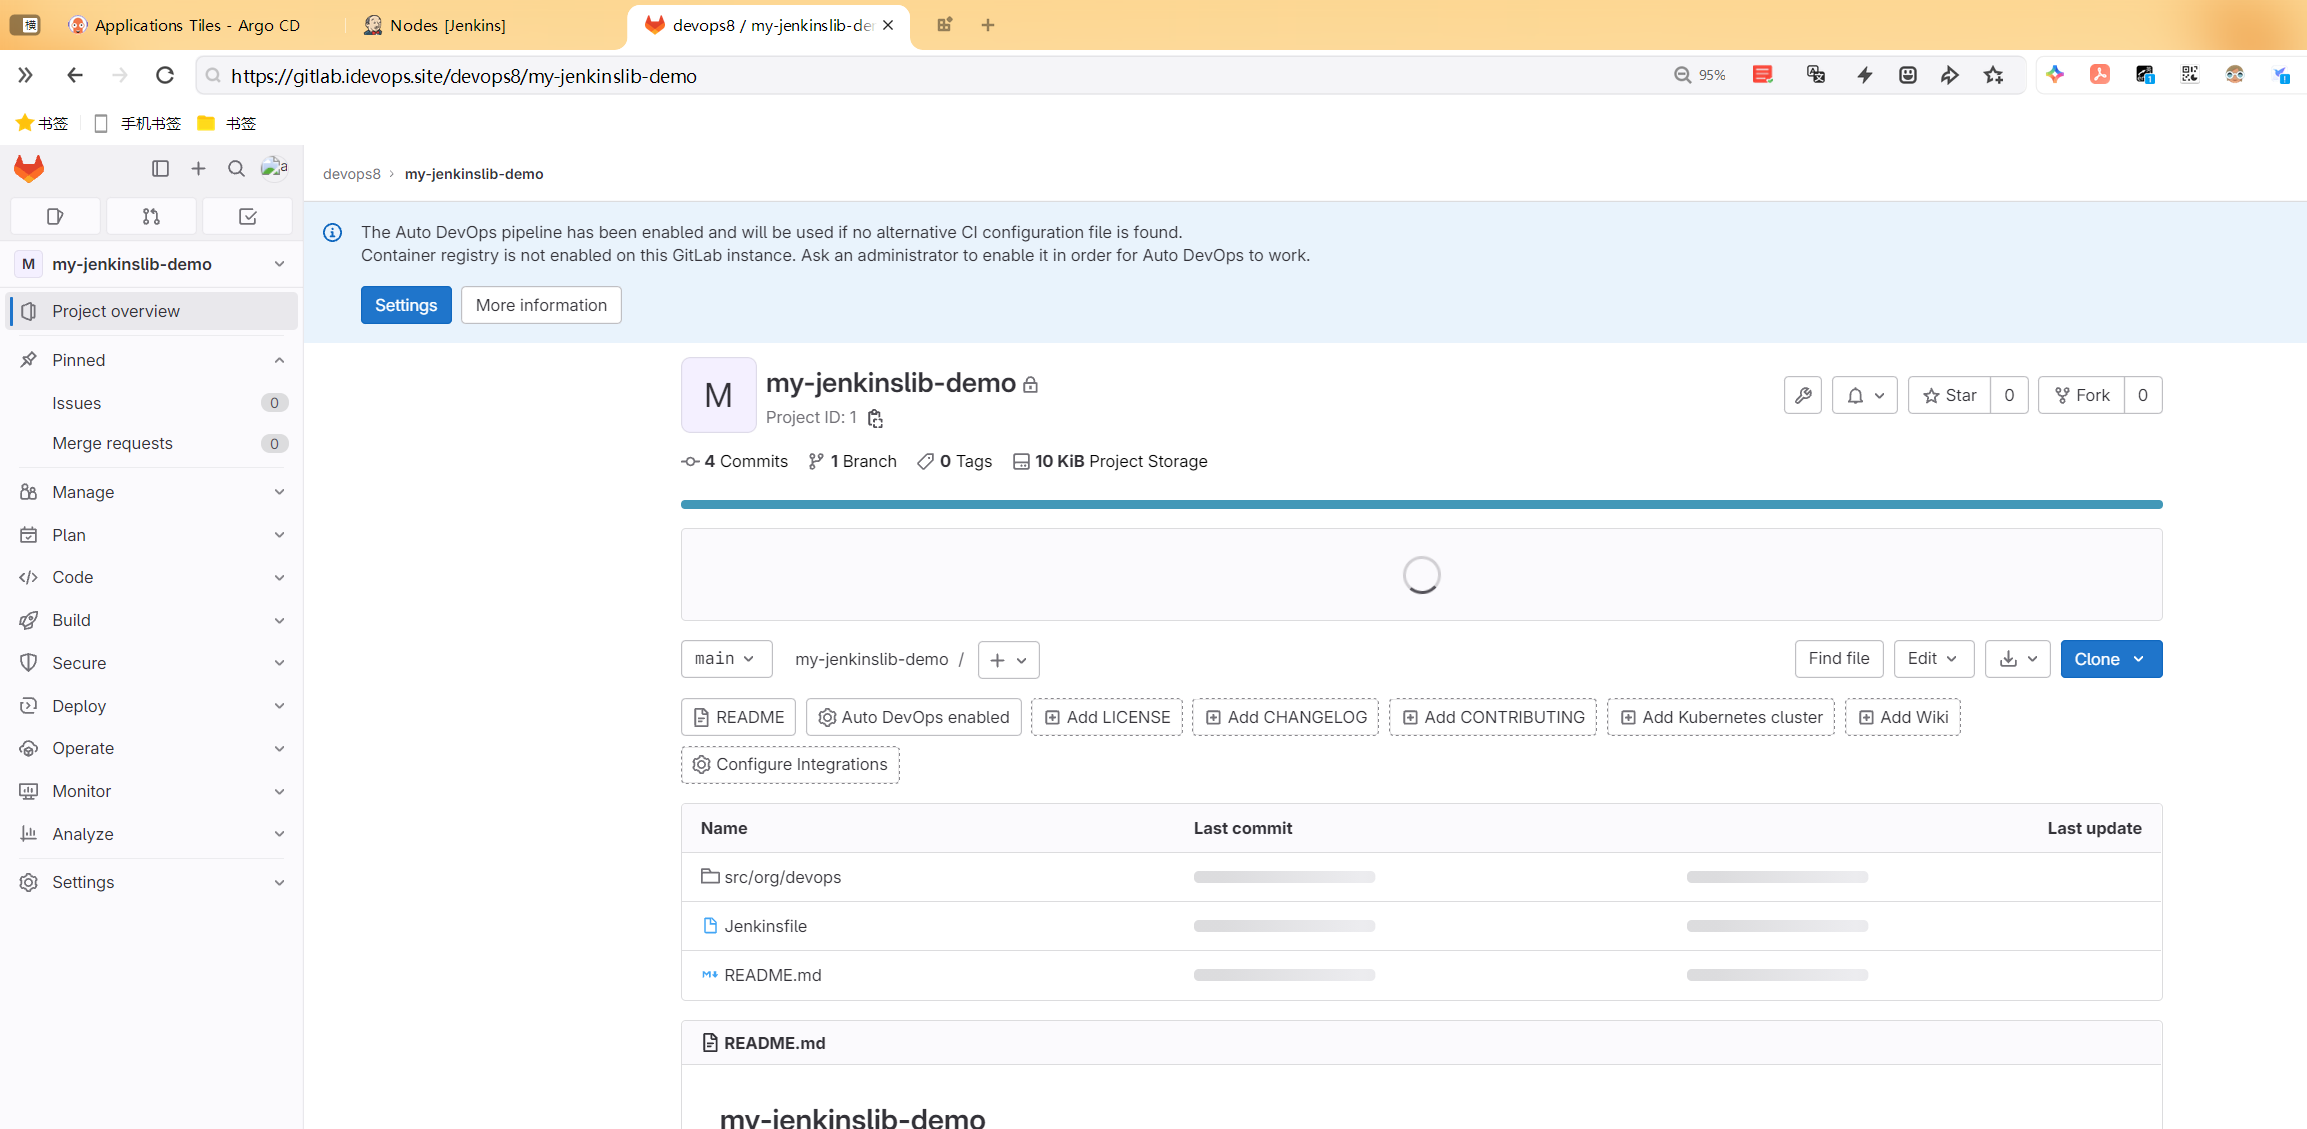
关于我
我的博客主旨:
- 排版美观,语言精炼;
- 文档即手册,步骤明细,拒绝埋坑,提供源码;
- 本人实战文档都是亲测成功的,各位小伙伴在实际操作过程中如有什么疑问,可随时联系本人帮您解决问题,让我们一起进步!
🍀 微信二维码
x2675263825 (舍得), qq:2675263825。

🍀 微信公众号
《云原生架构师实战》

🍀 个人主页:
🍀 知识库:
https://onedayxyy.cn/docusaurus/
🍀 博客:
🍀 csdn
https://blog.csdn.net/weixin_39246554?spm=1010.2135.3001.5421
🍀 知乎
https://www.zhihu.com/people/foryouone
最后
好了,关于本次就到这里了,感谢大家阅读,最后祝大家生活快乐,每天都过的有意义哦,我们下期见!