
快捷菜单
常用功能一站直达
更多功能请点顶栏「快捷菜单」
具备python环境,且具备impi软件环境;(windows版ipmi记得要把其路径添加到环境变量里去)
1os.system("ipmitool -I lanplus -H "+ ip + " -U 服务器带外账号 -P 服务器带外密码 power status") 1os.system("ipmitool -I lanplus -H "+ ip + " -U admin -P 123456 power reset") #重启
2os.system("ipmitool -I lanplus -H "+ ip + " -U admin -P 123456 power on") #开机
3os.system("ipmitool -I lanplus -H "+ ip + " -U admin -P 123456 power off") #关机1ipmitool -I lanplus -H 服务器带外ip -U admin -P ********* chassis statusip.txt
https://onedayxyy.cn/scripts/ipmi/ipmi_pxe/v1-2023.11.23/ip.txt
1/服务器带外地址/ipmi_pxe.py
https://onedayxyy.cn/scripts/ipmi/ipmi_pxe/v1-2023.11.23/ipmi_pxe.py
1import os
2import time
3for i in open(r'ip.txt'):
4    ip=i.split("/")[1]
5    print(ip)
6    os.system("ipmitool -I lanplus -H "+ ip + " -U admin -P 123456 chassis bootdev pxe") #从PXE启动
7    time.sleep(1)
8    os.system("ipmitool -I lanplus -H "+ ip + " -U admin -P 123456  power reset") #重启
9time.sleep(100) 1[root@docusaurus-wiki shell_pxe]# cat ip.txt
2/物理机带外ip/
3/物理机带外ip/[root@docusaurus-wiki shell_pxe]# cat ipmi_pxe_shell.sh
4#!/bin/bash
5for i in `cat /root/ipmi_ip.txt`
6do
7 impitool -H "$i" -I lanplus -U root -P 123456 chassis bootdev pxe && impitool -H "$i" -I lanplus -U root -P 123456 power reset &> /dev/null
8 if [ $? -ne 0 ]; then
9 echo $i Error
10 else
11 echo &i OK
12done[root@docusaurus-wiki shell_pxe]# https://onedayxyy.cn/scripts/ipmi/ipmi_pxe/shell_pxe/

ip.txt
https://onedayxyy.cn/scripts/ipmi/ipmi_modify_daiwai_password/v1-2023.11.23/ip.txt
1/服务器带外地址/ipmi_password.py
https://onedayxyy.cn/scripts/ipmi/ipmi_modify_daiwai_password/v1-2023.11.23/ipmi_password.py
1import os
2import time
3for i in open(r'ip.txt'):
4    ip=i.split("/")[1]
5    print(ip)
6    os.system("ipmitool -H  "+ ip + " -I lanplus -U admin -P 123456 user set password <user id> 新密码")
7    time.sleep(1)
8time.sleep(100)脚本位置:
https://onedayxyy.cn/scripts/ipmi/ipmi_modify_daiwai_password/v2-2024.4.5/
1[root@docusaurus-wiki v2-2024.4.5]#ll
2total 16
3-rw-rw-rw- 1 root root  1418 Nov 17  2021 changePassword.py
4-rw-rw-rw- 1 root root 10268 Apr  5 14:32 shanghai.xlsx
5[root@docusaurus-wiki v2-2024.4.5]#
changePassword.py
 1import os
 2import xlrd
 3
 4
 5def read_File():
 6    result = []
 7    data = xlrd.open_workbook('shanghai.xlsx')
 8    table = data.sheets()[0]
 9    rowNum = table.nrows
10    for j in range(1,rowNum):
11        cj = table.cell_value(j, 0)
12        addr = table.cell_value(j, 2)
13        userName = table.cell_value(j, 3)
14        passWord = table.cell_value(j, 4)
15        newPassWord = table.cell_value(j, 5)
16        result.append([cj, addr, userName, passWord, newPassWord])
17    return result
18
19def change_Password():
20    data = read_File()
21    for j in data:
22        if j[0] =='浪潮':
23            res =os.popen('ipmitool -I lanplus -H '+j[1]+' -U ' +j[2]+' -P '+j[3]+' user set password 1 '+j[4]).read()
24            print(type(res))
25            if 'successful' in res:
26                print(j[1] + ' change Password successful')
27            else:
28                print(j[1] + ' change Password fail')
29        elif j[0] =='烽火' or j[0] == '曙光' or j[0] =='华为':
30            res =os.popen('ipmitool -I lanplus -H '+j[1]+' -U ' +j[2]+' -P '+j[3]+' user set password 2 '+j[4]).read()
31            if 'successful' in res:
32                print(j[1] + ' change Password successful')
33            else:
34                print(j[1] + ' change Password fail')
35        else:
36            print(j[1]+ f' 配置失败{j[0]}设备不在支持范围内')
37
38if __name__ == '__main__':
39    change_Password()
shanghai.xlsx
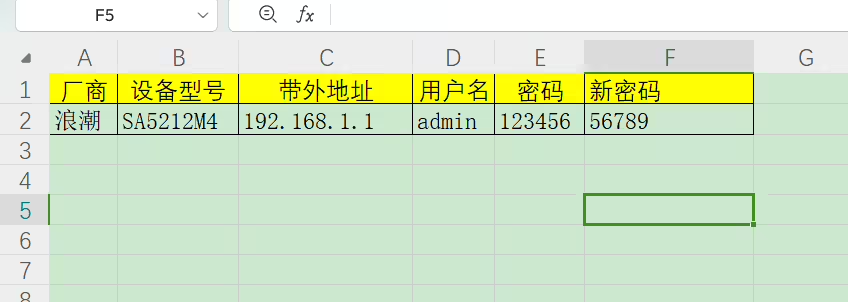
https://onedayxyy.cn/scripts/dell_Server_Modify_NtpServer/

ip.txt
1服务器带外地址DELLradamNtp.py
 1import os
 2import time
 3import paramiko
 4
 5for i in open(r'ip.txt'):
 6        ip=i.replace('\n','')
 7        print(ip)
 8        ssh = paramiko.SSHClient()
 9        ssh.set_missing_host_key_policy(paramiko.AutoAddPolicy())
10        ssh.connect(hostname=ip, port=22, username='root',password='123456')
11        stdin,stdout,stderr = ssh.exec_command("racadm set iDRAC.ntPConfigGroup.NTP1 192.168.1.1")
12        stdin,stdout,stderr = ssh.exec_command("racadm set iDRAC.ntPConfigGroup.NTP2 192.168.1.2")
13        #stdin,stdout,stderr = ssh.exec_command("testtrap -i 1")
14        #stdin,stdout,stderr = ssh.exec_command("testtrap -i 2")
15        ssh.close()
16        print("ok")
17time.sleep(100)R730
c6320
 1racadm>>racadm set iDRAC.ntPConfigGroup.NTP2 192.168.1.1
 2[Key=iDRAC.Embedded.1#NTPConfigGroup.1]
 3Object value modified successfully
 4racadm>>
 5racadm>>
 6racadm>>racadm set iDRAC.ntPConfigGroup.NTP1 192.168.1.2
 7[Key=iDRAC.Embedded.1#NTPConfigGroup.1]
 8Object value modified successfully
 9racadm>>
10racadm>>
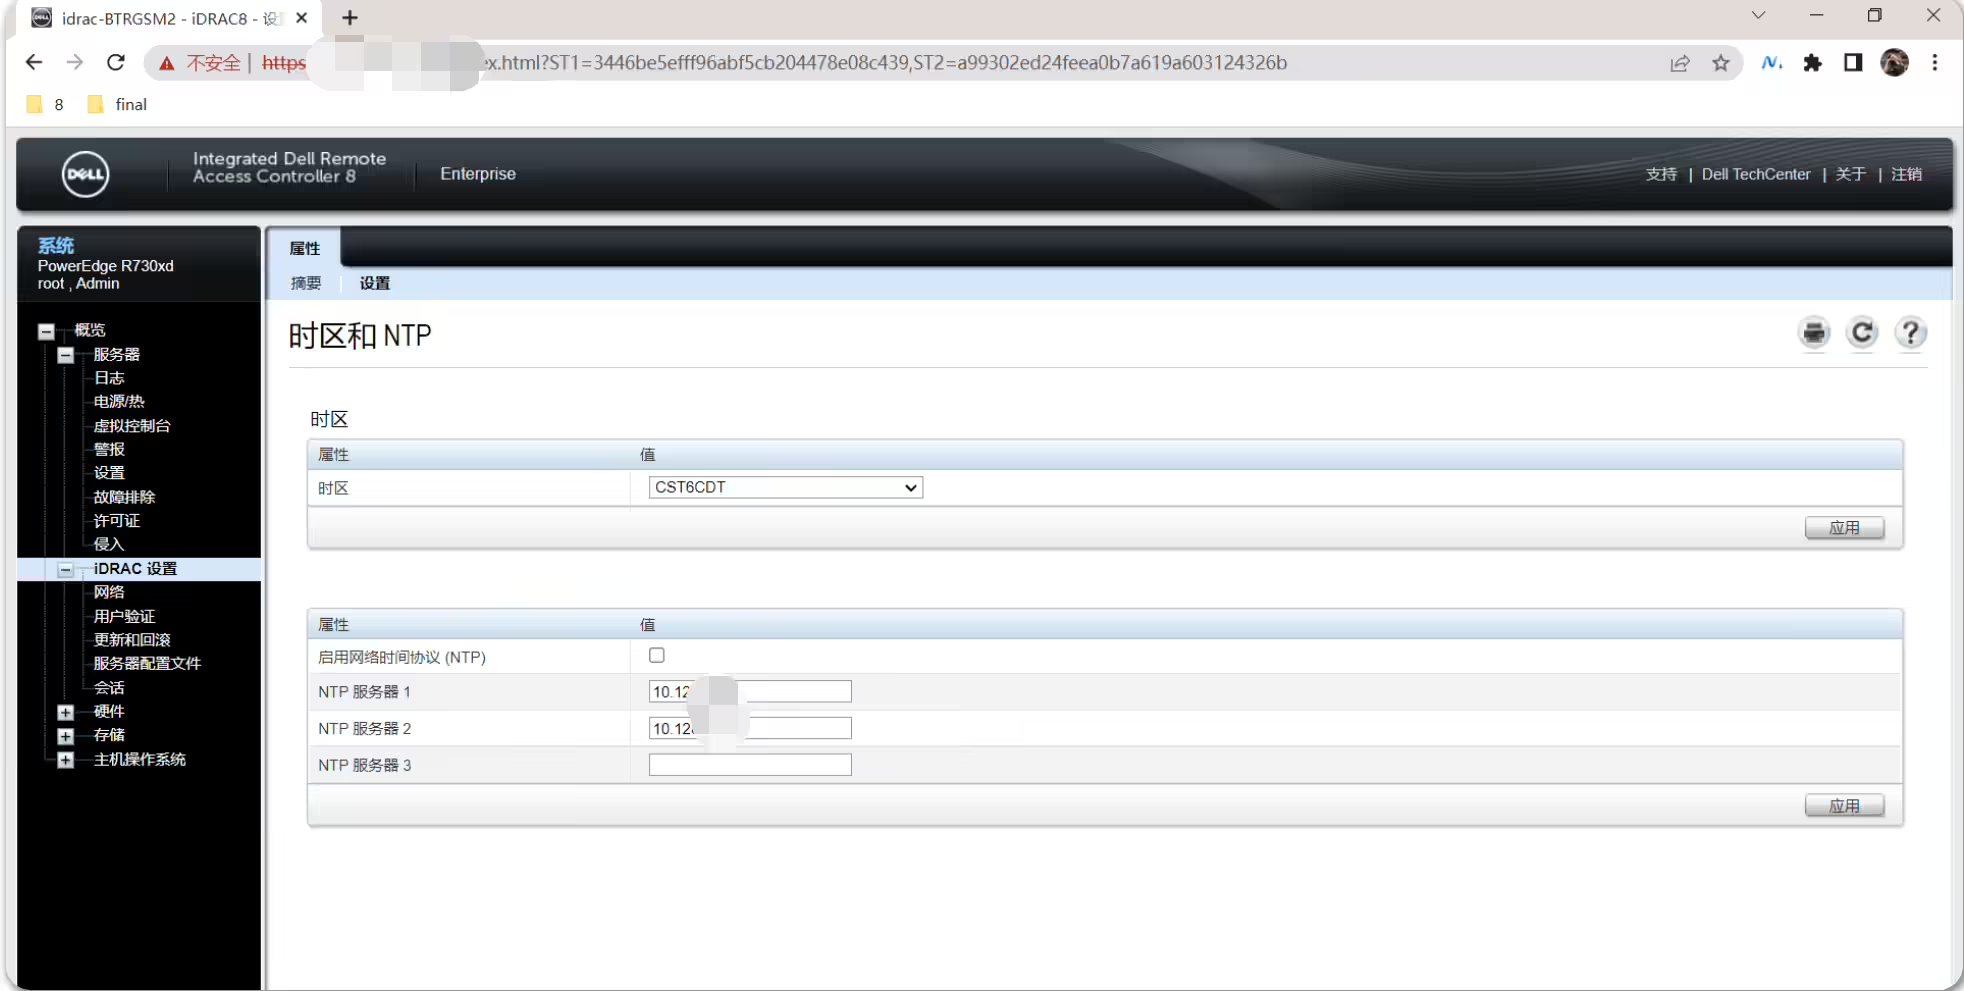
进测试:是可以生效的。
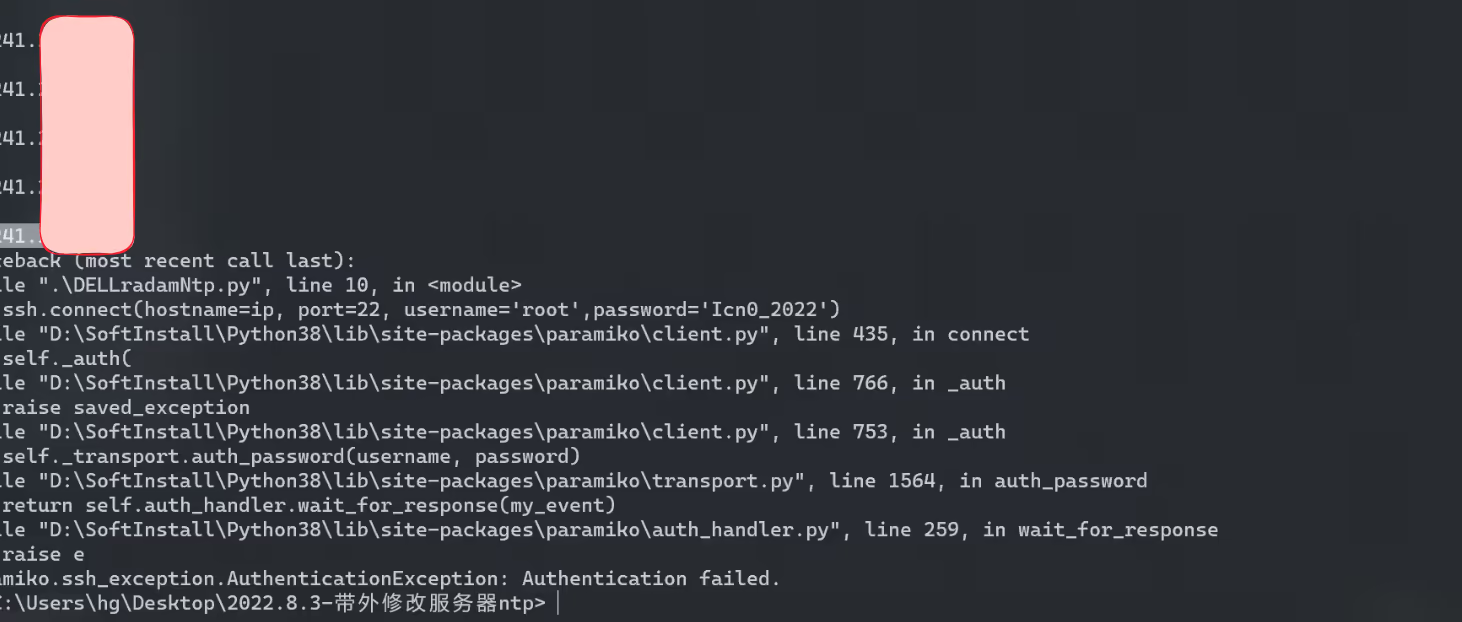
脚本需优化:认证失败的话,脚本就退出了。。。
结束。
精选 · 友链 · 更多

One的公众号
爱折腾博客的小白
