
快捷菜单
常用功能一站直达
更多功能请点顶栏「快捷菜单」
[toc]
2023年12月3日
ShareX-非常喜欢的免费截图工具
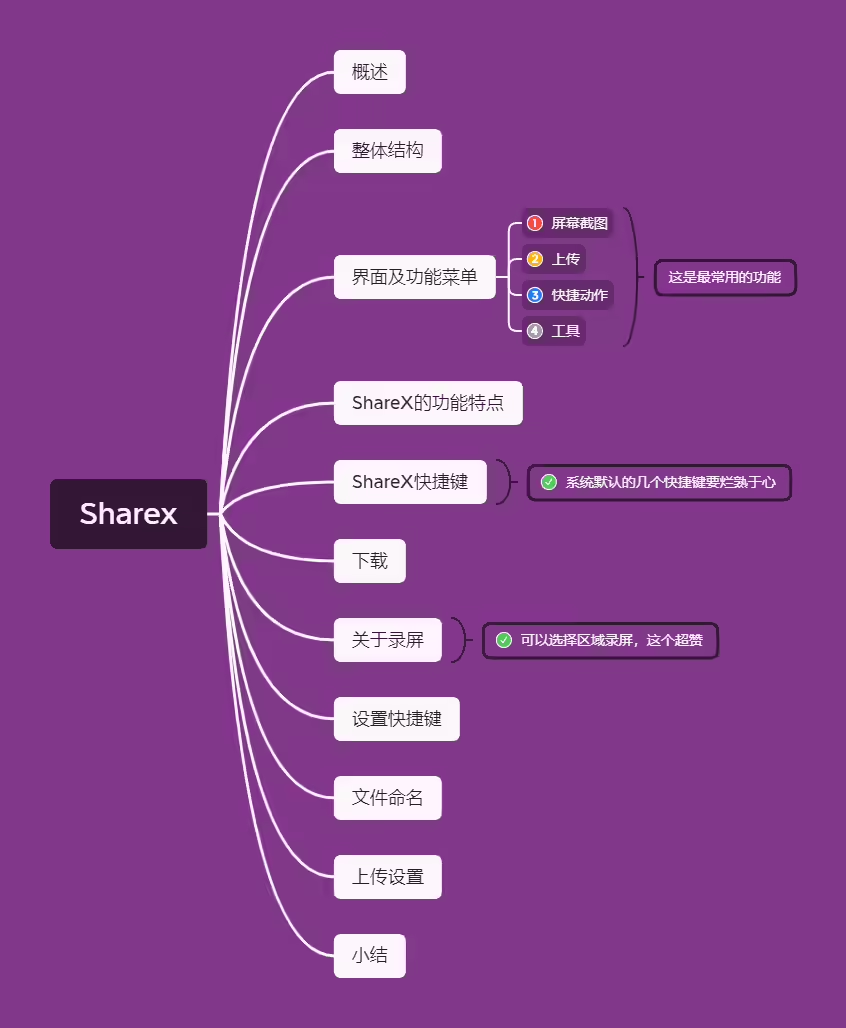
ShareX是一款免费的开源程序,不仅可以截图,还可以录屏,自动添加水印和阴影,除此之外,还有很多很多,比如OCR识别、屏幕录制、颜色拾取、哈希检查、修改DNS、尺子功能、显示器测试等等,大家可以自己去体验。

屏幕截图:

上传:

快捷动作:

工具:

⚠️ 注意:
以下配置都是目前已经配置了的,都是配合ecs nginx提供的图床方案而定制的。
注意:这里把
ShareX截图软件用的更顺手的话,那么自己的这个解决方案更丝滑哦!
结论:
1.云服务器要想做图床服务器,用nginx也是可以实现的,我这里用
ShareX截图软件截图后默认会在本地保存图片,然后会通过sftp上传图片到ecs的特定目录,在typora里直接按ctrl shit i就会直接插入刚才截的图片,很nice。(这个ShareX截图软件真的很强大呀!!!);2.图床使用域名做解析,即使以后换ecs的公网ip后,我们只需要迁移图片数据就行,md数据是不用动的,很丝滑。
3.另外,自己也利用rsync会每天定时从linux同步数据到本地windowsPC,简直nice。
typora里默认直接按ctrl shit i的含义是插入图片:

如果利用ShareX将截图上传服务器后然后默认复制图片url后,再次输入ctrl shit i快捷键后,就会直接插入如下格式:

简直是完美呀。(其他md软件目前没发现具备这个功能)
11.常规截图:Snipaste (alt d) -- 可以贴图
22.需要上传到ecs的:ShareX (alt x) -- 可以上传图片到云服务器;也可以录制gif;
33.需要截长图:FSCapture (alt f) --可以截长图;(qq浏览器也行)
配置:
147.100.215.163
2/images/
3onedayxyy.cn

1D:\BaiduSyncdisk\ShareXLocalImages
1image-%y%mo%d%h%mi%s
勾选如下设置选项:
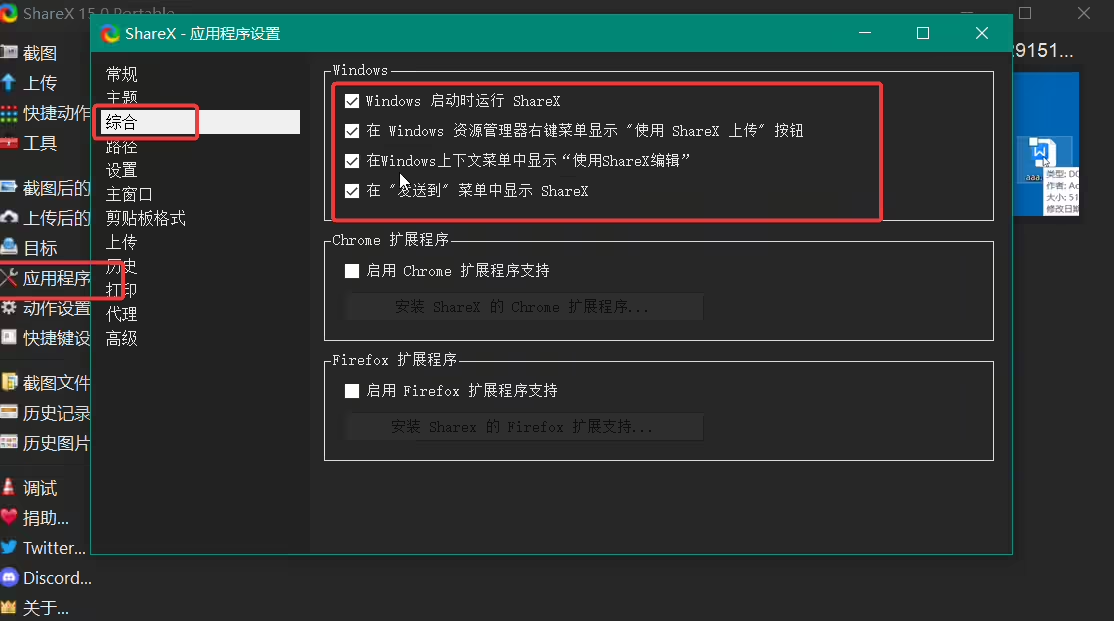
动作设置-截图-截图区域。


alt x截图
ctrl e--图像编辑器
效果:

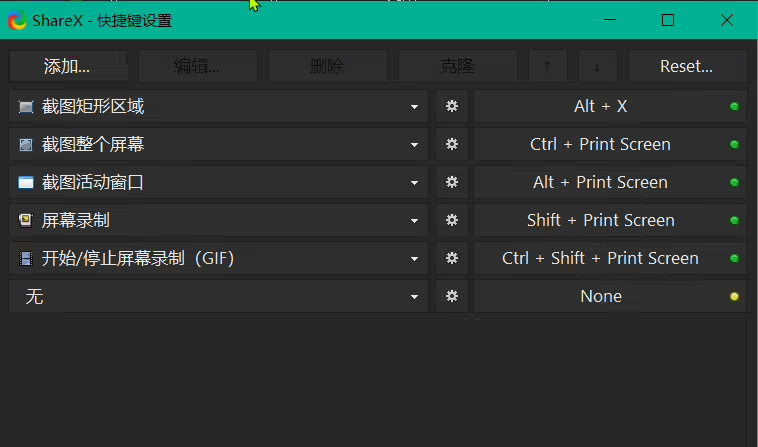
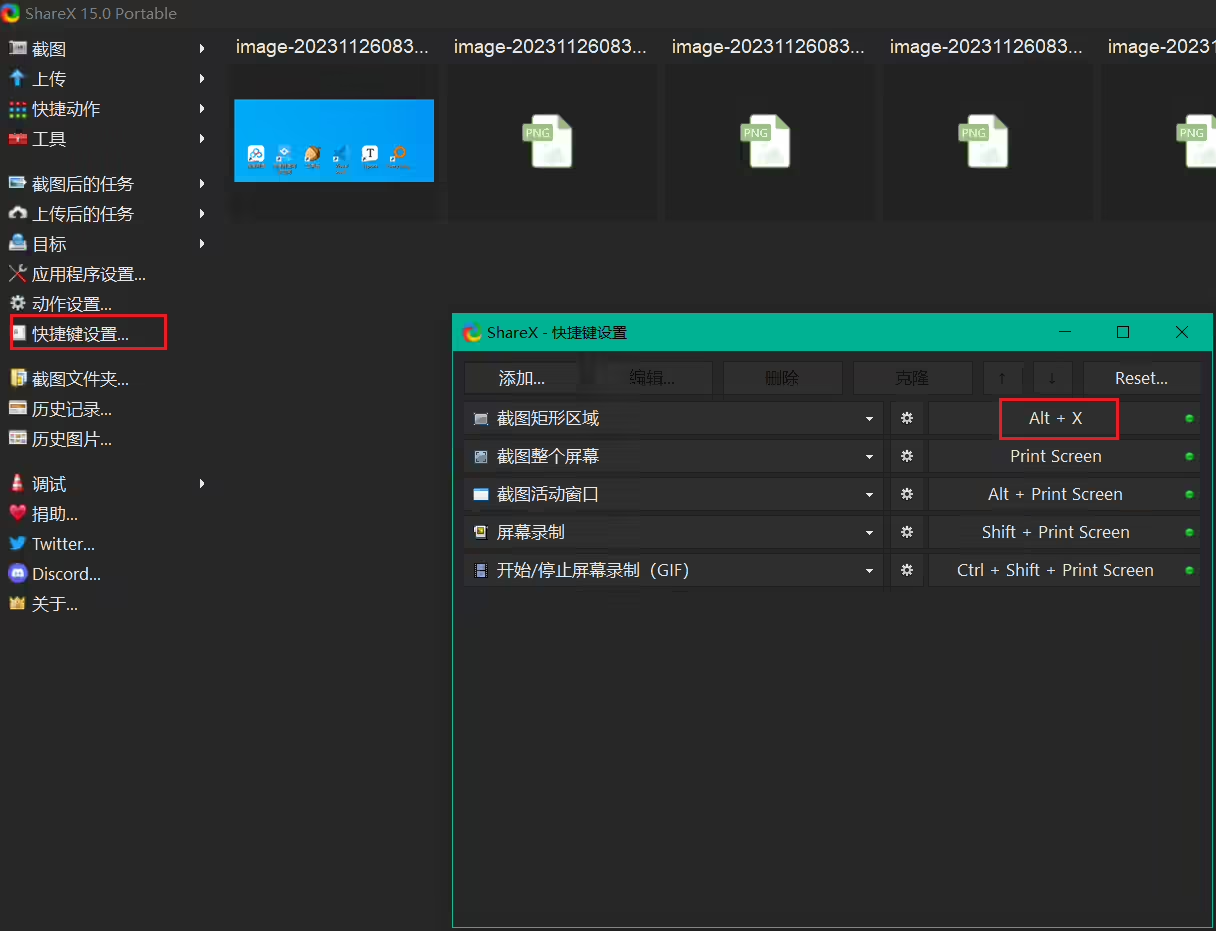
除了ShareX默认的快捷键之外,还可以自定义快捷键,下面以设置图像编辑器快捷键为例,说明如何添加快捷键。
点击左侧的“快捷键设置”选项卡,弹出如下图所示的窗口:

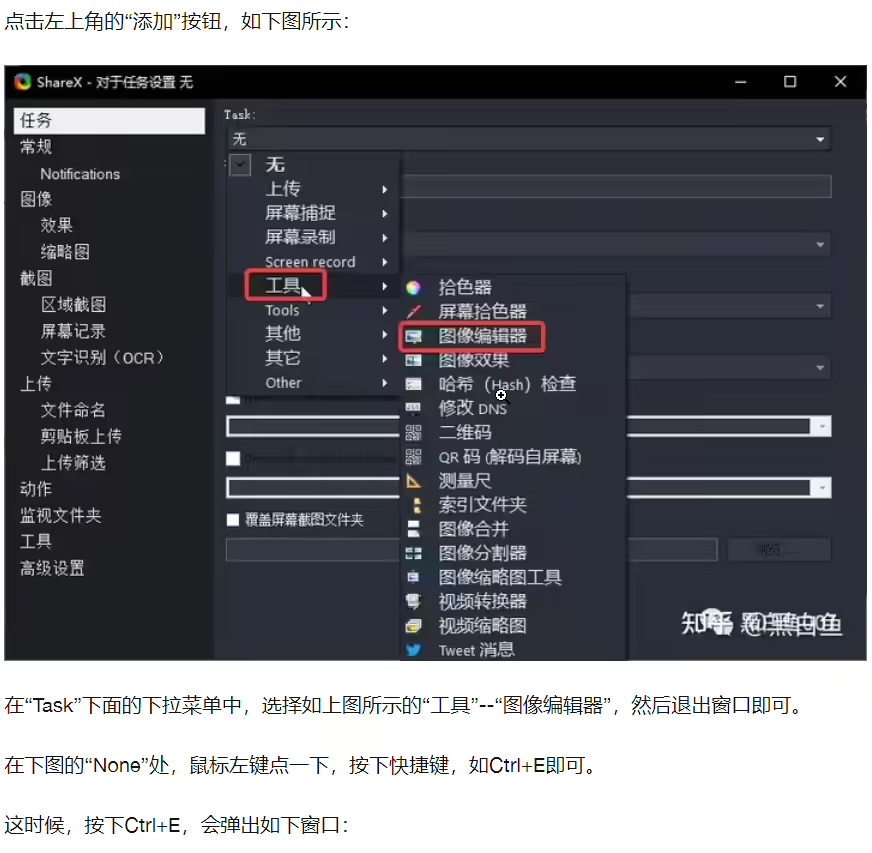
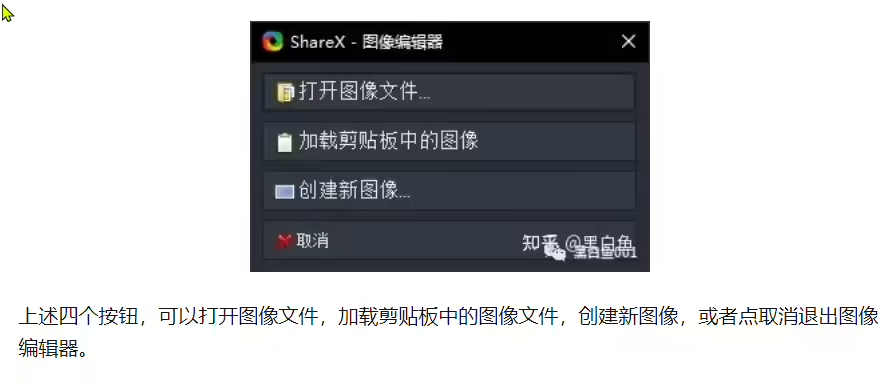
alt z


截图后,默认会弹出显示快速任务栏,再点击Save,Upload,Copy URL后,刚才的截图就会在本地也会留存一份数据,同时上传图片到ECS图床,且同时会拷贝URL,完美。(这里可以选择是否保存到本地)


查看效果:
http://47.97.48.237/images/image-20231126153904.avif
然后在typora里直接按ctrl shit i就会直接插入刚才截的图片:(nice)


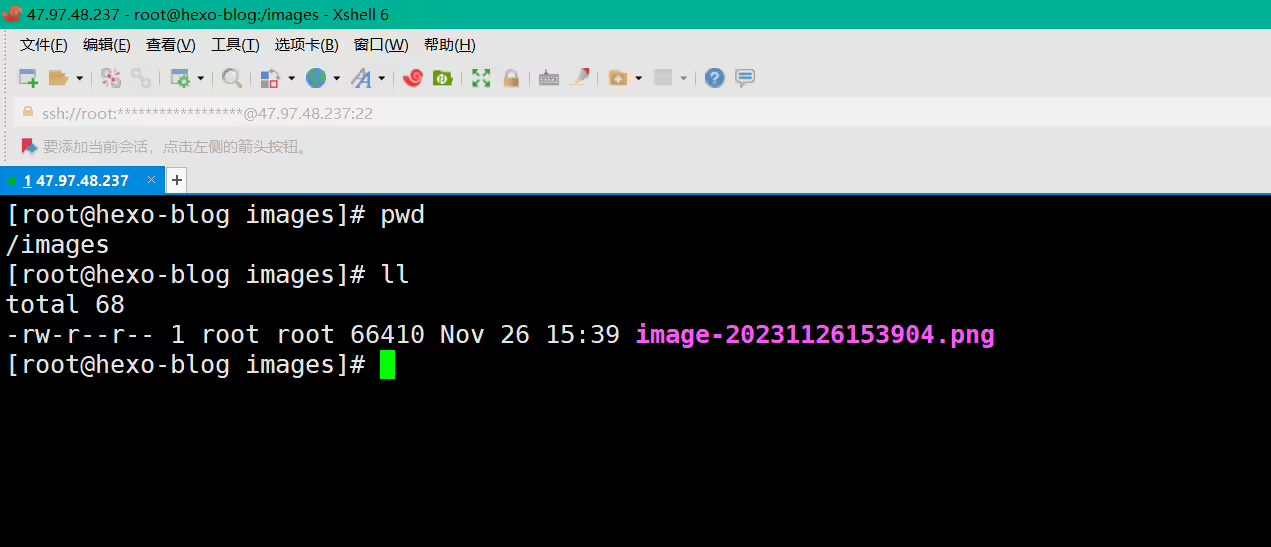
完美。
但是,以上存在一个问题:
如果图片URL里是ECS IP的话,typora是可以正常显示图片的,但是如果是域名的话,就无法正常显示图片。
自己随后也测试了下vscode、ob,发现不管是IP还是域名,都可以正常显示图片。
gpt了,估计还是typora的一些问题。
问题不大,等后续这个问题解决了的话,我这里可以使用vscode批量替换URL,也很快的。
1
2将
3(https://img.onedayxyy.cn/images/
4替换为
5(http://onedayxyy.cn/images/
6
7#注意:替换时,去除当前这个文档就行,因为里面有一些内容是设计当前替换内容的。
接下来,我把上面的一些现象做个记录:
1、typora
ip能正常显示图片,域名无法正常显示图片

2、vscode、ob
ip和域名都能正常显示图片。


额,这里还有个问题呀,记得之前docusaurus站点是强制要跳转Nginx的,不知道为啥后面又是http了,这里再配置下强制跳转nginx。
因为如果配置强制跳转nginx的话,md里涉及次公有图床的数据都要进行替换,包括shareX软件也需要做配置。
这里开始配置下:
1[root@hexo-blog ~]# cp /etc/nginx/nginx.conf nginx.conf-`date +%F_%H-%M-%S` 1#当前nginx.conf数据
2[root@hexo-blog ~]# cat /etc/nginx/nginx.conf
3#[root@hexo-blog ~]# cat /etc/nginx/nginx.conf
4# For more information on configuration, see:
5# * Official English Documentation: http://nginx.org/en/docs/
6# * Official Russian Documentation: http://nginx.org/ru/docs/
7
8user root;
9worker_processes auto;
10error_log /var/log/nginx/error.log;
11pid /run/nginx.pid;
12
13# Load dynamic modules. See /usr/share/doc/nginx/README.dynamic.
14include /usr/share/nginx/modules/*.conf;
15
16events {
17 worker_connections 1024;
18}
19
20http {
21 log_format main '$remote_addr - $remote_user [$time_local] "$request" '
22 '$status $body_bytes_sent "$http_referer" '
23 '"$http_user_agent" "$http_x_forwarded_for"';
24
25 access_log /var/log/nginx/access.log main;
26
27 sendfile on;
28 tcp_nopush on;
29 tcp_nodelay on;
30 keepalive_timeout 65;
31 types_hash_max_size 4096;
32
33 include /etc/nginx/mime.types;
34 default_type application/octet-stream;
35
36 # Load modular configuration files from the /etc/nginx/conf.d directory.
37 # See http://nginx.org/en/docs/ngx_core_module.html#include
38 # for more information.
39 include /etc/nginx/conf.d/*.conf;
40
41# server {
42# listen 80;
43# listen [::]:80;
44# server_name onedayxyy.cn;
45# #root /usr/share/nginx/html;
46# root /root/rsync/public;
47#
48# # Load configuration files for the default server block.
49# include /etc/nginx/default.d/*.conf;
50#
51# error_page 404 /404.html;
52# location = /404.html {
53# }
54#
55# error_page 500 502 503 504 /50x.html;
56# location = /50x.html {
57# }
58#
59# #将所有HTTP请求通过rewrite指令重定向到HTTPS。
60# rewrite ^(.*)$ https://$host$1;
61# location / {
62# index index.html index.htm;
63# }
64#
65# }
66
67# Settings for a TLS enabled server.
68#
69 server {
70 listen 443 ssl http2;
71 listen [::]:443 ssl http2;
72 server_name www.onedayxyy.cn;
73 root /root/rsync-wiki/build;
74
75 ssl_certificate "cert/www.onedayxyy.cn.pem";
76 ssl_certificate_key "cert/www.onedayxyy.cn.key";
77
78 ssl_session_cache shared:SSL:1m;
79 ssl_session_timeout 10m;
80 #ssl_ciphers HIGH:!aNULL:!MD5;
81 #自定义设置使用的TLS协议的类型以及加密套件(以下为配置示例,请您自行评估是否需要配置)
82 #TLS协议版本越高,HTTPS通信的安全性越高,但是相较于低版本TLS协议,高版本TLS协议对浏览器的兼容性较差。
83 ssl_ciphers ECDHE-RSA-AES128-GCM-SHA256:ECDHE:ECDH:AES:HIGH:!NULL:!aNULL:!MD5:!ADH:!RC4;
84 ssl_protocols TLSv1.1 TLSv1.2 TLSv1.3;
85
86 ssl_prefer_server_ciphers on;
87
88 # Load configuration files for the default server block.
89 include /etc/nginx/default.d/*.conf;
90
91 error_page 404 /404.html;
92 location = /40x.html {
93 }
94
95 error_page 500 502 503 504 /50x.html;
96 location = /50x.html {
97 }
98
99 }
100
101 server {
102 listen 80;
103 #填写证书绑定的域名
104 server_name www.onedayxyy.cn;
105 root /root/rsync-wiki/build;
106 #将所有HTTP请求通过rewrite指令重定向到HTTPS。
107 #rewrite ^(.*)$ https://$host$1;
108
109 location / {
110 index index.html index.htm;
111 }
112
113 location /hexoblog {
114 alias /root/rsync/public;
115 index index.html;
116 }
117
118 location /images {
119 alias /images;
120 index index.html;
121 }
122
123 }
124
125} 1[root@hexo-blog images]# cat /etc/nginx/nginx.conf
2#[root@hexo-blog ~]# cat /etc/nginx/nginx.conf
3# For more information on configuration, see:
4# * Official English Documentation: http://nginx.org/en/docs/
5# * Official Russian Documentation: http://nginx.org/ru/docs/
6
7user root;
8worker_processes auto;
9error_log /var/log/nginx/error.log;
10pid /run/nginx.pid;
11
12# Load dynamic modules. See /usr/share/doc/nginx/README.dynamic.
13include /usr/share/nginx/modules/*.conf;
14
15events {
16 worker_connections 1024;
17}
18
19http {
20 log_format main '$remote_addr - $remote_user [$time_local] "$request" '
21 '$status $body_bytes_sent "$http_referer" '
22 '"$http_user_agent" "$http_x_forwarded_for"';
23
24 access_log /var/log/nginx/access.log main;
25
26 sendfile on;
27 tcp_nopush on;
28 tcp_nodelay on;
29 keepalive_timeout 65;
30 types_hash_max_size 4096;
31
32 include /etc/nginx/mime.types;
33 default_type application/octet-stream;
34
35 # Load modular configuration files from the /etc/nginx/conf.d directory.
36 # See http://nginx.org/en/docs/ngx_core_module.html#include
37 # for more information.
38 include /etc/nginx/conf.d/*.conf;
39
40# server {
41# listen 80;
42# listen [::]:80;
43# server_name onedayxyy.cn;
44# #root /usr/share/nginx/html;
45# root /root/rsync/public;
46#
47# # Load configuration files for the default server block.
48# include /etc/nginx/default.d/*.conf;
49#
50# error_page 404 /404.html;
51# location = /404.html {
52# }
53#
54# error_page 500 502 503 504 /50x.html;
55# location = /50x.html {
56# }
57#
58# #将所有HTTP请求通过rewrite指令重定向到HTTPS。
59# rewrite ^(.*)$ https://$host$1;
60# location / {
61# index index.html index.htm;
62# }
63#
64# }
65
66# Settings for a TLS enabled server.
67#
68 server {
69 listen 443 ssl http2;
70 listen [::]:443 ssl http2;
71 server_name www.onedayxyy.cn;
72 root /root/rsync-wiki/build;
73
74 location /hexoblog {
75 alias /root/rsync/public;
76 index index.html;
77 }
78
79 location /images {
80 alias /images;
81 index index.html;
82 }
83
84 ssl_certificate "cert/www.onedayxyy.cn.pem";
85 ssl_certificate_key "cert/www.onedayxyy.cn.key";
86
87 ssl_session_cache shared:SSL:1m;
88 ssl_session_timeout 10m;
89 #ssl_ciphers HIGH:!aNULL:!MD5;
90 #自定义设置使用的TLS协议的类型以及加密套件(以下为配置示例,请您自行评估是否需要配置)
91 #TLS协议版本越高,HTTPS通信的安全性越高,但是相较于低版本TLS协议,高版本TLS协议对浏览器的兼容性较差。
92 ssl_ciphers ECDHE-RSA-AES128-GCM-SHA256:ECDHE:ECDH:AES:HIGH:!NULL:!aNULL:!MD5:!ADH:!RC4;
93 ssl_protocols TLSv1.1 TLSv1.2 TLSv1.3;
94
95 ssl_prefer_server_ciphers on;
96
97 # Load configuration files for the default server block.
98 include /etc/nginx/default.d/*.conf;
99
100 error_page 404 /404.html;
101 location = /40x.html {
102 }
103
104 error_page 500 502 503 504 /50x.html;
105 location = /50x.html {
106 }
107
108 }
109
110 server {
111 listen 80;
112 #填写证书绑定的域名
113 server_name www.onedayxyy.cn;
114 root /root/rsync-wiki/build;
115 #将所有HTTP请求通过rewrite指令重定向到HTTPS。
116 rewrite ^(.*)$ https://$host$1;
117
118 location / {
119 index index.html index.htm;
120 }
121
122 location /hexoblog {
123 alias /root/rsync/public;
124 index index.html;
125 }
126
127 location /images {
128 alias /images;
129 index index.html;
130 }
131
132 }
133
134}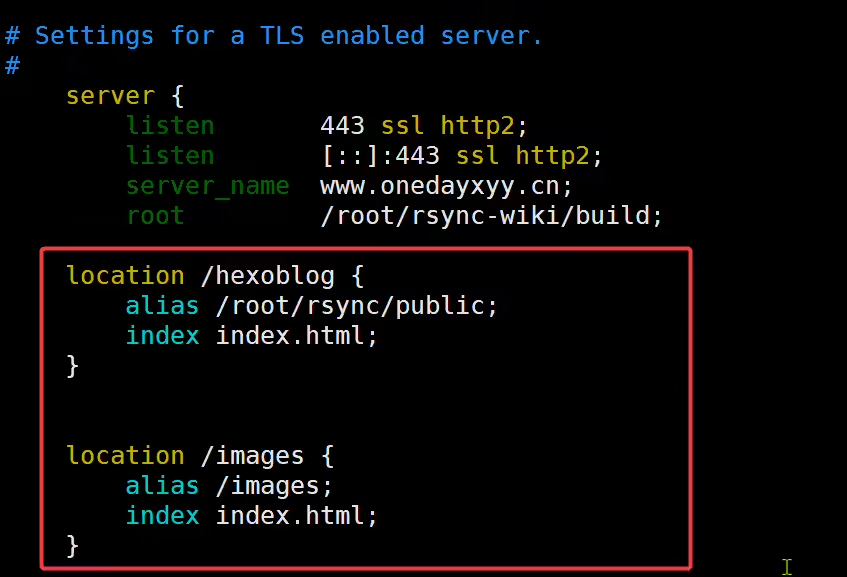
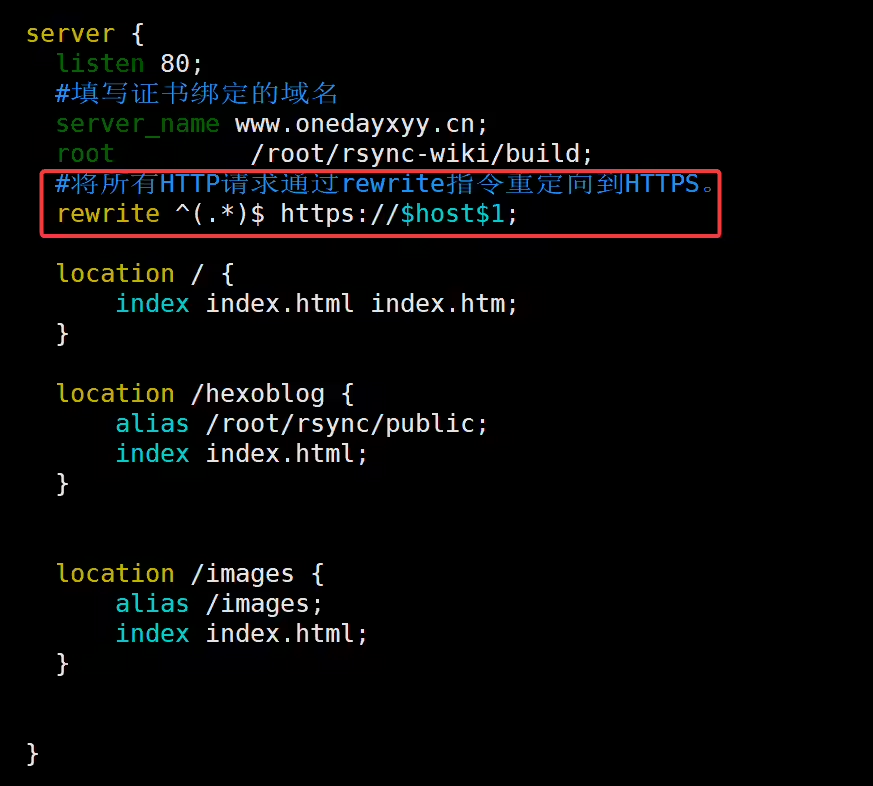
配置完成后,我们来测试下。
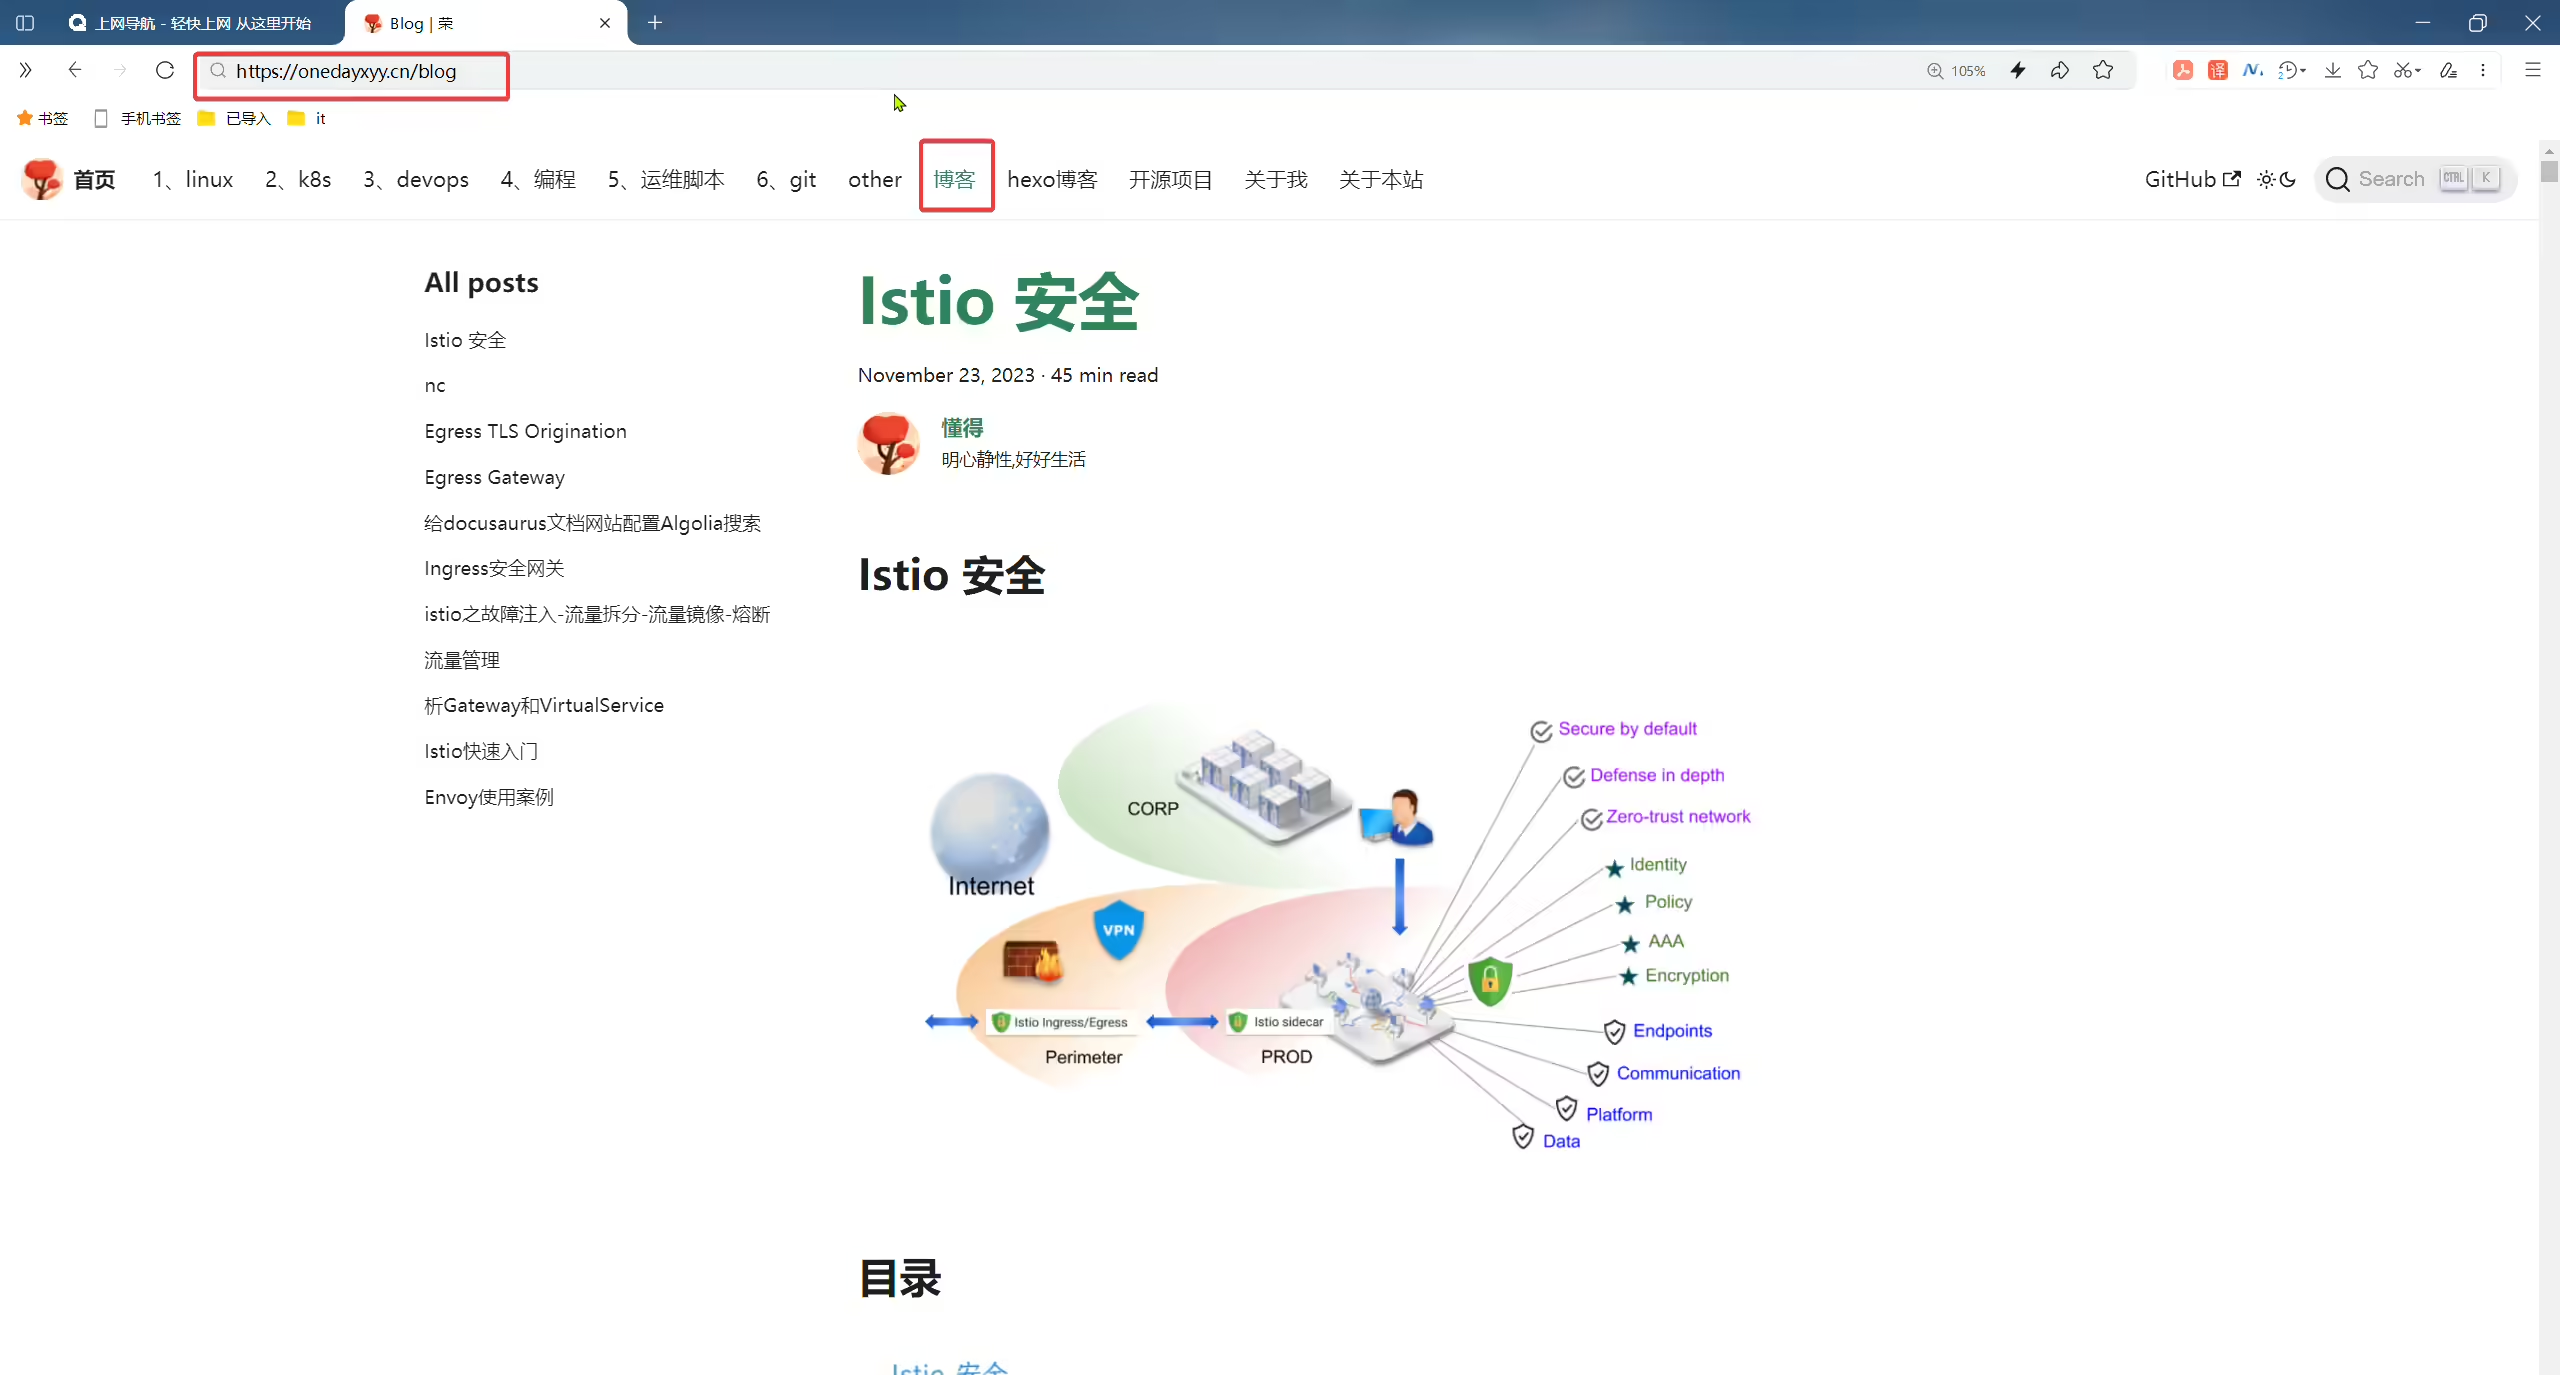
先测试下自己博客目前是否访问正常?
我们关闭浏览器,打开一个无痕模式
可以看到http会被强制跳转到https的:
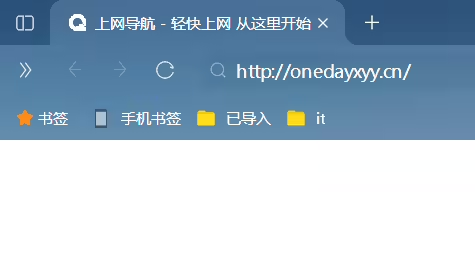
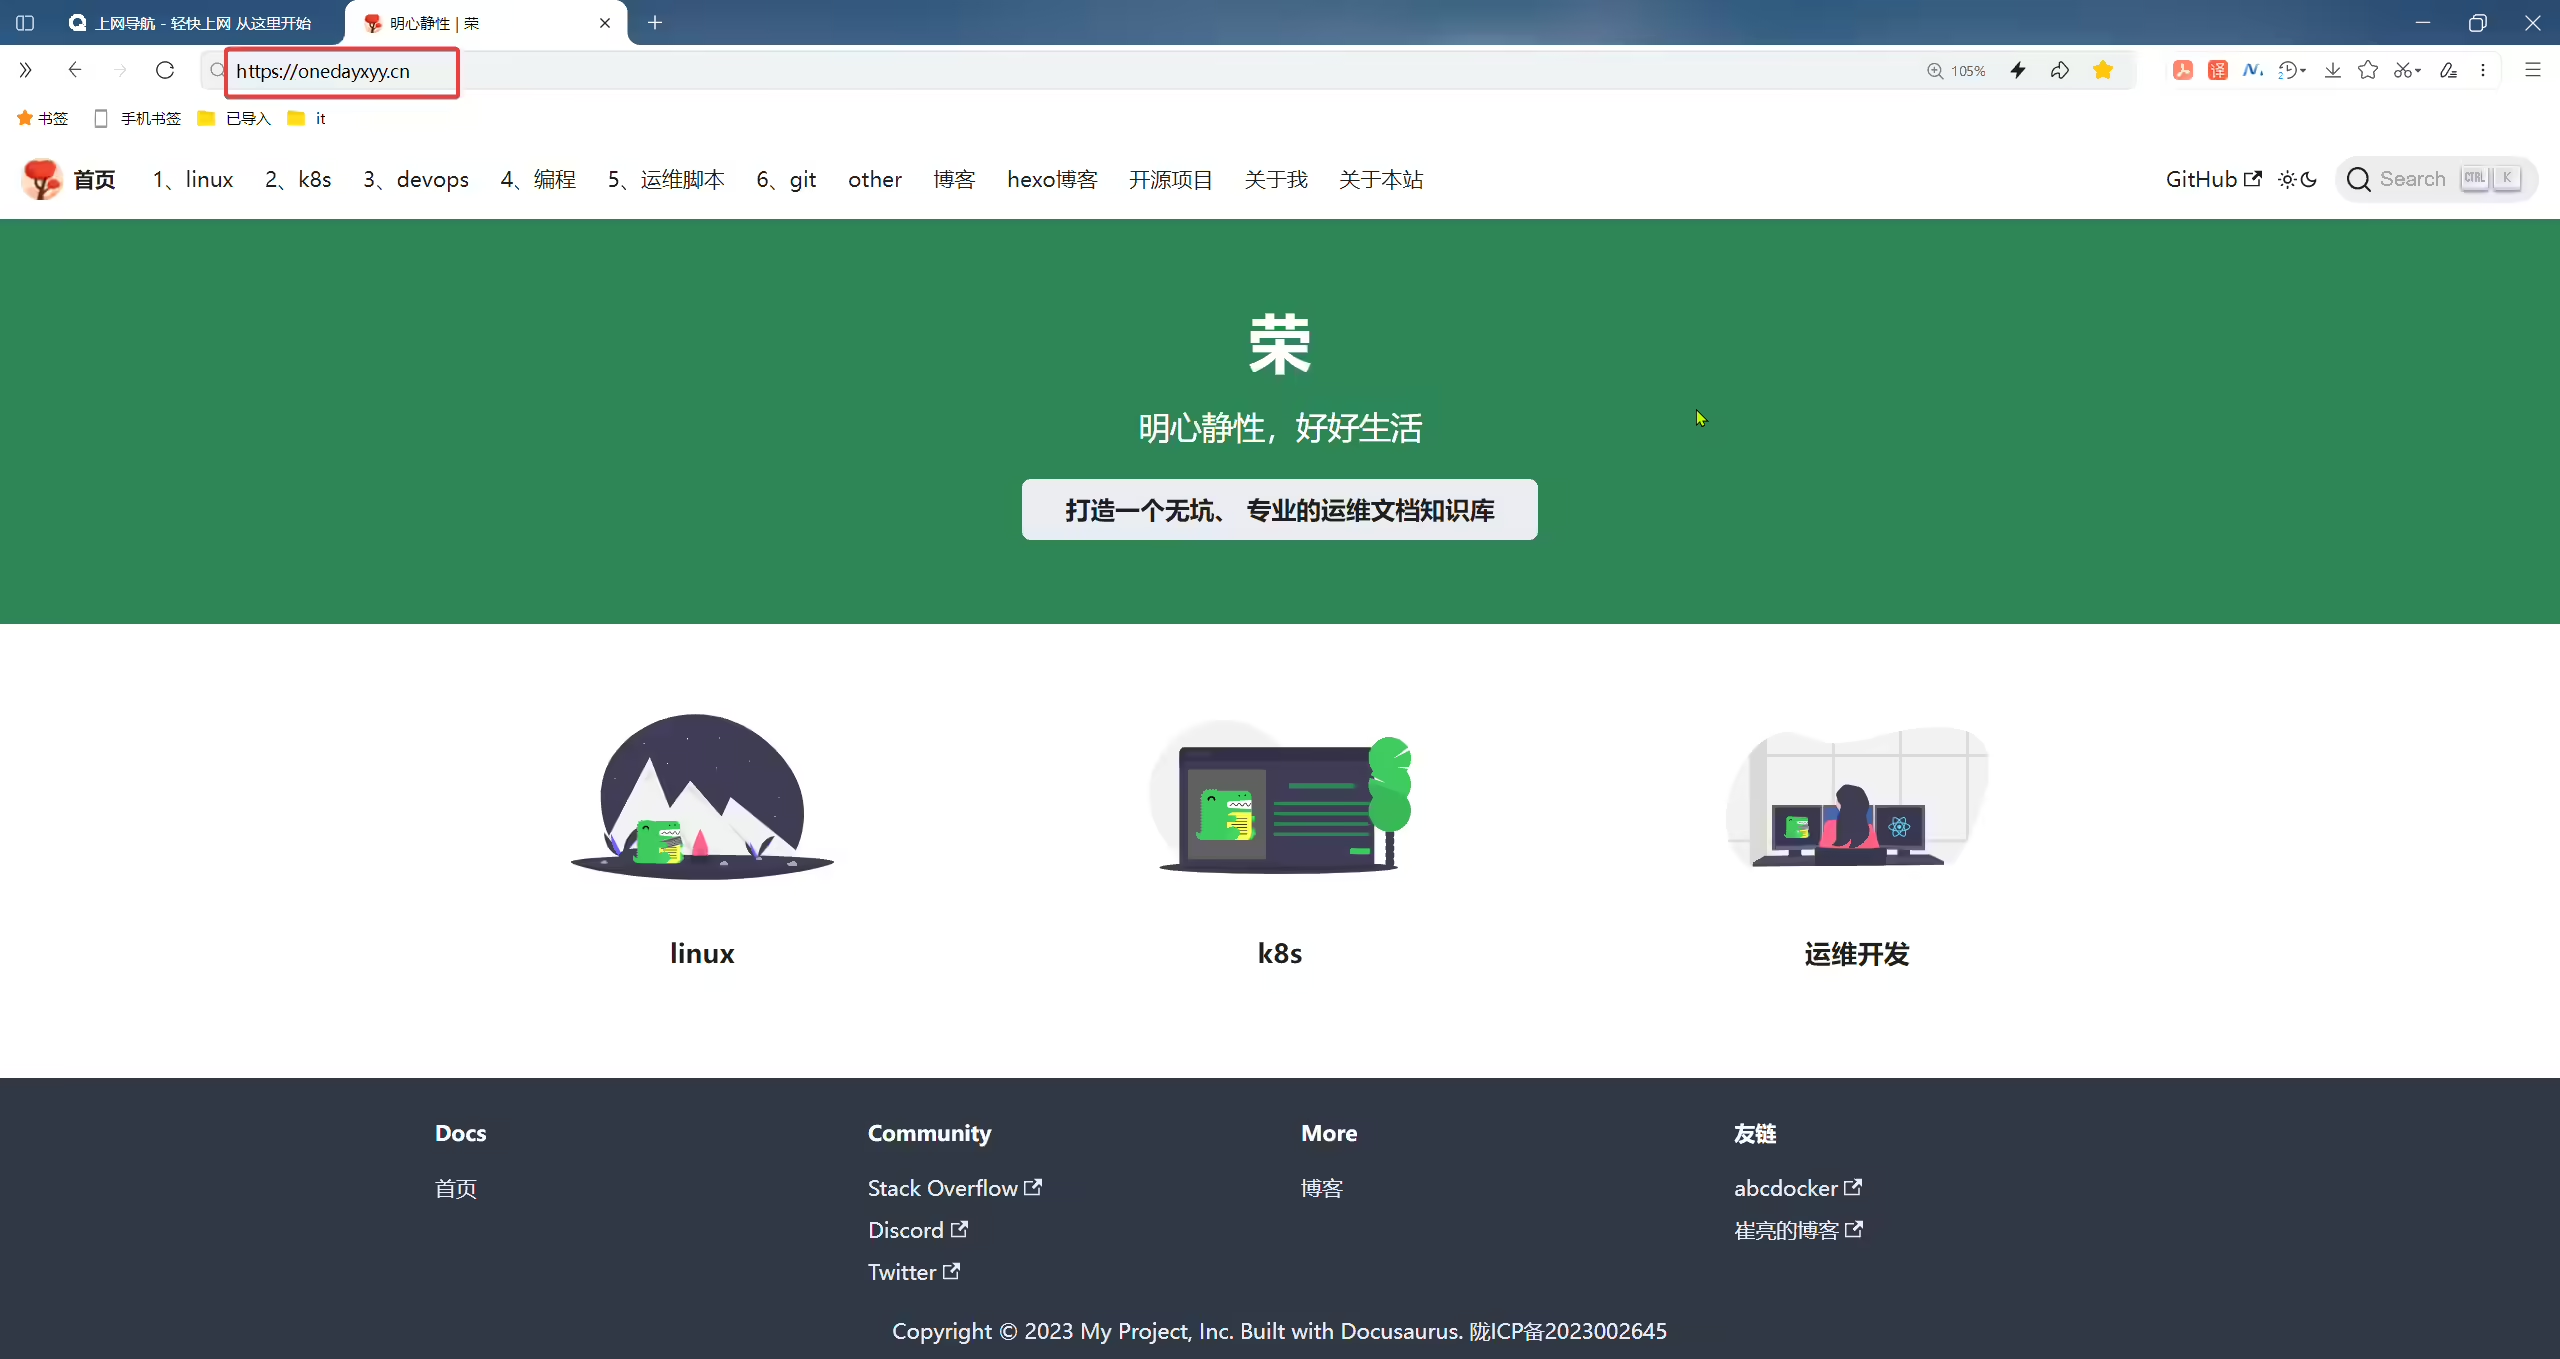
其他网页也能正常访问:

ShareX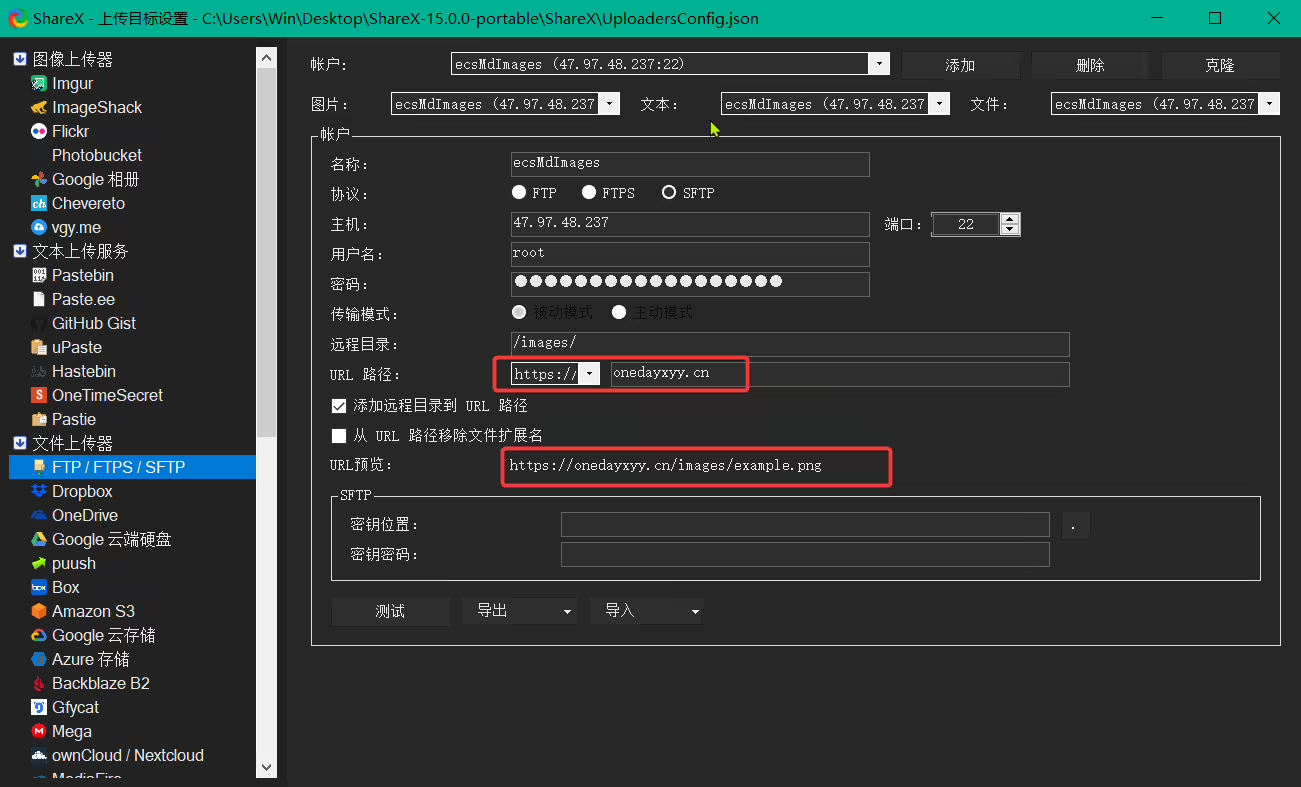
哇哦:图片URL这里是域名后,竟然可以正常在typora里显示了。

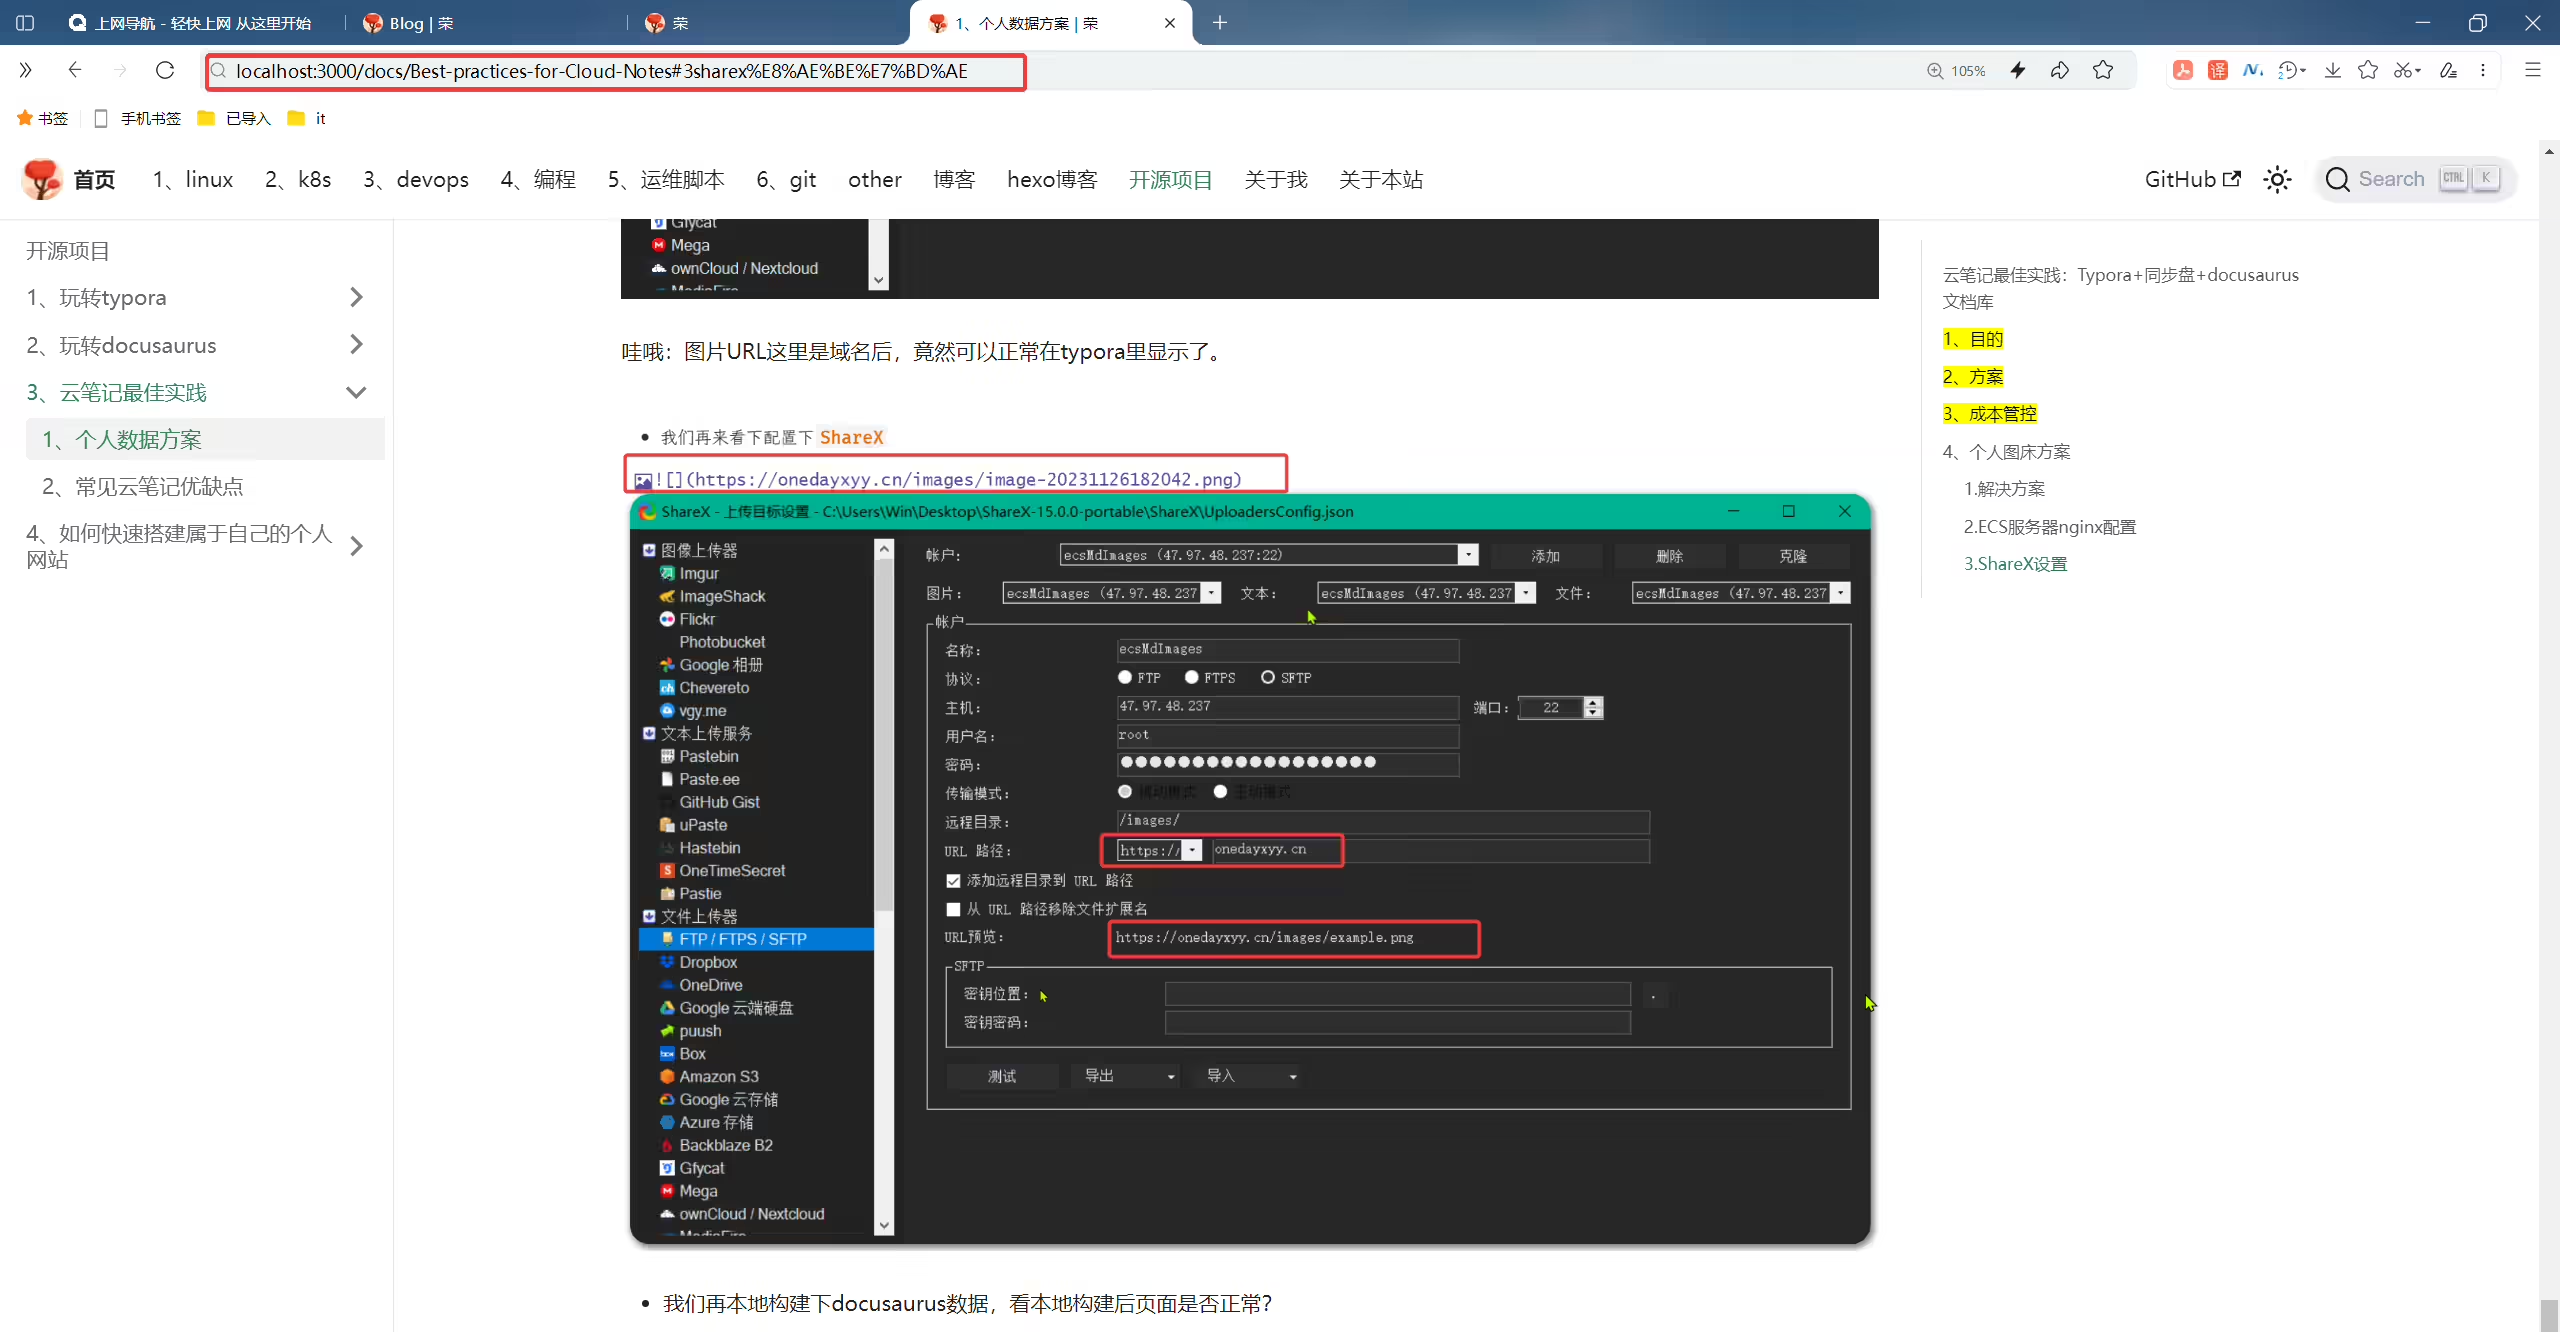
正常。
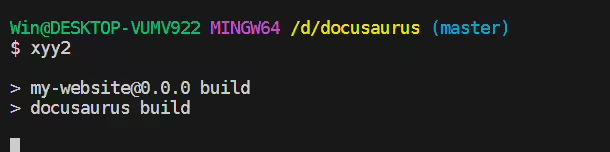
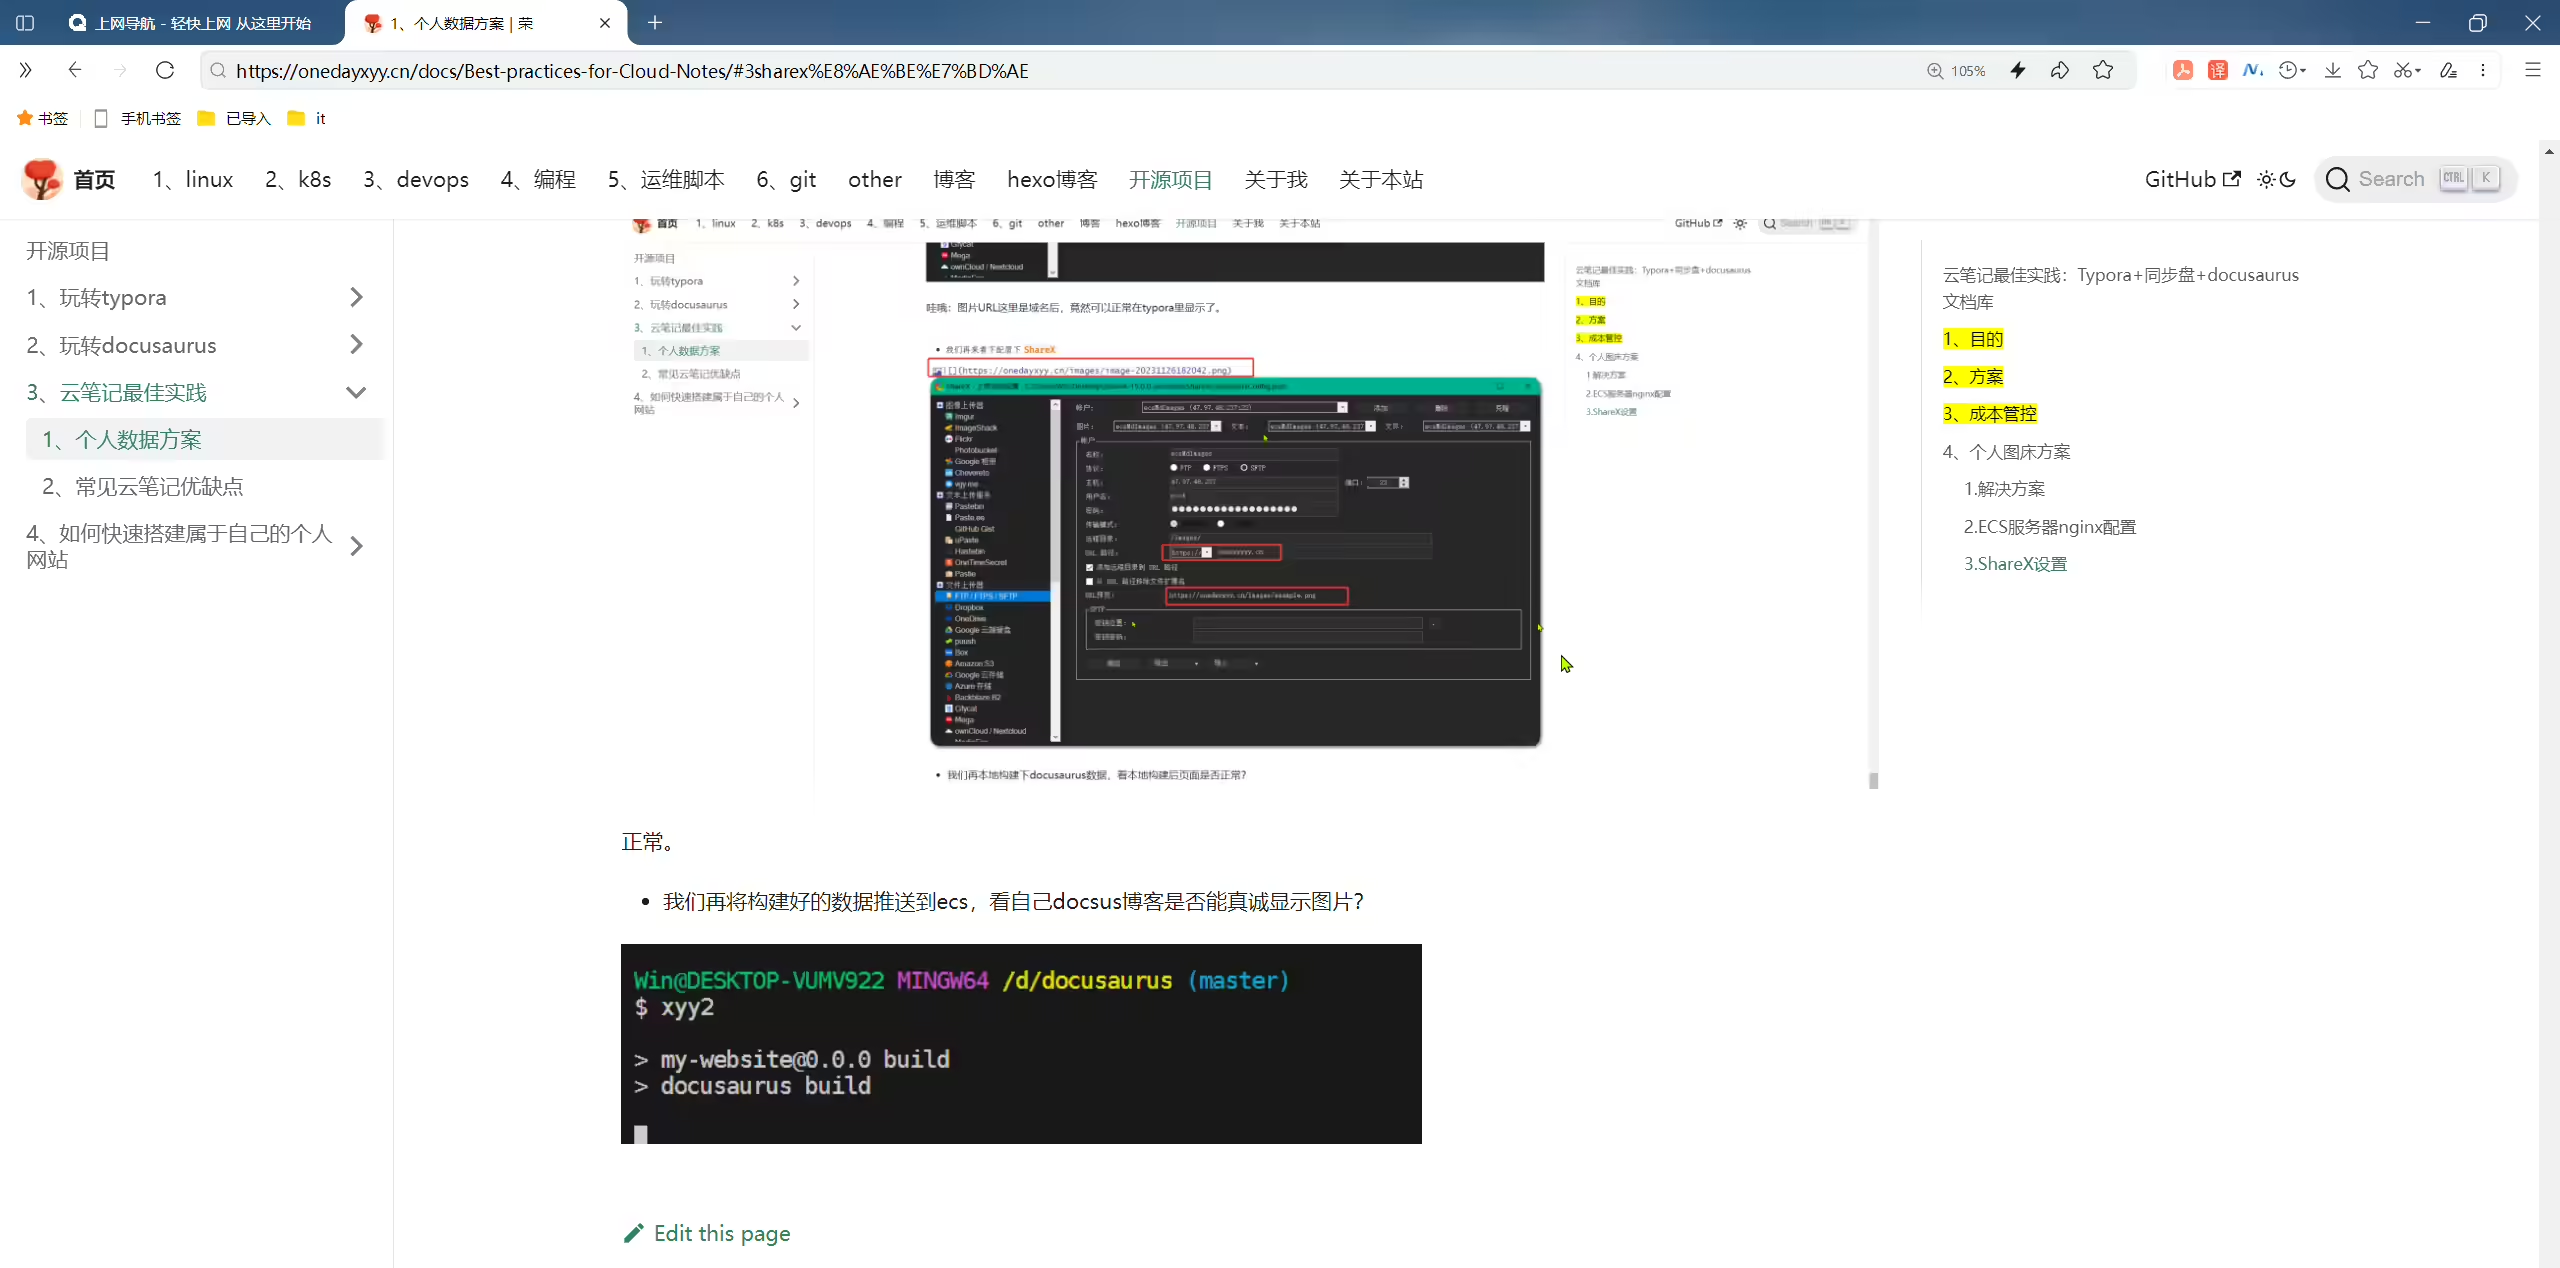
一切真诚,完美。😘,至此,自己图床方案,已彻底解决。
1(http://47.97.48.237/
2替换为
3(https://onedayxyy.cn/已解决。
更新于:2023年11月27日
环境:
1ShareX v15.0.0
2win10
这个方式也方方便与typora里图片上传到ecs了,完美。
问题:从网页拷贝图片后,图片就存放到了pc的剪贴板里,那么如何直接用ShareX保存到本地后然后再上传到个人ecs里呢?
默认情况下,ShareX效果如下
在网页里右键复制图片:

ShareX这里有上传/从剪切板上传:

点击上传:

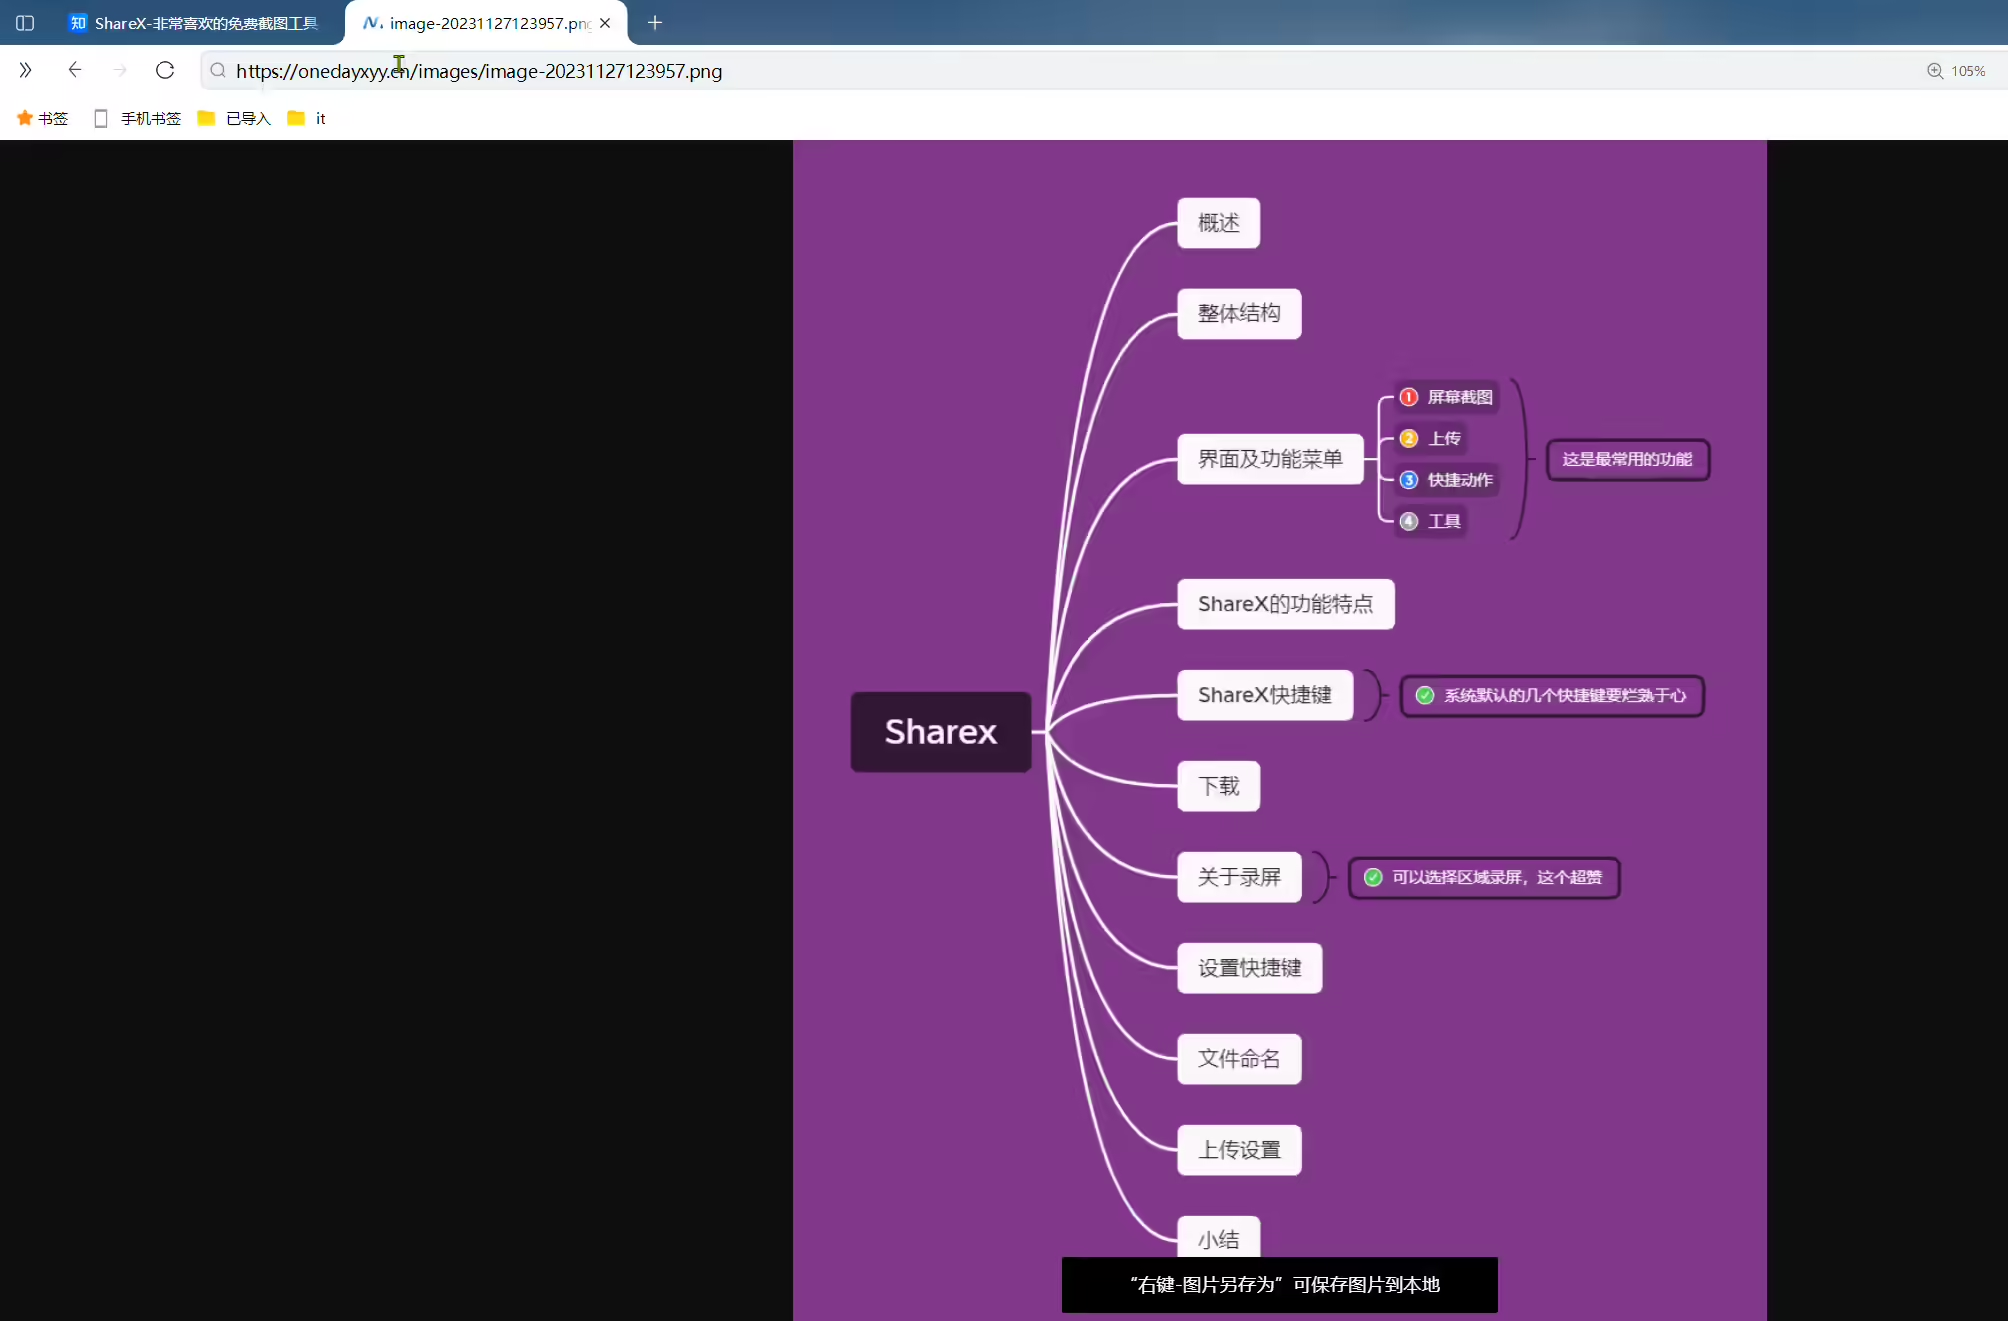
可以看到,刚才拷贝的图片是已经上传到自己ECS里了:
https://img.onedayxyy.cn/images/image-20231127123957.avif
但是是否也上传到自己本地ShareXLocalImages目录了呢?

经验证,是没上传到自己本地ShareXLocalImages目录。
那么,如何来解决这个问题呢?
复制网页的图片–>工具/图像查看器/加载剪切板中的图像
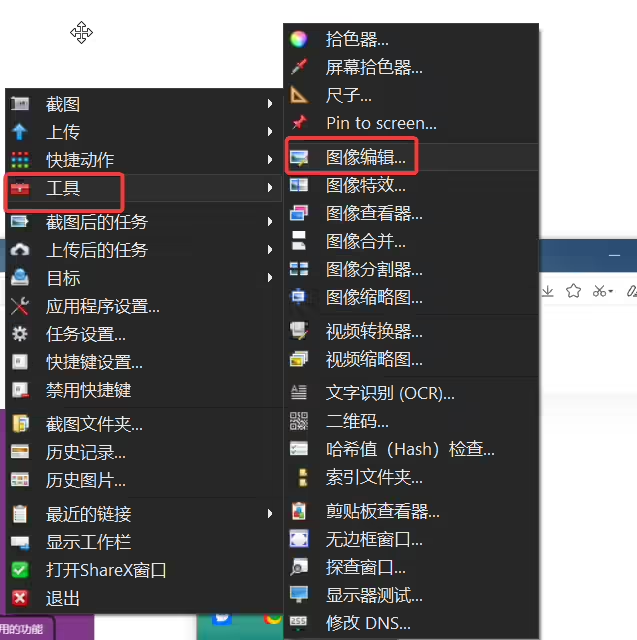

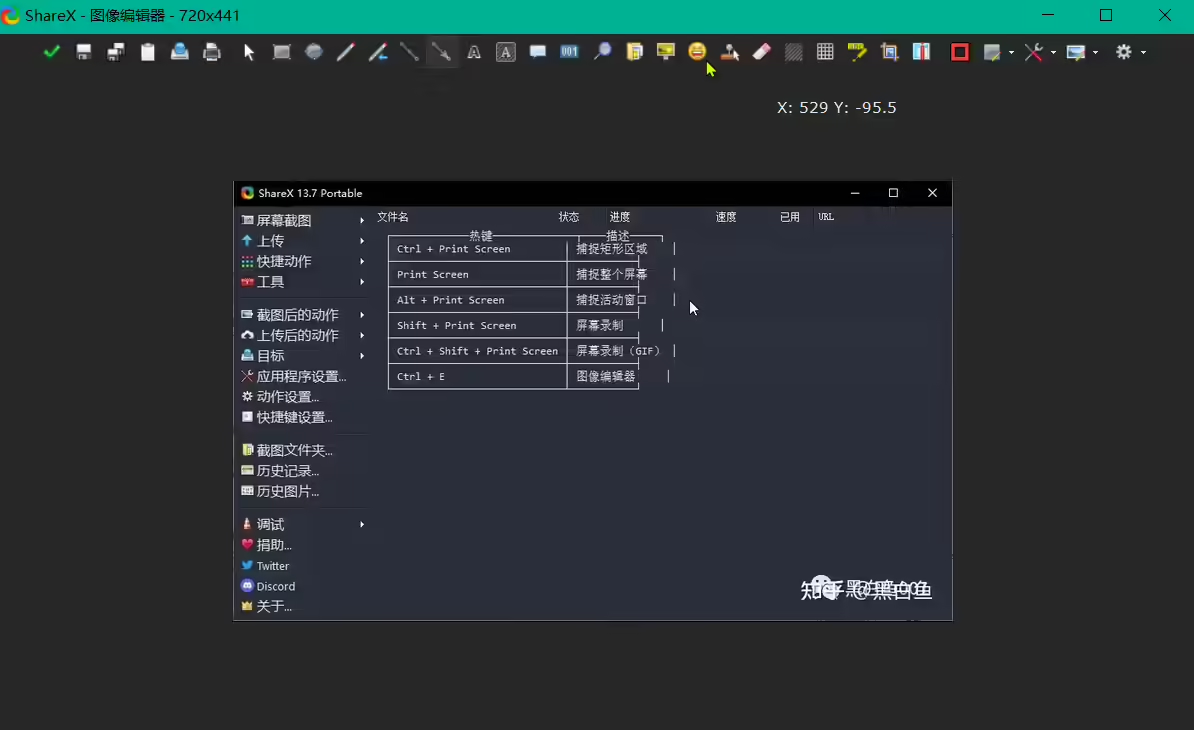
ctrl e--图像编辑器
效果:
2023年12月4日记录
图床中图片上传工具该选择picgo还是ShareX呢
方案1:ShareX –(最大优点是,上传图片到ecs前同时会拷贝图片数据到本地。)
方案2:Picgo (typora里集成picgo,可以批量上传md里所有的图片到ecs,也可单张图片上传到ecs,最大问题是不能上传图片到ecs前同时先拷贝图片数据到本地。)
虽然,我会利用rsync定时从linux的nginx图床同步数据到本地,但是基于数据安全及备份情况,自己还是喜欢使用ShareX工具来上传图片到nginx图床。
1、后续md里图片截图统一使用
ShareX;2、迁移本地md图片到ecs图床时,统一前移到
上传中转站,然后利用scp等批量传输图片,再进行替换md里图片url;3、typora里插入图片设置为默认,不做任何操作。上传图片,配置好picgo就行。
FFmpeg

的确不是很友好,只有开始和停止按钮。。。,还是选择专业的录屏软件吧。

我的博客主旨:
🍀 微信二维码 x2675263825 (舍得), qq:2675263825。

🍀 微信公众号 《云原生架构师实战》

🍀 个人博客站点


🍀 语雀
https://www.yuque.com/xyy-onlyone

🍀 csdn
https://blog.csdn.net/weixin_39246554?spm=1010.2135.3001.5421

🍀 知乎
https://www.zhihu.com/people/foryouone

好了,关于本次就到这里了,感谢大家阅读,最后祝大家生活快乐,每天都过的有意义哦,我们下期见!

精选 · 友链 · 更多

One的公众号
爱折腾博客的小白
